by Teffin Varghese | Oct 31, 2021 | Hosting, Howtos, Linux, Networking, OS, Review, Security, Servers, Troubleshooting, Unix, VPN, VPS, Vulnerability, Workstation
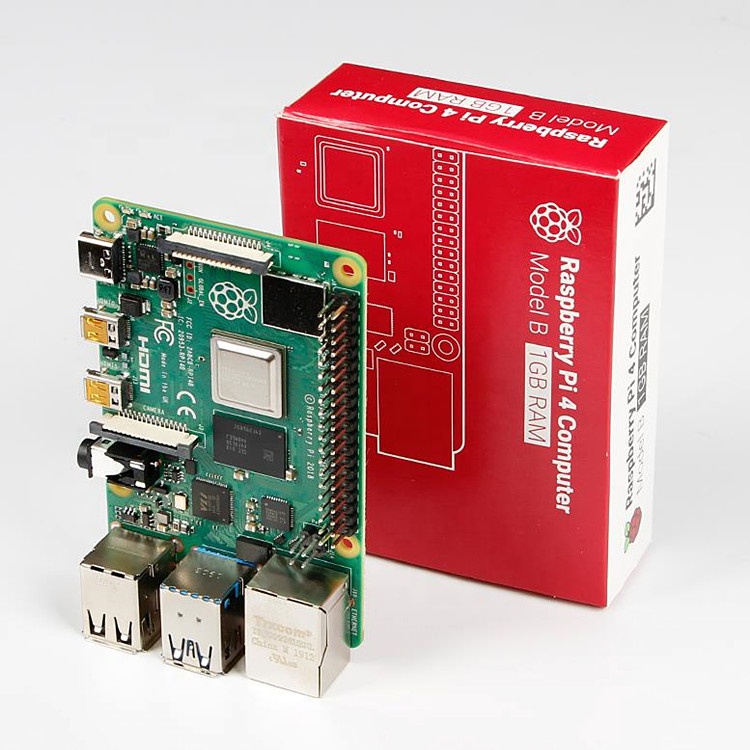
For the 64-Bit OS support we need to use Raspberry Pi 4
I’m using Raspberry Pi 4 Model-B With * Gigs of RAM, A 4GB RAM model would work just fine.
But First what is Raspberry Pi and what is it used for ?
he Raspberry Pi is a low cost, credit-card sized computer that plugs into a computer monitor or TV, and uses a standard keyboard and mouse.
It is a capable little device that enables people of all ages to explore computing, and to learn how to program in languages like Scratch and Python.
It’s capable of doing everything you’d expect a desktop computer to do, from browsing the internet and playing high-definition video, to making spreadsheets, word-processing, and playing games.
What’s more, the Raspberry Pi has the ability to interact with the outside world, and has been used in a wide array of digital maker projects, from music machines and parent detectors to weather stations and tweeting birdhouses with infra-red cameras.
We want to see the Raspberry Pi being used by kids all over the world to learn to program and understand how computers work.
Assemble and enclose the Raspberry Pi, We recommend a case with passive cooling or with a small fan and heat-sinks.
Yes of course you can the Pi without any case or cooling setup, But we recommend to use a cooling case for protection and better performance.
Download Kali-Linux Image from the official website.
You can get the download link from the below URL.
You need to select ARM image category, then choose the Raspberry Pi 64-bit Image.
Now you need to write this image to a Micro SD card, Which you are going to use it on your Raspberry Pi.
You can use either Balena Etcher or the official Raspberry Pi imager for this task.
Here we are using the official Raspberry Pi imager. You can download the imager from the following URL.
https://www.raspberrypi.com/software/
Here is the download link for Windows machines
https://downloads.raspberrypi.org/imager/imager_1.6.2.exe
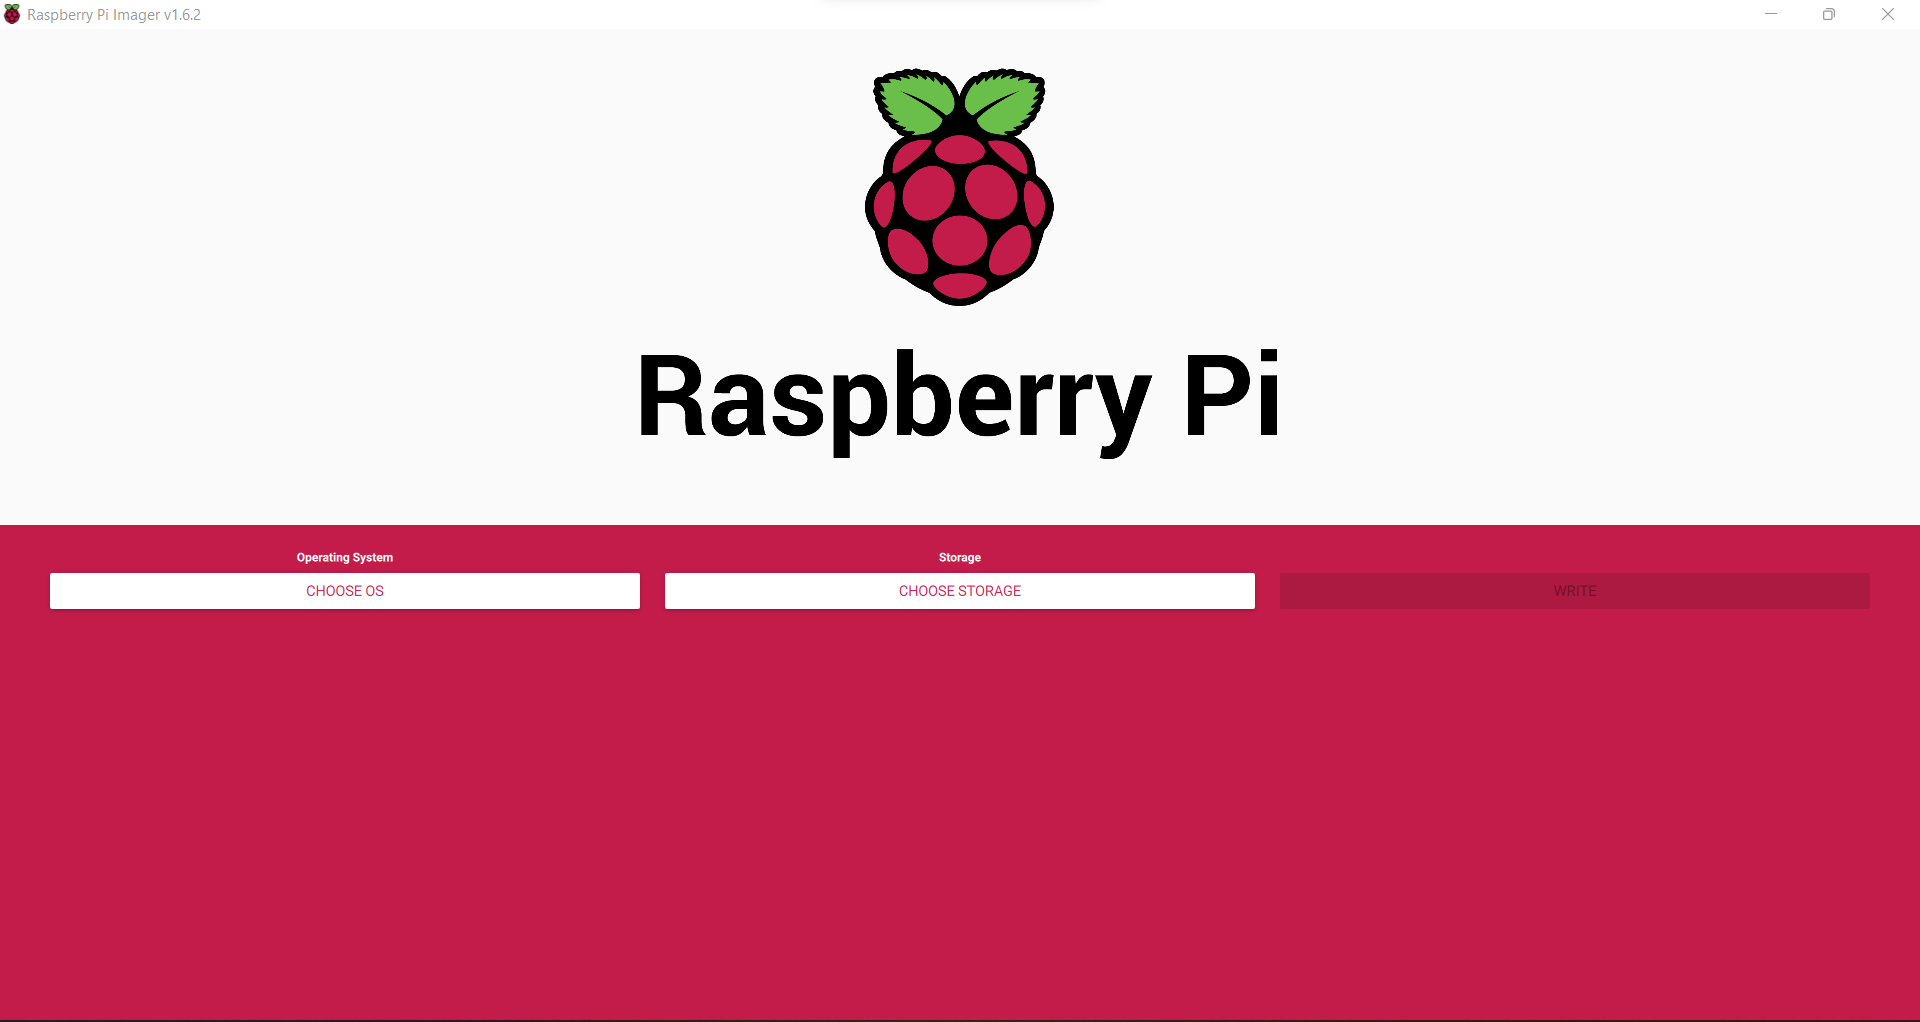
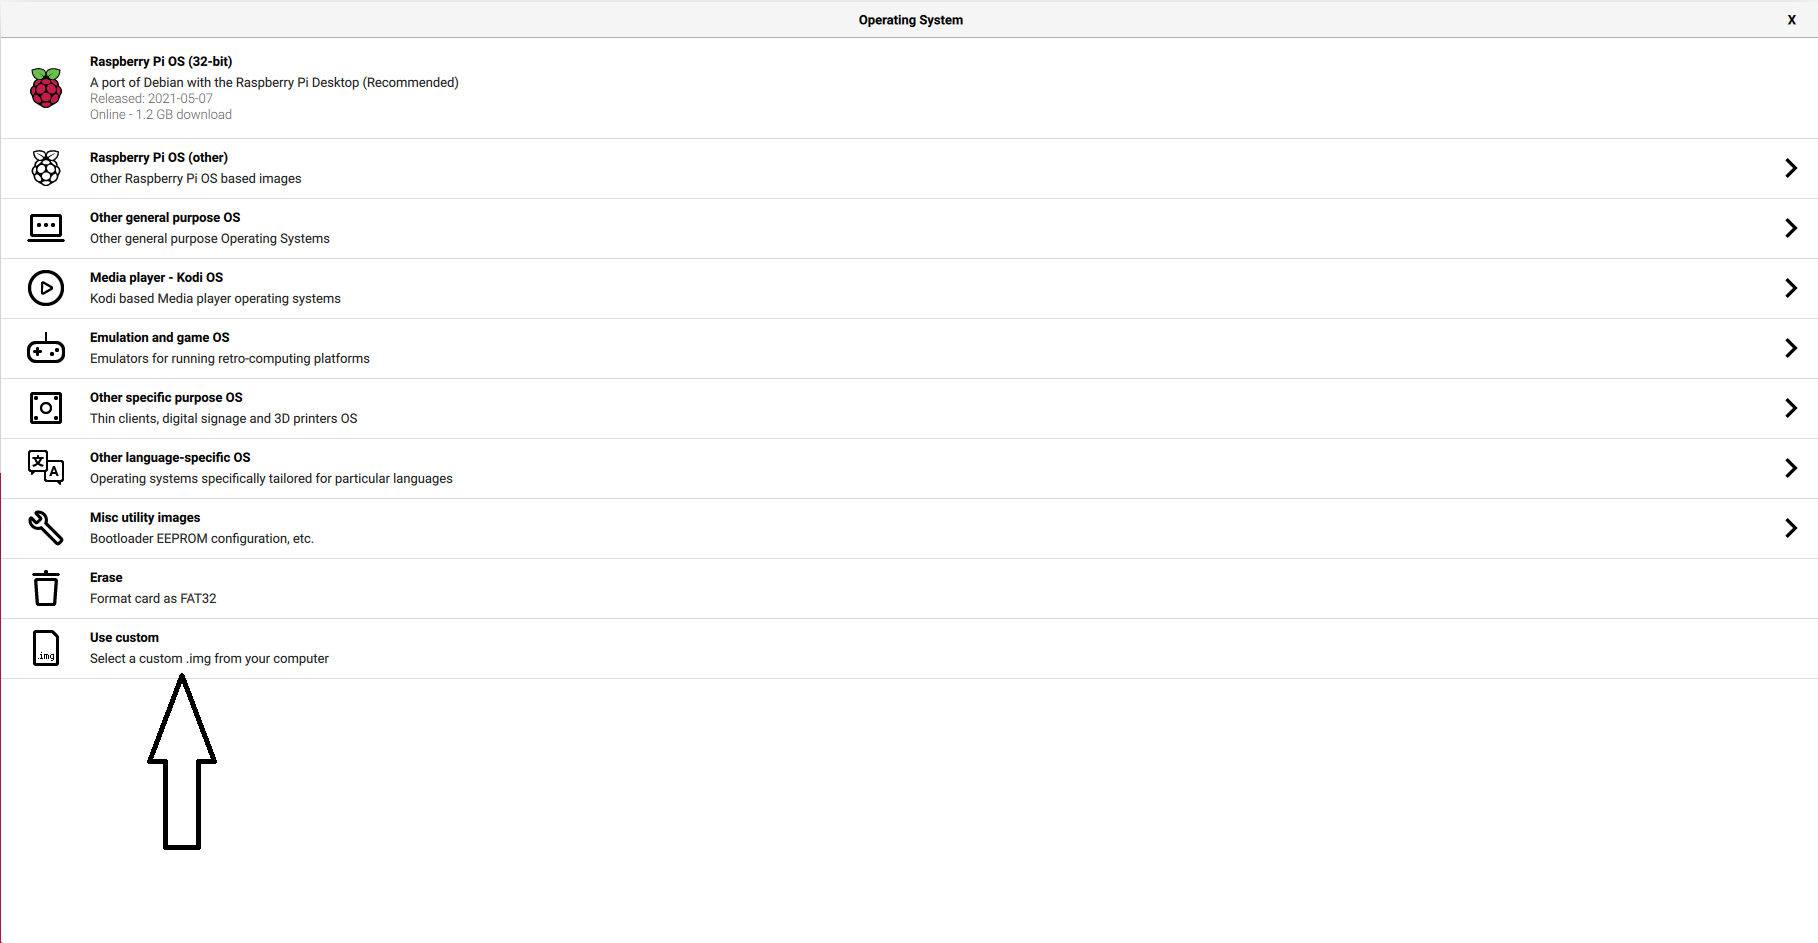
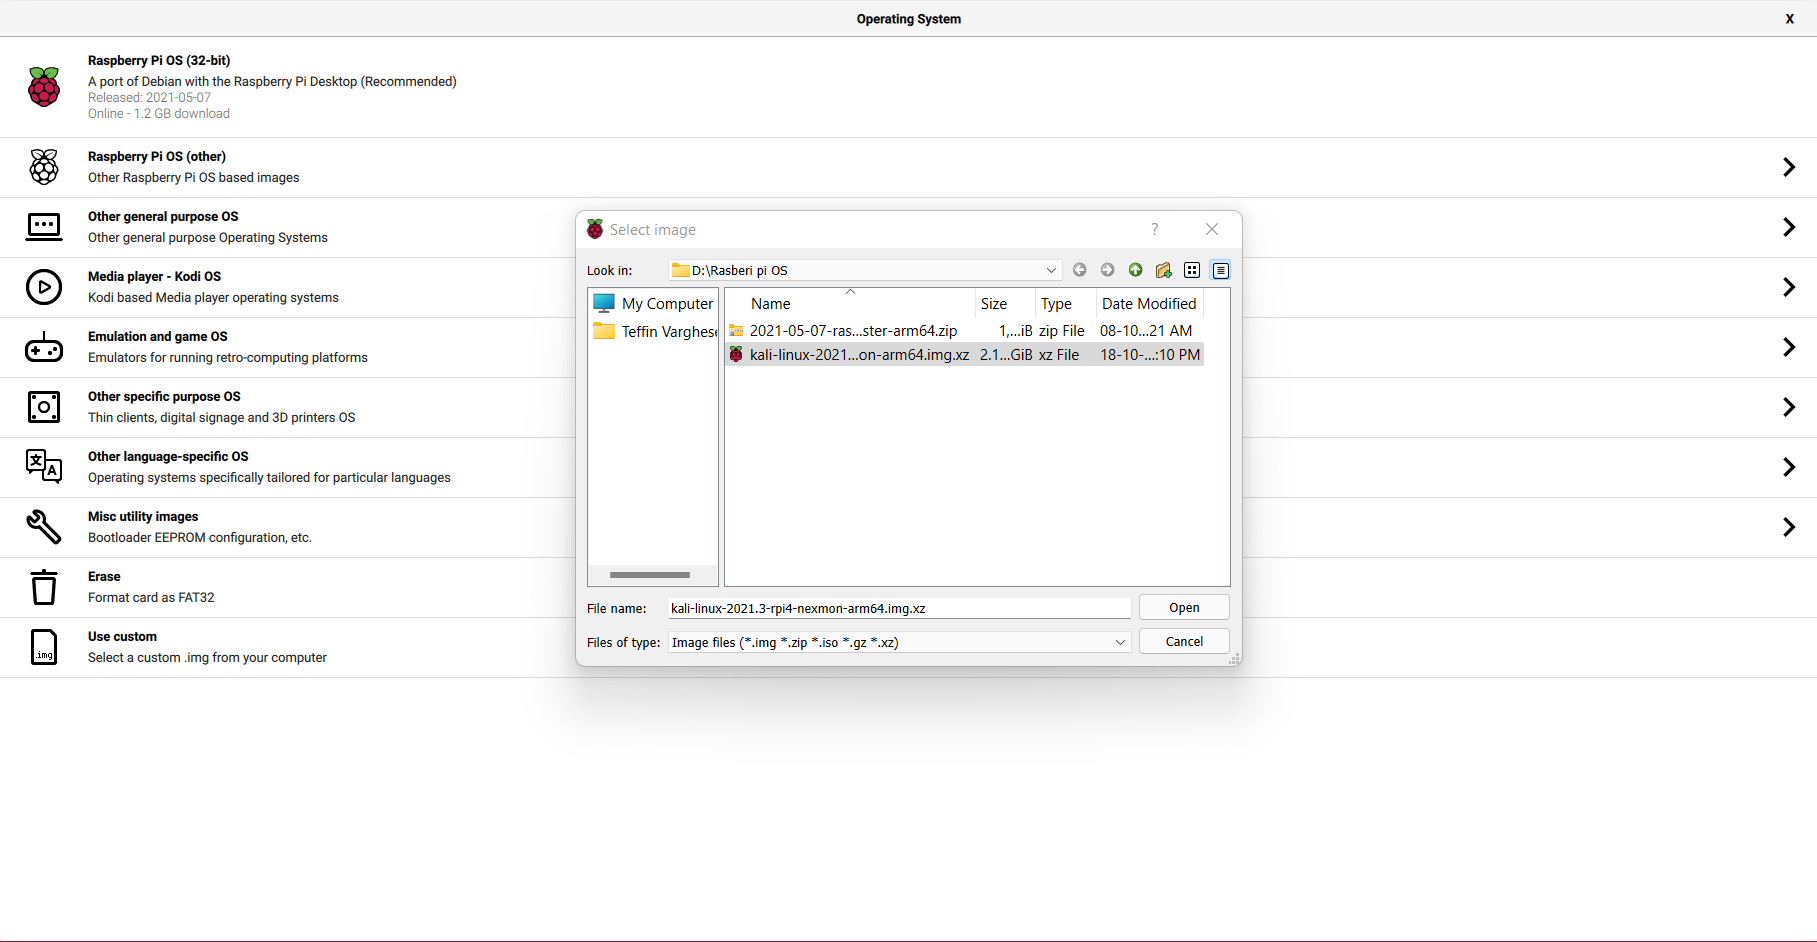
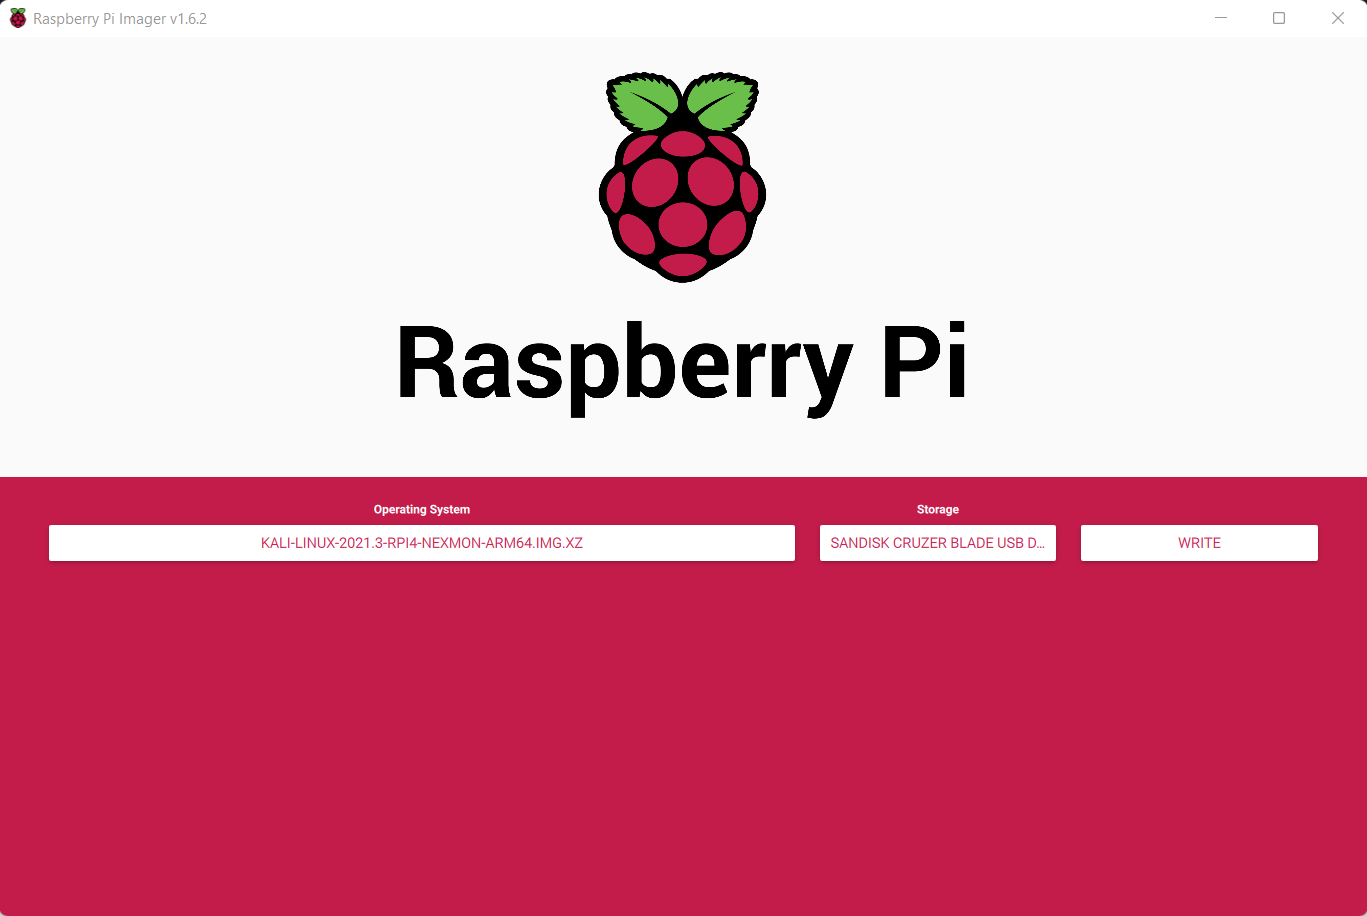
Write Kali-Linux image to the Micro SD-Card. Please follow the following images.
1, Launch the Pi Imager and select Choose OS.
2, Select the option “Use Custome” for our Kali-Linux Image
3, Browse and choose the Kali-Linux Image we have downloaded from our PC.
4, Now select storage and choose our micro SD-Card and click write to write the Image.
Note: Please make sure you have selected the correct storage, In our case the SD-Card. If you choose the wrong location the imager will wipe the selected storage location.
- step 5
Insert the Micro SD-card to your Raspberry Pi. Plug in your Raspberry Pi Power-Brick to the device and
connect your Pi to a monitor, also plugin your Mouse and Keyboard as well, Then power-on the power brick.
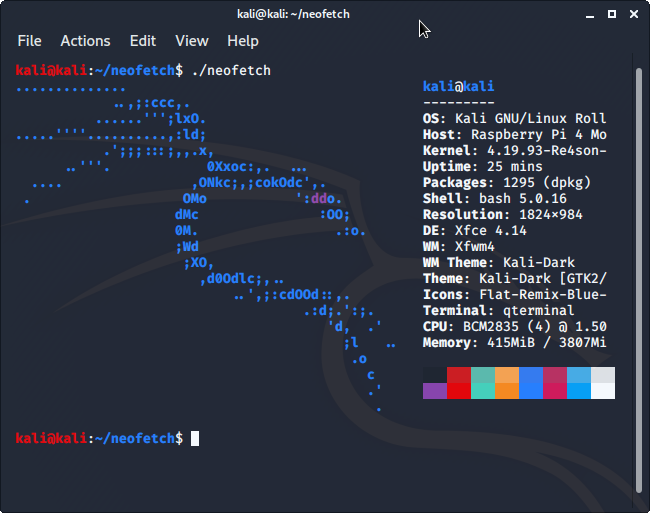
It will take some time for the initial bootup, Wait for it. If everything is perfect your Raspberry Pi will boot into Kali-Linux.
by George Sruthin | Sep 5, 2020 | Android, Crypto Currency, Howtos, Networking
Pi Network introduce First crypto currency mining app to mobile platform, to join and download miner app please click below button and use invitation code " impiza ".
- Mining crypto is hard.
- Investing in crypto is risky.
- Too many of us are left out of the cryptocurrency revolution.
- Pi makes crypto mining easy
- Breakthrough tech allows you to mine on your phone without draining your battery.
Decentralized
Secure, Immutable, non-counterfeitable and interoperable digital money.
Mobile First
Works on your mobile phone and does not drain your battery.
User & Planet-Friendly
Easy to use security at scale, without the massive electrical waste.
use above link, it will guide you to Pi network official website.
Currently Pi not yet listed on exchanges and you can't buy it with any currency, the only way to install pi app and start working using invitation code.
Do not download any apps outside Pi network
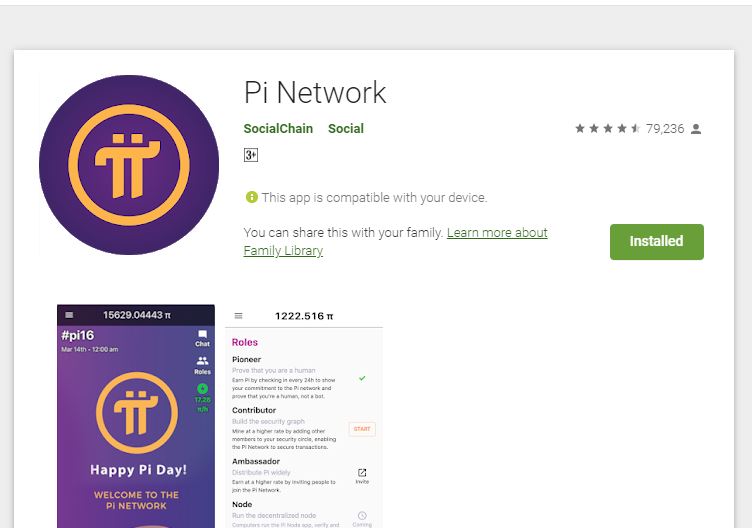
by clicking download button, it will redirect you to official android play store, install the app.
Open your application, now type "Your desired username", remember if you invite your friends in the future you have to use this as your invitation code,
there are 2 types of verification available
- Facebook
- Phone Number
you have to choose one of those, this will help you to retrieve your pi miner if you phone is lost.
Remember "Yon only use one device at a time"
Finally use invitation code " impiza ", now you can start mining, you need to open miner at least once every day. by doing so you can also verify your team members are mining or not, if they are not mining you can ping them and notify.

Currently, our everyday financial transactions rely upon a trusted third party to maintain a record of transactions. For example, when you do a bank transaction, the banking system keeps a record & guarantees that the transaction is safe & reliable. Likewise, when Cindy transfers $5 to Steve using PayPal, PayPal maintains a central record of $5 dollars debited from Cindy’s account and $5 credited to Steve’s. Intermediaries like banks, PayPal, and other members of the current economic system play an important role in regulating the world’s financial transactions.
However, the role of these trusted intermediaries also has limitations:
- Unfair value capture. These intermediaries amass billions of dollars in wealth creation (PayPal market cap is ~$130B), but pass virtually nothing onto their customers - the everyday people on the ground, whose money drives a meaningful proportion of the global economy. More and more people are falling behind.
- Fees. Banks and companies charge large fees for facilitating transactions. These fees often disproportionately impact lower-income populations who have the fewest alternatives.
- Censorship. If a particular trusted intermediary decides that you should not be able to move your money, it can place restrictions on the movement of your money.
- Permissioned. The trusted intermediary serves as a gatekeeper who can arbitrarily prevent anybody from being part of the network.
- Pseudonymous. At a time when the issue of privacy is gaining greater urgency, these powerful gatekeepers can accidentally disclose -- or force you to disclose -- more financial information about yourself than you may want.
After identifying these key barriers to adoption, the Pi Core Team set out to find a way that would allow everyday people to mine (or earn cryptocurrency rewards for validating transactions on a distributed record of transactions). As a refresher, one of the major challenges that arises with maintaining a distributed record of transactions is ensuring that updates to this open record are not fraudulent. While Bitcoin’s process for updating its record is proven (burning energy / money to prove trustworthiness), it is not very user (or planet!) friendly. For Pi, we introduced the additional design requirement of employing a consensus algorithm that would also be extremely user friendly and ideally enable mining on personal computers and mobile phones.
Roadmap / Deployment plan
Phase 1 - Design, Distribution, Trust Graph Bootstrap.
The Pi server is operating as a faucet emulating the behavior of the decentralized system as it will function once its live. During this phase improvements in the user experience and behavior are possible and relatively easy to make compared to the stable phase of the main net. All minting of coins to users will be migrated to the live net once it launches. In other words, the livenet will pre-mint in its genesis block all account holder balances generated during Phase 1, and continue operating just like the current system but fully decentralized. Pi is not listed on exchanges during this phase and it is impossible to “buy” Pi with any other currency.
Before we launch the main net, the Node software will be deployed on a test net. The test net will use the same exact trust graph as the main net but on a testing Pi coin. Pi core team will host several nodes on the test net, but will encourage more Pioneers to start their own nodes on the testnet. In fact, in order for any node to join the main net, they are advised to begin on the testnet. The test net will be run in parallel to the Pi emulator in phase one, and periodically, e.g. daily, the results from both systems will be compared to catch the gaps and misses of the test net, which will allow Pi developers to propose and implement fixes. After a thorough concurrent run of both systems, testnet will reach a state where its results consistently match the emulator’s. At that time when the community feels its ready, Pi will migrate to the next phase.
When the community feels the software is ready for production, and it has been thoroughly tested on the testnet, the official mainnet of the Pi network will be launched. An important detail is that, in the transition into the mainnet, only accounts validated to belong to distinct real individuals will be honored. After this point, the faucet and Pi network emulator of Phase 1 will be shut down and the system will continue on its own forever. Future updates to the protocol will be contributed by the Pi developer community and Pi’s core team, and will be proposed by the committee. Their implementation and deployment will depend on nodes updating the mining software just like any other blockchains. No central authority will be controlling the currency and it will be fully decentralized. Balances of fake users or duplicate users will be discarded. This is the phase when Pi can be connected to exchanges and be exchanged for other currencies.
- Pioneer. A user of the Pi mobile app who is simply confirming that they are not a “robot” on a daily basis. This user validates their presence every time they sign in to the app. They can also open the app to request transactions (e.g. make a payment in Pi to another Pioneer)
- Contributor. A user of the Pi mobile app who is contributing by providing a list of pioneers he or she knows and trusts. In aggregate, Pi contributors will build a global trust graph.
- Ambassador. A user of the Pi mobile app who is introducing other users into Pi network.
- Node. A user who is a pioneer, a contributor using the Pi mobile app, and is also running the Pi node software on their desktop or laptop computer. The Pi node software is the software that runs the core SCP algorithm, taking into account the trust graph information provided by the Contributors.
I will include mining using node in the future blog.
Happy Mining
by Teffin Varghese | Jul 20, 2020 | Howtos, Linux, Networking, News, OS, Review
NVMe over Fabrics
The performance of storage technology increased 100 times in the last 5 years.
with the introduction if flash based solid state drives SSD’s especially SSD’s connected over NVMe Non volatile memory express is a specification which enables a SSD to take advantage of high speed peripheral component interconnect express PCIe bus in the computer by connecting directly into it.
As the performance of the storage gets faster, the network wire speed and protocols become the bottleneck we can speed up the wires with the latest Ethernet and Inifiniband speeds. But without faster protocol technologies these new SSD’s and NVMe technologies will have their performance locked up inside the server.
NVMe over Fabrics NVMe-oF is an exciting networking storage technology. allowing you to take full advantages of SSD’s performance across ether net or Infiniband networks. NVMe-oF is designed to leverage the performance of NVMe technology across the network using RDMA (remote direct memory access) RDMA enables data in memory to transfer between computers and storage devices across the network with little to no CPU usage.
NVMe over fabrics technology enables.
1, Extremely high bandwidth.
2, Low fabric latency.
3, Scalability, management and storage fault isolation.
4, Better utilization of the storage, rack-space and power.
5, Sharing storage across multiple servers.
6, Compute and storage can be disconnected from each other or dis-aggregated.
NVMe-oF is the perfect technology to fill the recent performance gap between storage and storage network technology
Cheers!!!
by Teffin Varghese | Jul 16, 2020 | Howtos, Networking, News, OS, Security, Servers, Storages, Troubleshooting

Step 1: Identify the Adapter model
===========================
You can use the lspci command to view the details of the Adapter.
[root@localhost ~]# lspci | grep Mellanox
a1:00.0 Infiniband controller: Mellanox Technologies MT28908 Family [ConnectX-6]
Here our Adapter is Mellanox Technologies MT28908 Family [ConnectX-6]
Step 2: Download the OFED driver for the Adapter.
===================================================================================
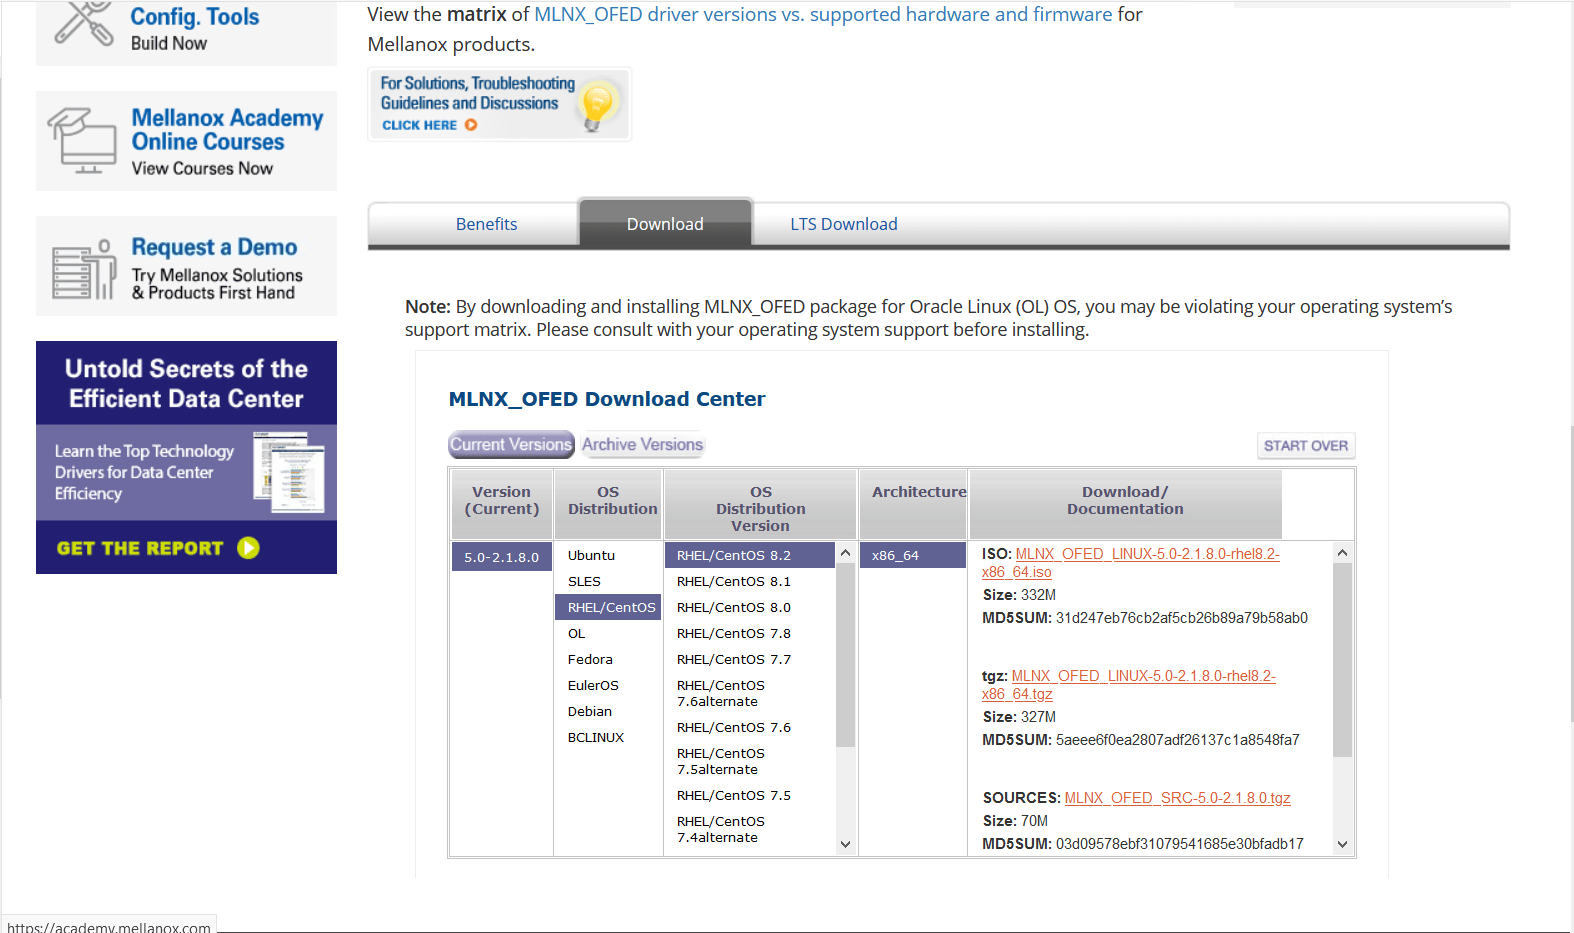
You can download the OFED driver from the below link and choose the OS and select the tar file for download.
https://www.mellanox.com/products/infiniband-drivers/linux/mlnx_ofed
https://www.mellanox.com/products/infiniband-drivers/linux/mlnx_ofed
You can use wget command to download the driver.
Example: wget http://content.mellanox.com/ofed/MLNX_OFED-5.0-2.1.8.0/MLNX_OFED_LINUX-5.0-2.1.8.0-rhel8.2-x86_64.tgz
http://content.mellanox.com/ofed/MLNX_OFED-5.0-2.1.8.0/MLNX_OFED_LINUX-5.0-2.1.8.0-rhel8.2-x86_64.tgz
Step 3: Extract the zip file.
============================================
Untar the zip file you have just downloaded
Example: tar -xvf MLNX_OFED_LINUX-5.0-2.1.8.0-rhel8.2-x86_64.tgz
Step 4: Navigate to the extracted directory.
======================================================================
Once you have extracted the tar file you can view a directory with the same name, navigate to the directory
by cd command
Example: cd MLNX_OFED_LINUX-5.0-2.1.8.0-rhel8.2-x86_64
Once you are in the directory please list the contents on the directory using a ls command.
and from the output you can view a script file name “mlnxofedinstall”
Step 5: Run the script file.
==========================================
You can run the script file using “./mlnxofedinstall”
Once you run the script the driver will be installed and once it is completed reload the driver or reboot the machine.
Note: The server must have Perl, python and GCC compilers for completing the driver installation.
If the installation run failed due to any unmet dependencies, please install the packages and libraries mentioned on the failed message.
Firmware upgrade.
————————–
Once the OFED driver is successfully installed then you can go with the firmware upgrade.
We are using the tool MSTFLINT for performing the firmware upgrade.
Step 1: First we need to identify the PCI bus ID of the adapter.
===========================================================================
Run “lspci | grep Mellanox” to determine the PCI bus ID
Example: [root@localhost ~]# lspci | grep Mellanox
a1:00.0 Infiniband controller: Mellanox Technologies MT28908 Family [ConnectX-6]
Here “a1:00.0” is our PCI bus ID.
Step 2: Download and unzip the Firmware Zip file.
=============================================================
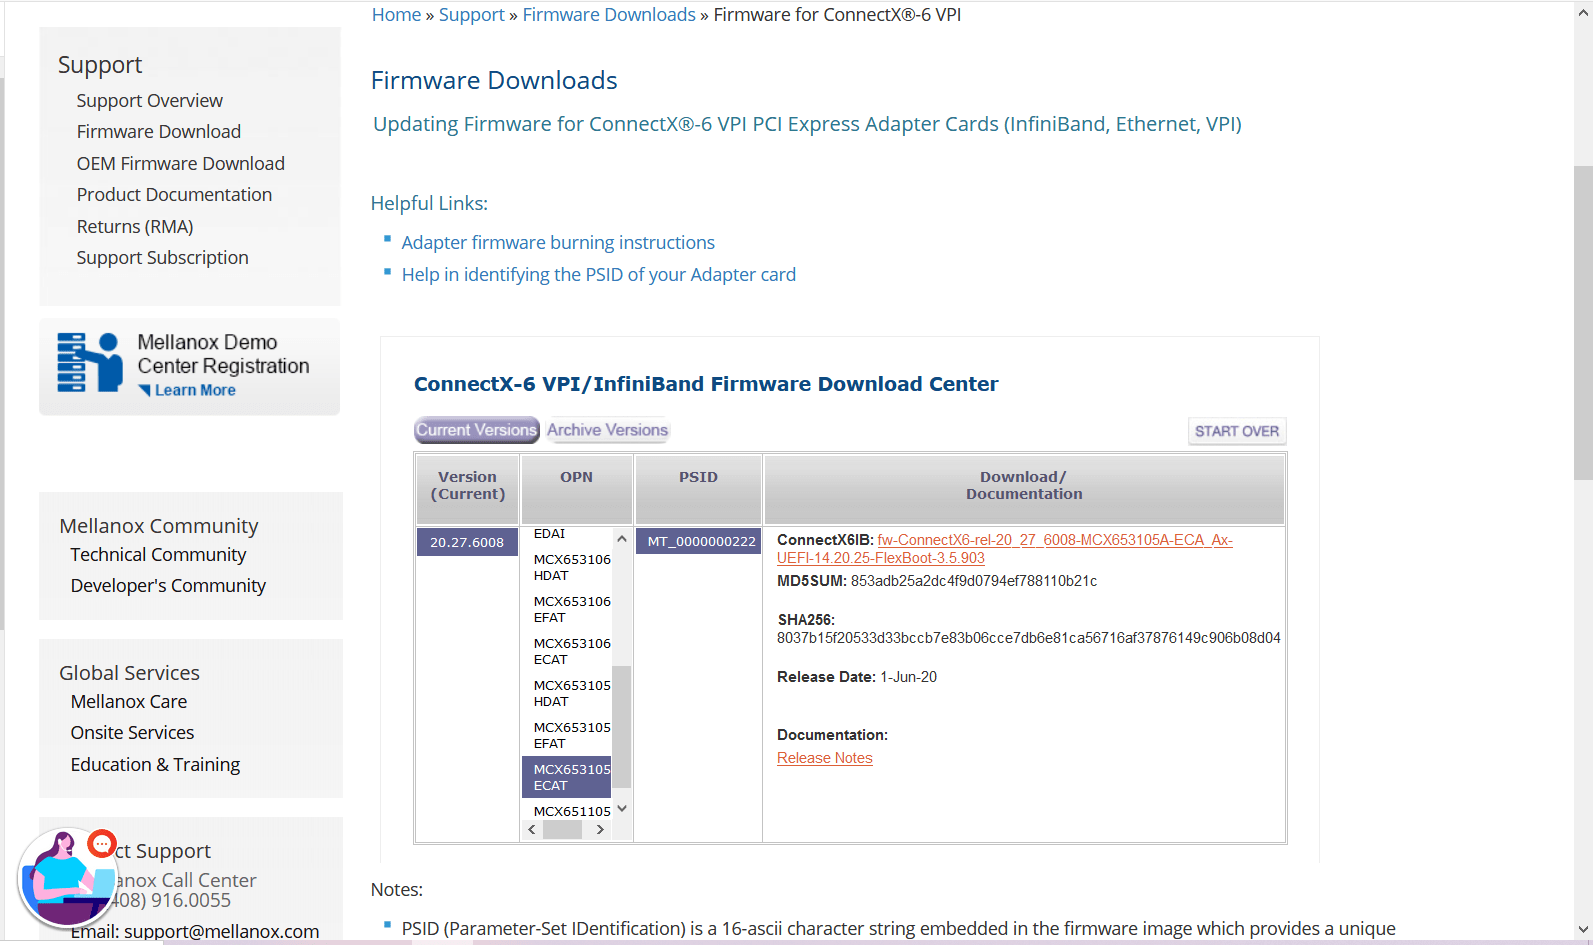
You can download the firmware from the official Mellanox website.
Link: https://www.mellanox.com/support/firmware/connectx6ib
https://www.mellanox.com/support/firmware/connectx6ib
Please download the firmware using “wget”
Example: wget http://www.mellanox.com/downloads/firmware/fw-ConnectX6-rel-20_27_6008-MCX653105A-ECA_Ax-UEFI-14.20.25-FlexBoot-3.5.903.bin.zip
http://www.mellanox.com/downloads/firmware/fw-ConnectX6-rel-20_27_6008-MCX653105A-ECA_Ax-UEFI-14.20.25-FlexBoot-3.5.903.bin.zip
Once it is downloaded unzip it by using the command “unzip”
Example: unzip fw-ConnectX6-rel-20_27_6008-MCX653105A-ECA_Ax-UEFI-14.20.25-FlexBoot-3.5.903.bin.zip
Once you unzip the file you can view a .bin file which is our firmware.
Example: fw-ConnectX6-rel-20_27_6008-MCX653105A-ECA_Ax-UEFI-14.20.25-FlexBoot-3.5.903.bin
Step3: Burn the firmware to the NIC.
============================================
You need the mstflint utility to update the firmware. You can download mstflint from the OpenFabrics site at mstflint_SW for Linux.
NOTE: If OFED is installed on your machine, then mstflint is already installed.
For burning the new firmware run
the command in the same directory as the firmware file, run “mstflint –d <PCI bus ID, i.e. 05:00.0> -i <.bin file> b”
Example: mstflint -d a1:00.0 -i fw-ConnectX6-rel-20_27_6008-MCX653105A-ECA_Ax-UEFI-14.20.25-FlexBoot-3.5.903.bin b
To load new FW run mstfwreset or reboot machine and check.
Example: [root@localhost ~]# ethtool -i ib0
driver: mlx5_core[ib_ipoib]
version: 5.0-2.1.8
firmware-version: 20.27.6008 (MT_0000000222)
expansion-rom-version:
bus-info: 0000:a1:00.0
supports-statistics: yes
supports-test: yes
supports-eeprom-access: no
supports-register-dump: no
supports-priv-flags: yes
Here “ib0” is our interface name, yours maybe different.
Please refer Mellanox documentation if you need any further details.
https://www.mellanox.com/products/adapter-software/firmware-tools https://www.mellanox.com/support/firmware/update-instructions
by Teffin Varghese | Jul 12, 2020 | Howtos, Networking, News
Hello there, We all may have access to internet by one-way or another. Although you may be living in an on area with limited providers or network speeds. Improving the network speeds will improve everything from entertainment to work to education and health care.
But 41% of the world does not have access to internet at all.
And that’s were SpaceX comes in with Starlink which is very close to launching their service.

And we are trying to address the below three questions.
what is it.
what are the least developments.
why should we even care.
Starlink is a satellite constellation being constructed by SpaceX to provide satellite Internet access.
The constellation will consist of thousands of mass-produced small satellites in low Earth orbit (LEO), working in combination with ground transceivers.
SpaceX also plans to sell some of the satellites for military, scientific, or exploratory purposes.
The SpaceX satellite development facility in Redmond, Washington houses the Starlink research, development, manufacturing, and on-orbit control operations.
The total cost of the decade-long project to design, build, and deploy the constellation was estimated by SpaceX in May 2018 to be about US $10 billion.
So as I mentioned just over 40% of the world does not have any access to the internet yet and even in areas with access it can be limited if you are not in the urban area.
Places like Africa the Middle East and Asia are lagging behind areas like North America and Europe.
Laying long cables into remote regions can be costly than the number of potential customers even building a wireless signals in those areas are costly which is why there are so many low bandwidth areas across the world.
96% of the urban areas have access to broadband only 61% of the rural areas do.
Satellite internet program can solve that problem because you can cover large area with a single satellite but there are some big downsides.
Current satellite based internet services are using geostationary satellites that are orbiting over 35000 KM above the surface of the earth its that distances creating the first major problem. Latency a radio signal takes 120 mill seconds to reach Geo stationary satellite and another 120 mill second to relay that sound back to ground. So in theory we looking at latency of 240 mill seconds but in practice we can see around 400 to 600 mill seconds, 12 times slower than what we see on the ground and then we have another challenge how much bandwidth a single satellite can handle which can affect the download and upload speed of everyone sharing that satellite. Which is your maximum download and upload speed will be most likely on the lower side. And also you may have some data caps to content with each month that’s mean there is a huge opening for competition that’s where SpaceX comes with Starlink.

Since we have already satellite internet and what’s make Starlink different.
It’s a low earth orbiting constellation of satellites operates at 1 third to one one hundred of the height of the Geo stationary satellites
As of April 22nd 2020 there are 420 satellites under Starlink constellation so far and most of them are deployed around are 550 KM above the earth.
They tend to launch 60 satellite per Falcon 9 flight so total around 4400 satellites on phase one and another 7500 in phase 2.
So around the year 2027 they nearly have 12000 satellites deployed in three orbital shells.
This not guarantee that SpaceX also submitted paper work for additional 13000 satellites beyond that.
So why so many satellites.
Well low earth orbital satellites much closer to earth means they can be stationary they have to move faster to maintain their orbit and also they have smaller count of coverage.
But big benefit of much closer is much lower latency for communication. Latency here is 20 to 35 mill seconds. which make them comparable with cable and fiber optics networks.
However when using lasers to communicate with satellites which Starlink will eventually do it will get a little physics boost.
light travel 40% faster in vacuum than in glass like a fiber optic cable and each satellite will be able to handle 1 Tb/s which is 4 times the capacity if vsat.
that is roughly 40000 people streaming 4k video at once. all that sounds incredible isn’t it a service that meant to knock out all the current internet services.
No the service is meant to be a smaller segment of the market with primarily areas that are less populated.

With tens of thousands of satellite being put into orbit it’s going to dwarf everything that comes before.
At this point of history we only launch about 9000 objects in the space and of those less than 6000 of them are in still use today, SpaceX is going to triple that number in 5 to 7 years. And if they move forward with the additional 13000 then you may know why lot of people are concerned about over crowding and space debris.
SpaceX have strict plan to mitigate space debris. which means a high level of de-orbiting reliability than NASA uses for itself. that is 90% of the satellite is successfully de-orbiting.
With the targeted life span of 3 to 5 years, space x confirms that implement an operations plan for the orderly de-orbit of satellites nearing the end of their
useful lives at a rate far faster than is required under international standards.
And SpaceX satellites will de-orbit by moving to a disposal orbit from which they will reenter the Earth’s atmosphere within approximately one year
after completion of their mission.
About 95% of the satellite parts will disintegrate while entering the atmosphere as they de-orbit.
There is also been an impact on astronomical observation, the satellite will very visible when they deployed
and they will be noticeable while they tumbling their way to their orbit.
Astronomers are worried about the light pollution.
SpaceX address these issues with painting their satellite black to reduce the reflection.

There is a huge opportunity for a company to up and running first. Which is obviously looking like is SpaceX.
In 2018 they estimated the total cost will be about 10 billion dollars. Which is a lofty price tag for only expected to make 3 to 5 billion dollars a year by launches from 2025.
The projection from lead revenue from Starlink are 30 to 50 billion dollars a year by 2025.
On a media call the very first launch of a satellite Elon said.
“We see this as a way for SpaceX to generate revenue that can be used to develop more and more advanced rockets and spaceships. We believe we can use the revenue from Starlink to fund Starship.”
Which leads right into their goal to become a multi planetary species.
The Starlink beta testing is planning to start in North America and Europe in august 2020.
when more satellites are add into the constellation we can see more area under the beta program.
It interest how it’s going to perform within the next year or two and what opportunities its opens in internet access and other business.
by Teffin Varghese | Jul 7, 2020 | Howtos, Linux, Networking, OS, Python, Security, Servers, Storages, Troubleshooting, Uncategorized, VMware Esxi, Workstation
How to upgrade 10G Intel NIC driver in Linux.
Step 1: Identify the NIC adapter on the server/machine.
For upgrading the NIC driver, First you need to identify the NIC model for that you can use “lspci” command.
Use the command “lspci | grep -i net” to list the PCIe devices. (Usually 10G NIC’s are plugged into the PCIe slots on the Motherboard)
Command: lspci | grep -i net
Sample Output:
04:00.0 Ethernet controller: Intel Corporation 82599ES 10-Gigabit SFI/SFP+ Network Connection (rev 01)
04:00.1 Ethernet controller: Intel Corporation 82599ES 10-Gigabit SFI/SFP+ Network Connection (rev 01)
06:00.0 Ethernet controller: Intel Corporation 82576 Gigabit Network Connection (rev 01)
06:00.1 Ethernet controller: Intel Corporation 82576 Gigabit Network Connection (rev 01)
Here our 10G adapter is Ethernet controller: Intel Corporation 82599ES 10-Gigabit SFI/SFP+ Network Connection (rev 01)
Step 2: Identify the active interface in the OS.
For identify the active interface just type “ip a” on the terminal, this will display the interfaces on the OS and from the list identify the active interface name.
Command: ip a
Sample Output:
1: lo: <LOOPBACK,UP,LOWER_UP> mtu 65536 qdisc noqueue state UNKNOWN
link/loopback 00:00:00:00:00:00 brd 00:00:00:00:00:00
inet 127.0.0.1/8 scope host lo
inet6 ::1/128 scope host
valid_lft forever preferred_lft forever
2: eth0: <BROADCAST,MULTICAST,UP,LOWER_UP> mtu 1500 qdisc pfifo_fast state UP qlen 1000
link/ether 32:36:65:64:66:34 brd ff:ff:ff:ff:ff:ff
inet x.x.x.x/x brd 50.7.126.127 scope global eth0
inet6 x:x:x::x/64 scope global
valid_lft forever preferred_lft forever
inet6 x::x:x:x:x/64 scope link
valid_lft forever preferred_lft forever
Step 3: Check the current driver version of the NIC.
For identifying the driver version use the command “ethtool -i <interface name>” Eg: ethool -i eth0
From the results you can view the current driver version. The output will be something like this.
Command: ethtool -i <interface name>
Sample Output:
driver: ixgbe
version: 4.2.1-k
firmware-version: 0x80000208
bus-info: 0000:04:00.0
supports-statistics: yes
supports-test: yes
supports-eeprom-access: yes
supports-register-dump: yes
supports-priv-flags: no
Here the “version: 4.2.1-k” indicates the current driver version of the NIC.
Step 4: Download the latest available driver from Intel.
Go to https://downloadcenter.intel.com/product/32609/Intel-82599-10-Gigabit-Ethernet-Controller
to download the required driver.
https://downloadcenter.intel.com/product/32609/Intel-82599-10-Gigabit-Ethernet-Controller
For Linux: https://downloadcenter.intel.com/download/14687/Ethernet-Intel-Network-Adapter-Driver-for-PCIe-Intel-10-Gigabit-Ethernet-Network-Connections-Under-Linux-?product=32609
https://downloadcenter.intel.com/download/14687/Ethernet-Intel-Network-Adapter-Driver-for-PCIe-Intel-10-Gigabit-Ethernet-Network-Connections-Under-Linux-?product=32609
Download the latest available driver from the above link.
Step 5: Install/upgrade the Driver.
To manually build the driver
—————————-
1. Move the base driver tar file to the directory of your choice.
For example, use ‘/home/username/ixgbe’ or ‘/usr/local/src/ixgbe’.
2. Untar/unzip the archive, where <x.x.x> is the version number for the
driver tar file:
# tar zxf ixgbe-<x.x.x>.tar.gz
3. Change to the driver src directory, where <x.x.x> is the version number
for the driver tar:
# cd ixgbe-<x.x.x>/src/
4. Compile the driver module:
# make install
The binary will be installed as:
/lib/modules/<KERNEL VER>/updates/drivers/net/ethernet/intel/ixgbe/ixgbe.ko
The install location listed above is the default location. This may differ
for various Linux distributions.
5. Load the module using the modprobe command.
To check the version of the driver and then load it:
# modinfo ixgbe
# modprobe ixgbe [parameter=port1_value,port2_value]
Alternately, make sure that any older ixgbe drivers are removed from the
kernel before loading the new module:
# rmmod ixgbe; modprobe ixgbe
Note: For certain distributions like (but not limited to) Red Hat Enterprise
Linux 7 and Ubuntu, once the driver is installed, you may need to update the
initrd/initramfs file to prevent the OS loading old versions of the ixgbe
driver.
Use the dracut utility on Red Hat distributions:
# dracut –force
For Ubuntu:
# update-initramfs -u
Step 6: Check and verify the new driver version.
Use the same command we used before “ethtool -i <interface name>” to view the driver version
Command: ethtool -i <interface name>
Sample Output:
driver: ixgbe
version: 5.7.1-k
firmware-version: 0x80000208
bus-info: 0000:04:00.0
supports-statistics: yes
supports-test: yes
supports-eeprom-access: yes
supports-register-dump: yes
supports-priv-flags: no
Note: Please read the read me file available from Intel before proceeding.
That’s all for now. CHEERS!!!