Select Page

Installing Kali-Linux 64-Bit on Raspberry Pi-4
Installing Kali-Linux (64-bit) in Raspberry Pi-4

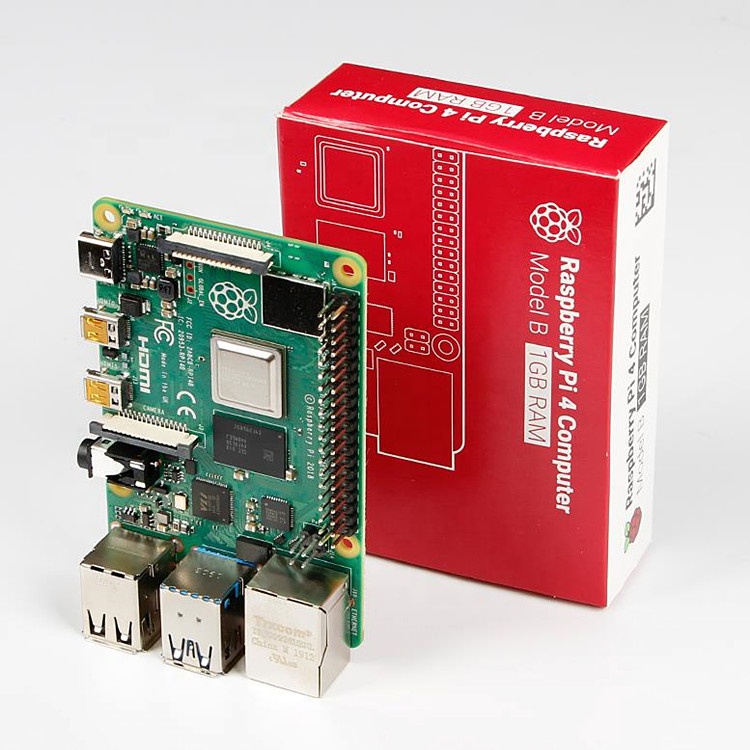
For the 64-Bit OS support we need to use Raspberry Pi 4
I’m using Raspberry Pi 4 Model-B With * Gigs of RAM, A 4GB RAM model would work just fine.

But First what is Raspberry Pi and what is it used for ?

he Raspberry Pi is a low cost, credit-card sized computer that plugs into a computer monitor or TV, and uses a standard keyboard and mouse.
It is a capable little device that enables people of all ages to explore computing, and to learn how to program in languages like Scratch and Python.
It’s capable of doing everything you’d expect a desktop computer to do, from browsing the internet and playing high-definition video, to making spreadsheets, word-processing, and playing games.

What’s more, the Raspberry Pi has the ability to interact with the outside world, and has been used in a wide array of digital maker projects, from music machines and parent detectors to weather stations and tweeting birdhouses with infra-red cameras.
We want to see the Raspberry Pi being used by kids all over the world to learn to program and understand how computers work.

Now please follow the following steps to install Kali-Linux on a Raspberry Pi 4

  • Step 1

Assemble and enclose the Raspberry Pi, We recommend a case with passive cooling or with a small fan and heat-sinks.
Yes of course you can the Pi without any case or cooling setup, But we recommend to use a cooling case for protection and better performance.

  • Step 2

Download Kali-Linux Image from the official website.
You can get the download link from the below URL.
You need to select ARM image category, then choose the Raspberry Pi 64-bit Image.

  • Step 3

Now you need to write this image to a Micro SD card, Which you are going to use it on your Raspberry Pi.
You can use either Balena Etcher or the official Raspberry Pi imager for this task.

Here we are using the official Raspberry Pi imager. You can download the imager from the following URL.
https://www.raspberrypi.com/software/
Here is the download link for Windows machines
https://downloads.raspberrypi.org/imager/imager_1.6.2.exe

  • Step 4

Write Kali-Linux image to the Micro SD-Card. Please follow the following images.

1, Launch the Pi Imager and select Choose OS.
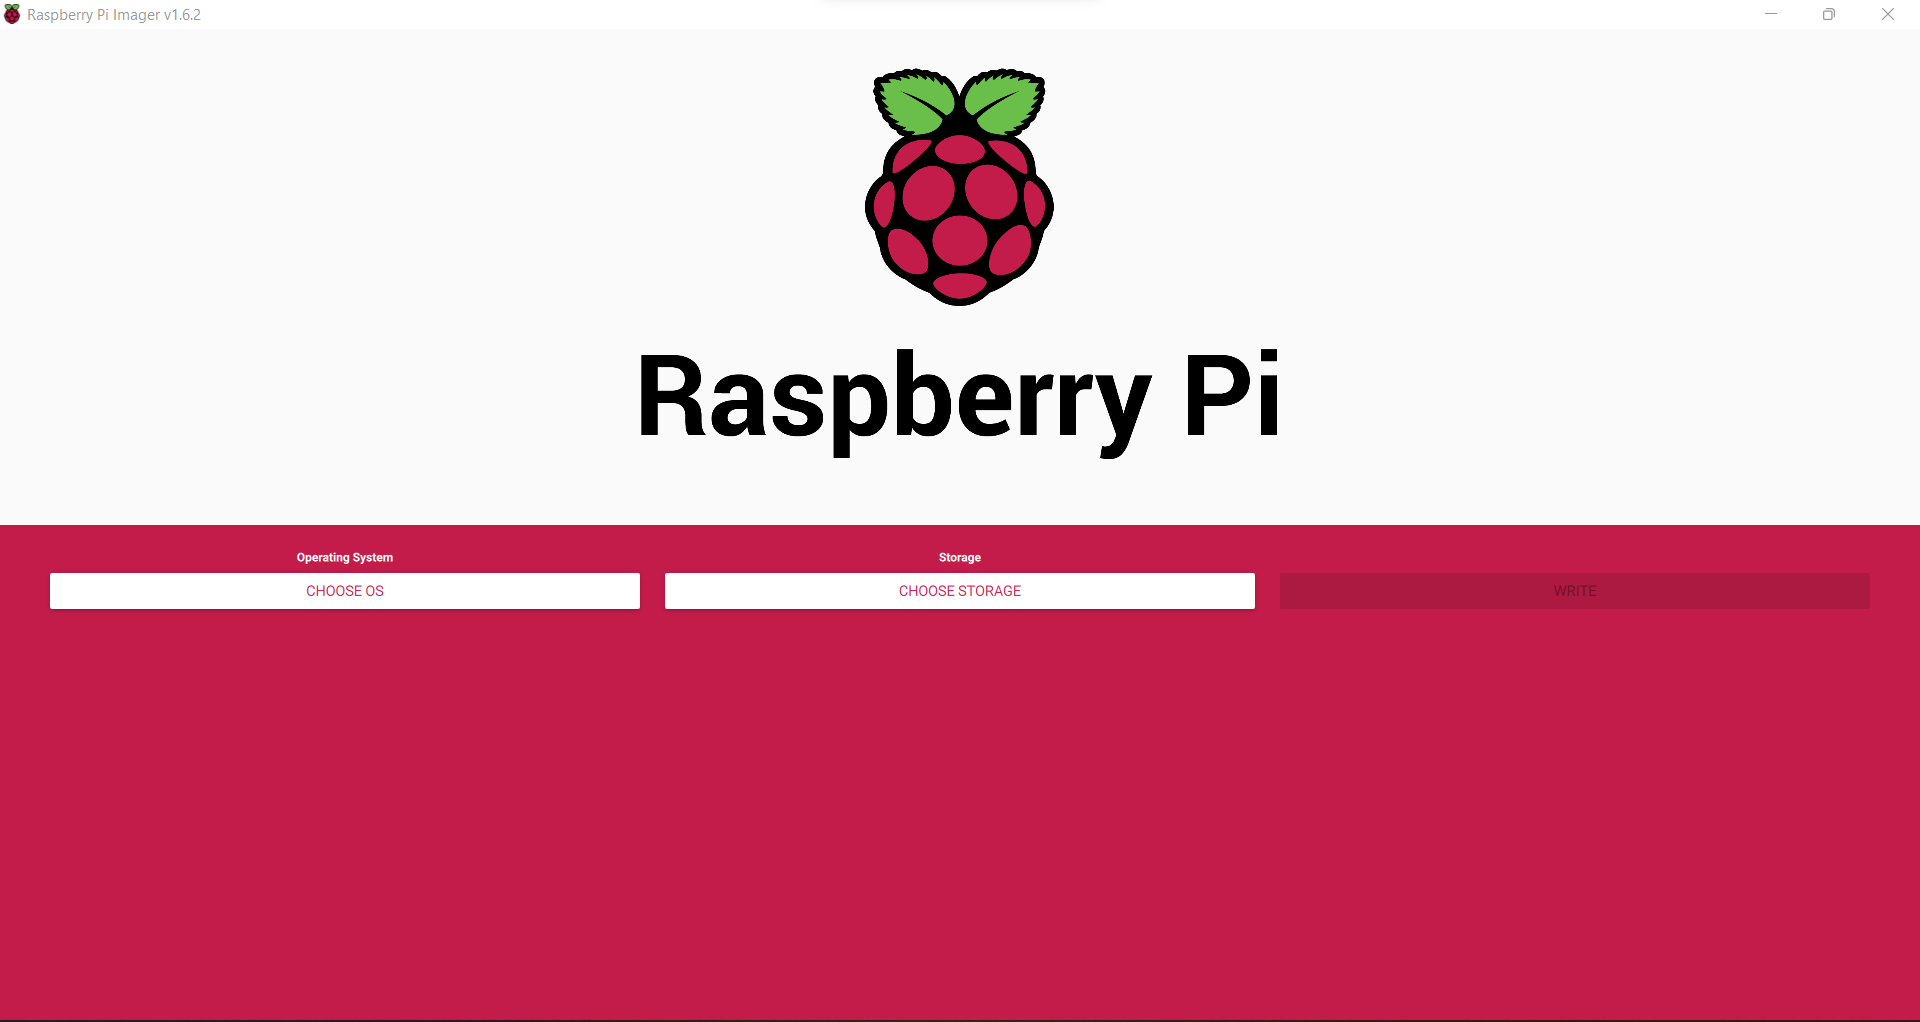
2, Select the option “Use Custome” for our Kali-Linux Image
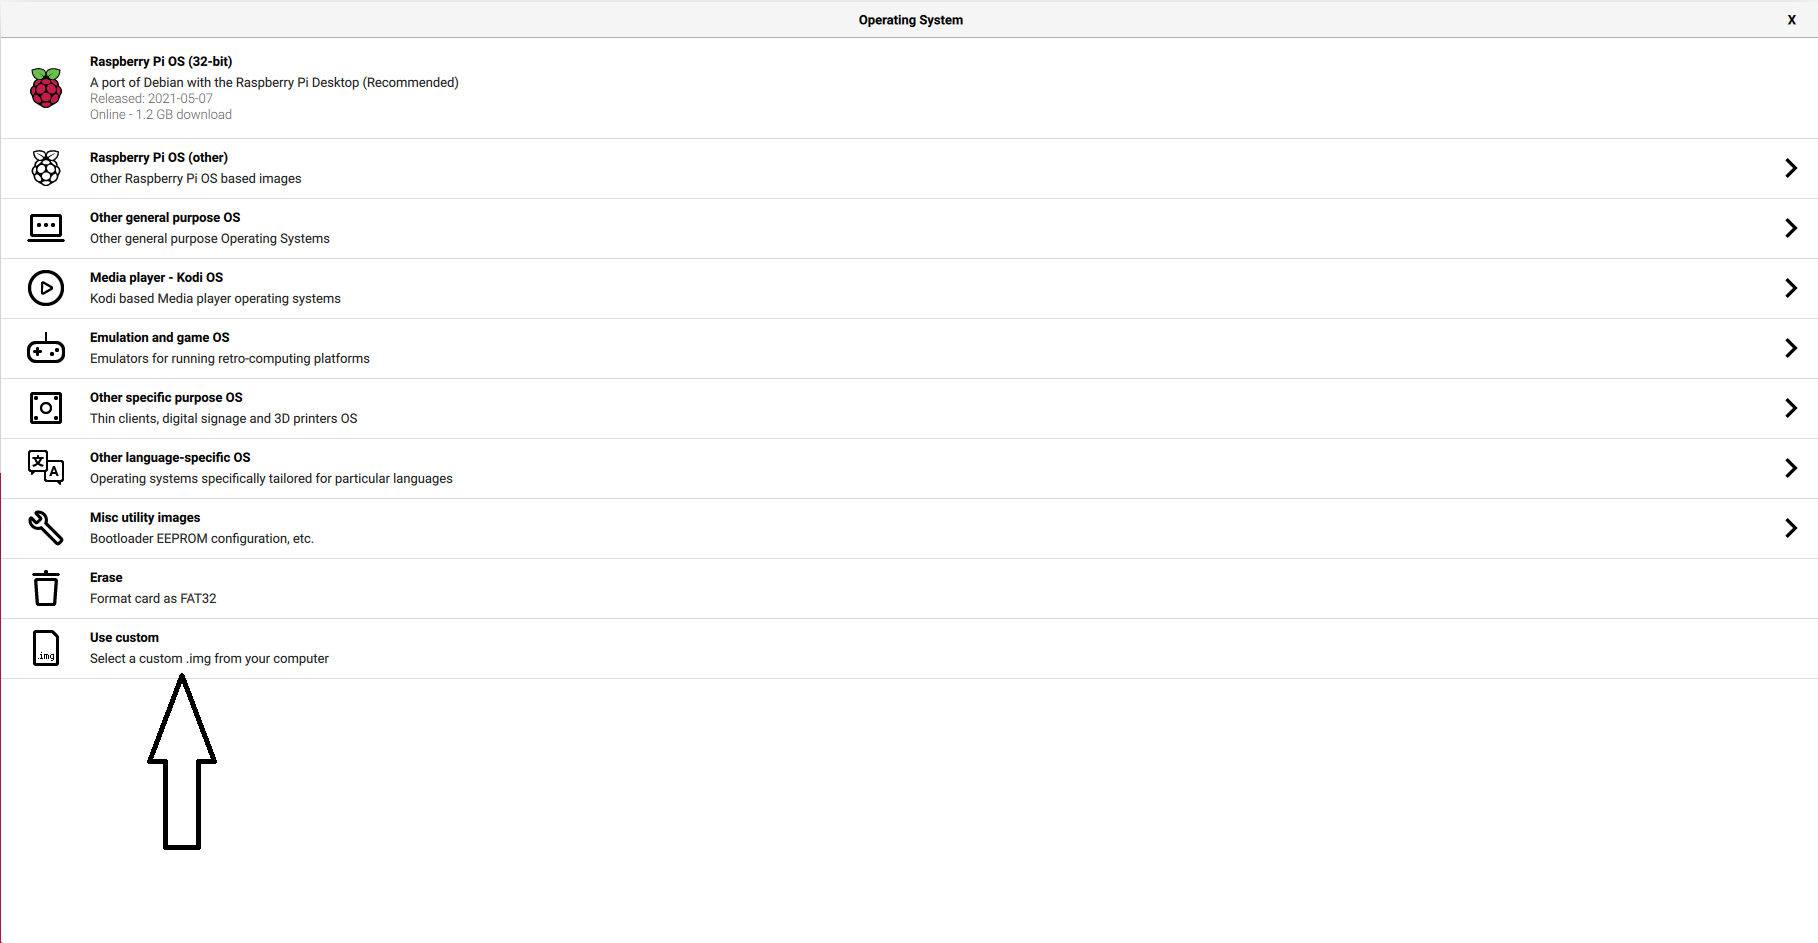
3, Browse and choose the Kali-Linux Image we have downloaded from our PC.
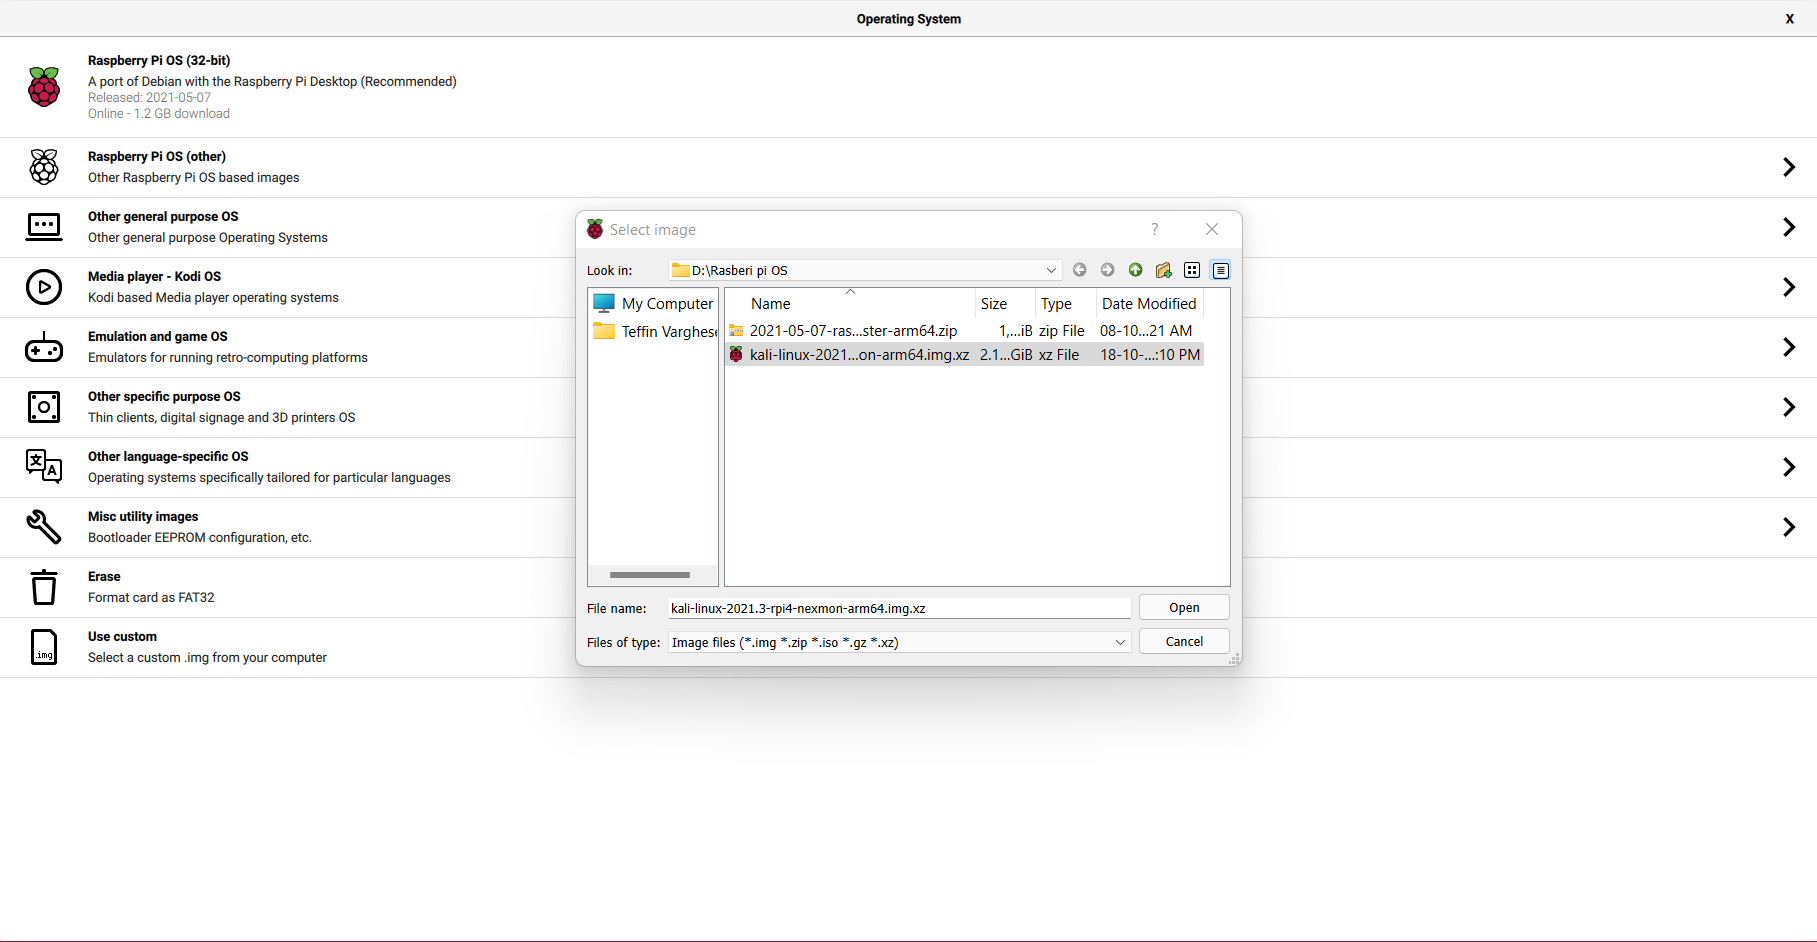
4, Now select storage and choose our micro SD-Card and click write to write the Image.
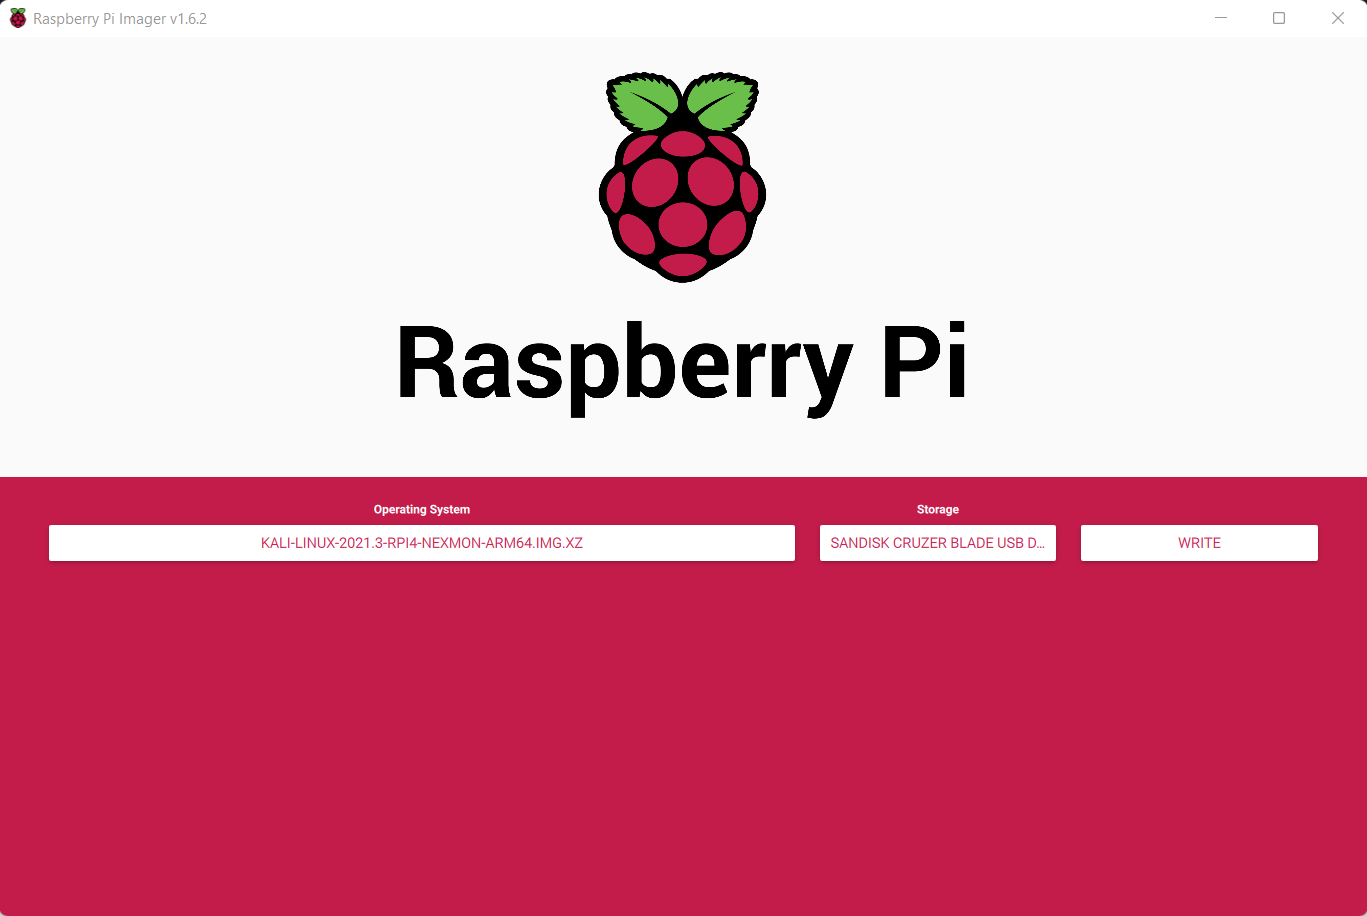
Note: Please make sure you have selected the correct storage, In our case the SD-Card. If you choose the wrong location the imager will wipe the selected storage location.

  • step 5
    Insert the Micro SD-card to your Raspberry Pi. Plug in your Raspberry Pi Power-Brick to the device and
    connect your Pi to a monitor, also plugin your Mouse and Keyboard as well, Then power-on the power brick.

It will take some time for the initial bootup, Wait for it. If everything is perfect your Raspberry Pi will boot into Kali-Linux.
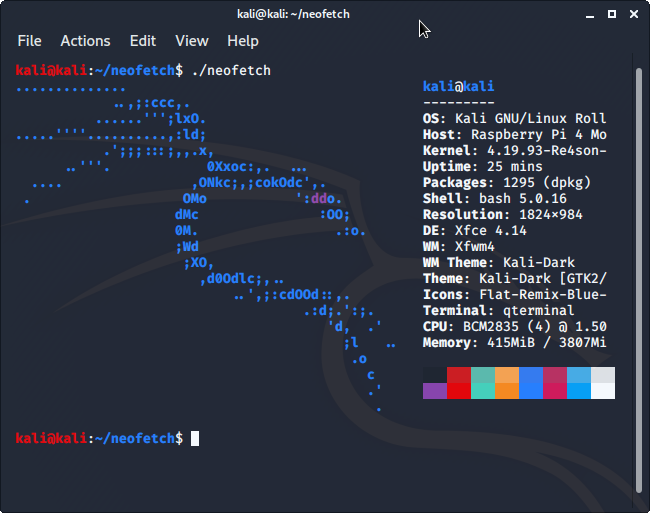
That’s it, Have fun.
How to create your own vpn server

For creating a VPN you will need these things.

  • A VPS(Virtual Private Server), I am using Ubuntu-based VPS

Here is the link for a free credit of 100$ with this you can create a VPS for free and test it if you like then you can continue.


For Free $100 Credit for VPS use this link

Then you will need

  • ssh client Since I am using Linux for this demo I will be using remmina, or you can use a terminal.
  • Outline Manager and Outline Client ( I am using Outline as a VPN server, it's opensource and free.) here is the link to outline website  https://getoutline.org/

Your content goes here. Edit or remove this text inline or in the module Content settings. You can also style every aspect of this content in the module Design settings and even apply custom CSS to this text in the module Advanced settings.

Ok, Let's get started, first create a VPS server, register your account and deploy your VPS server, i am using Vultr as VPS hosting provider, they have multiple datacenters in multiple continent.  

For Free $100 Credit for VPS use this link

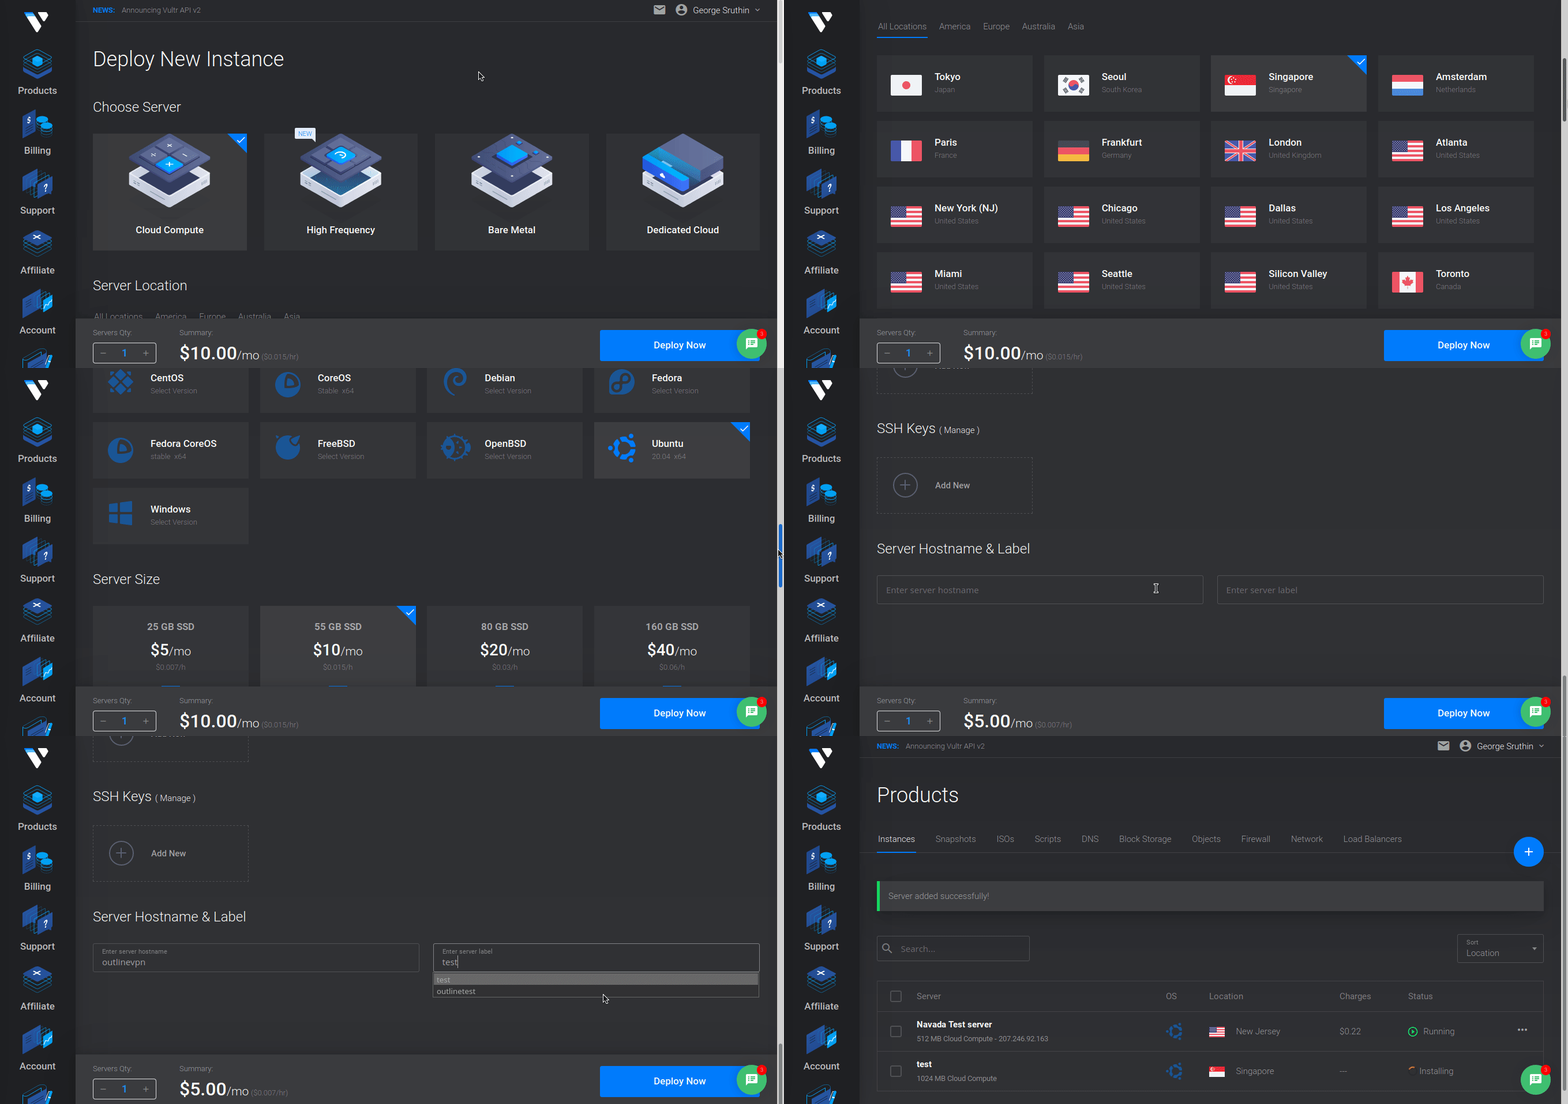
after creating account on Vultr, you need to go to products, Click plus icon and click on create new server, this will redirect your page and follow below steps. wait for some time till your new vps server is up and running.


after that you will get your new VPS server listed in your product section, then open it now you can see, server detail including your server IP, user name, password. etc.

you need to note down 3 things,

  • Server IP
  • username
  • password

now you have open your ssh client and connect to your VPS server.

i will put  a link here how you can do that.

after connecting to your VPS, first thing you need to do is update & upgrade your server if available. please follow this command to update and upgrade.

for update use this command

sudo apt update

for upgrade use this.

sudo apt upgrade

for restart use this

sudo reboot now


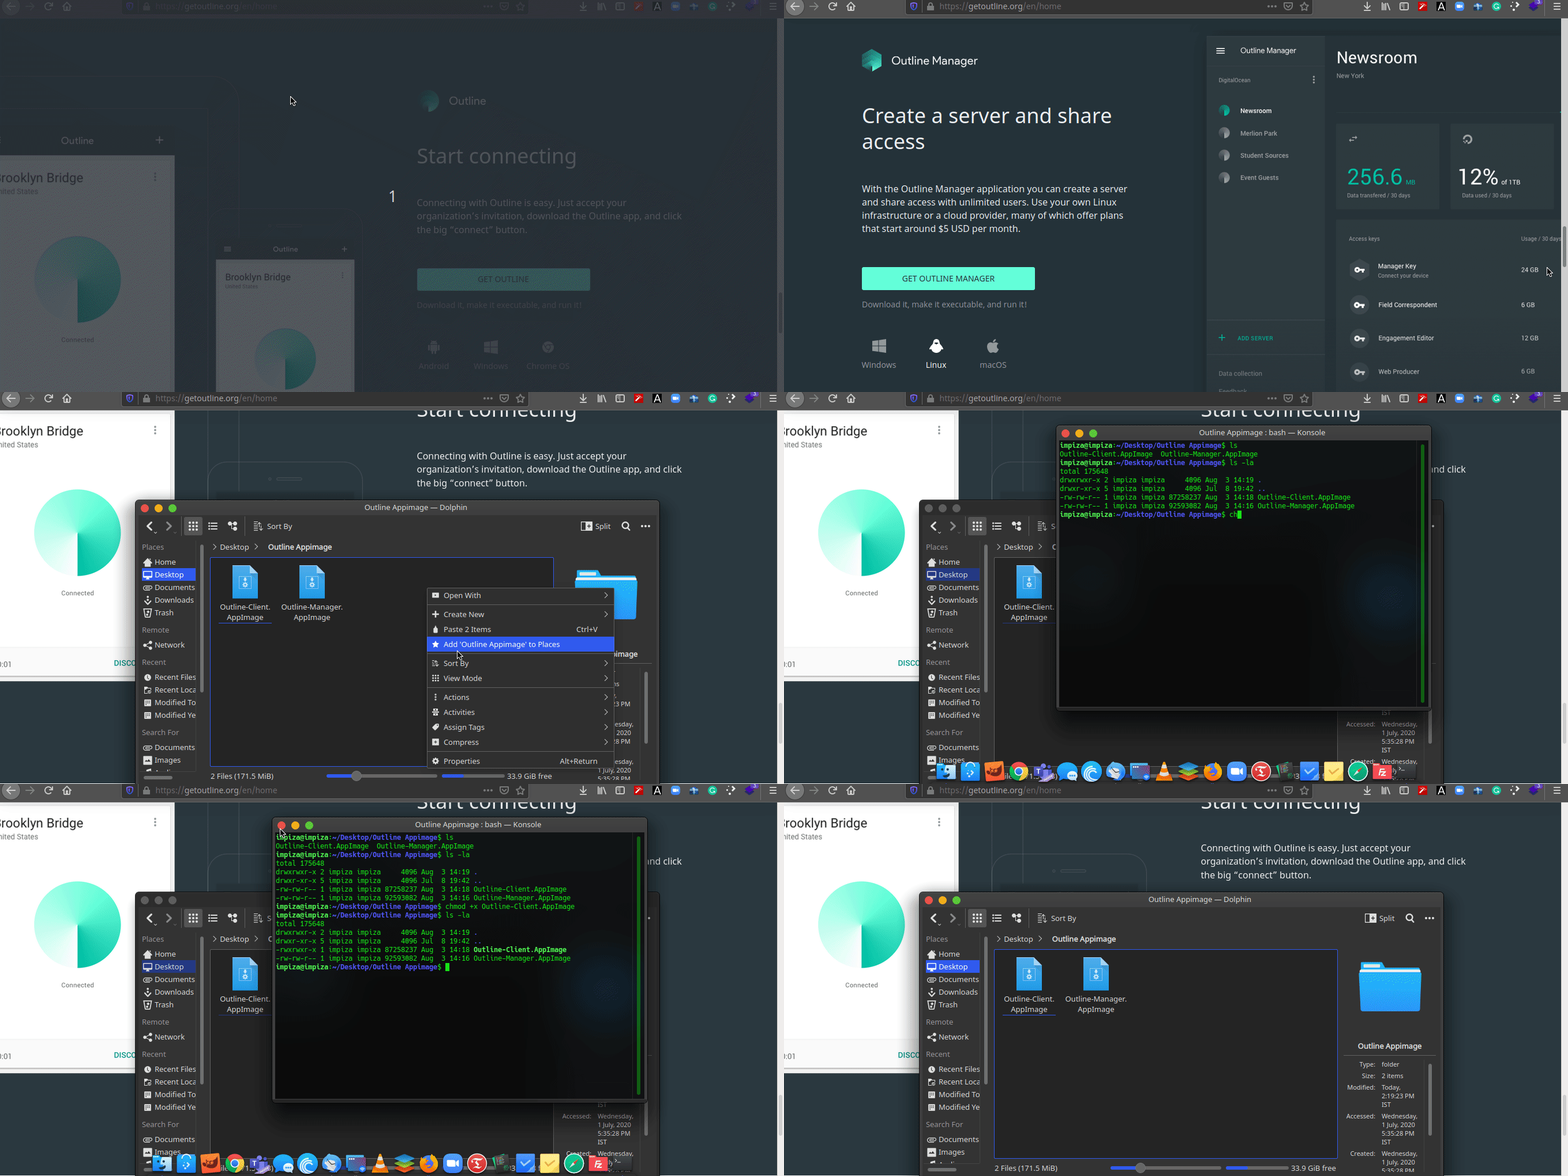
then restart reconnect to your server, then go to outline VPN website and download outline manager and outline client. and move both files to a directory so that you can find that files easily. then make those files executable. i will give you detailed tutorial below. there is gui method also available its depends on the distro you are using.

https://techridez.com/blog/make-file-executable-using-terminal/

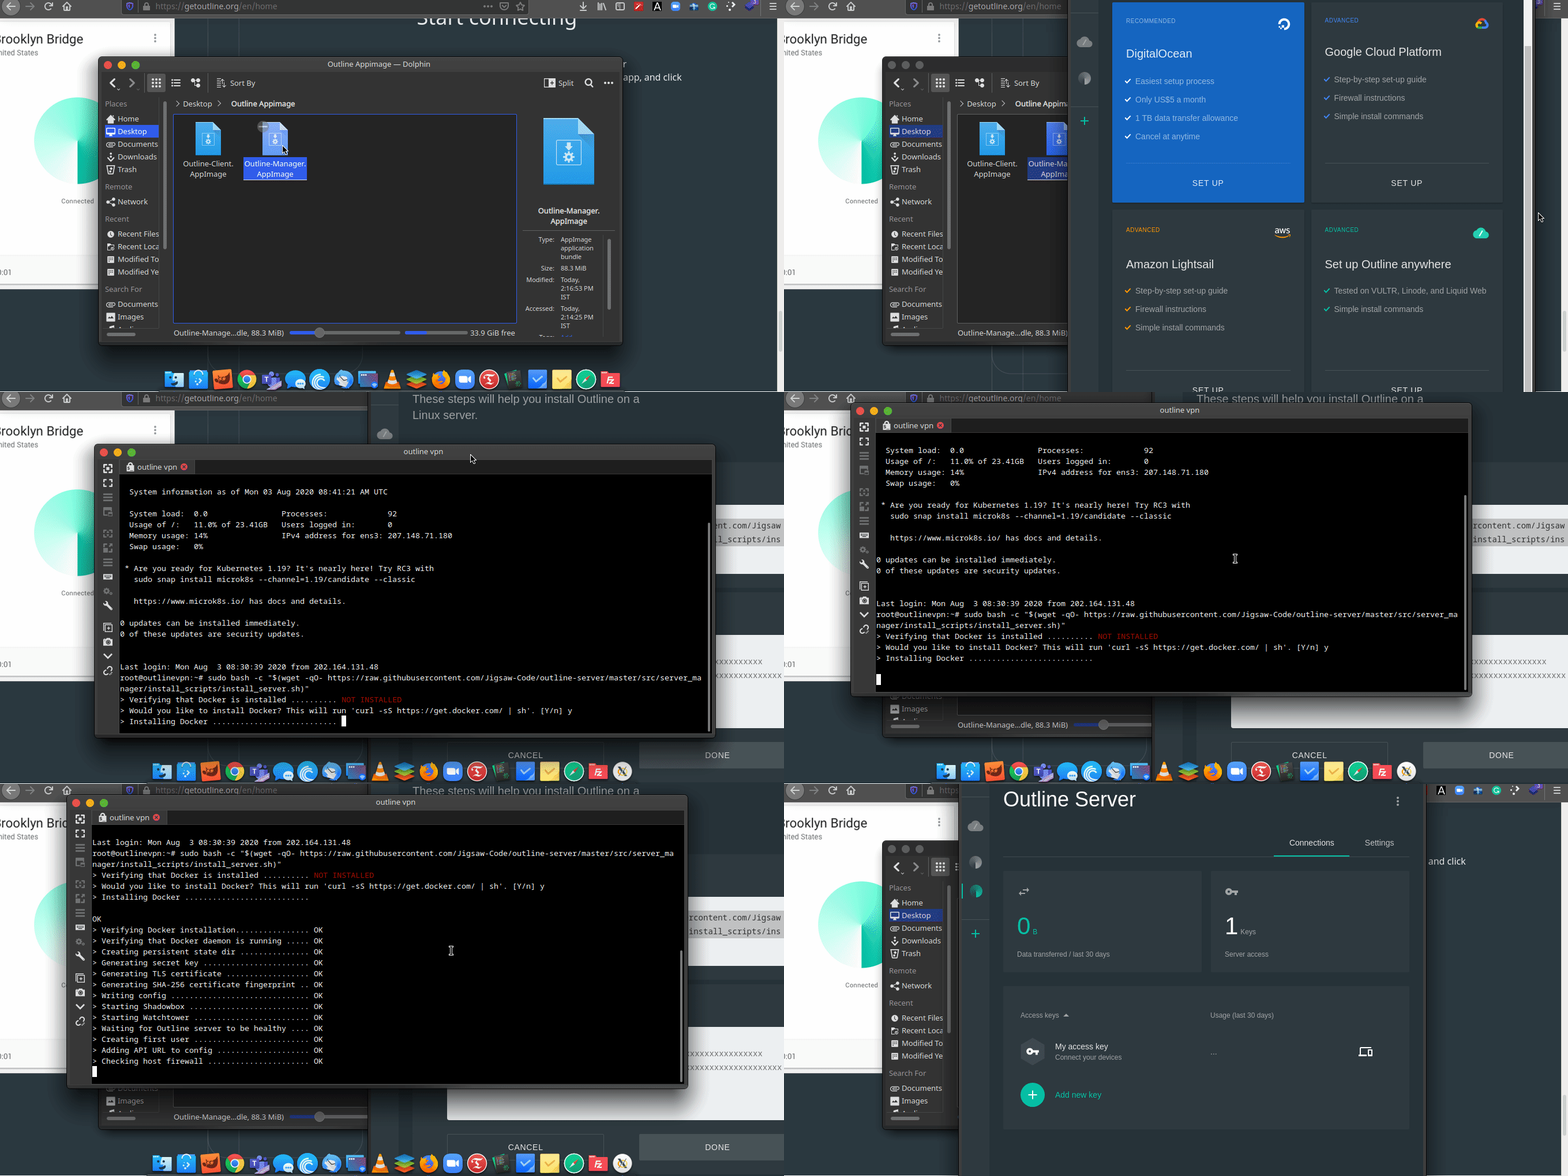
Ok now open Outline-Manager.Appimage

since its already executable you just need to double click.

it will open Outline Manager, and you can find 4 options.

  • Digital Ocean
  • Google Cloud
  • Aws Cloud
  • Advanced option.

we will use Advanced option. this will give you a command line, you need to copy that and paste in the ssh client which is connected VPS server.

as you can see from above, after pasting those command to VPS Server it will install docker, it will takes some time, after that you will get API key as output which is highlighted in green, copy that and paste it in field in the Outline Manager.

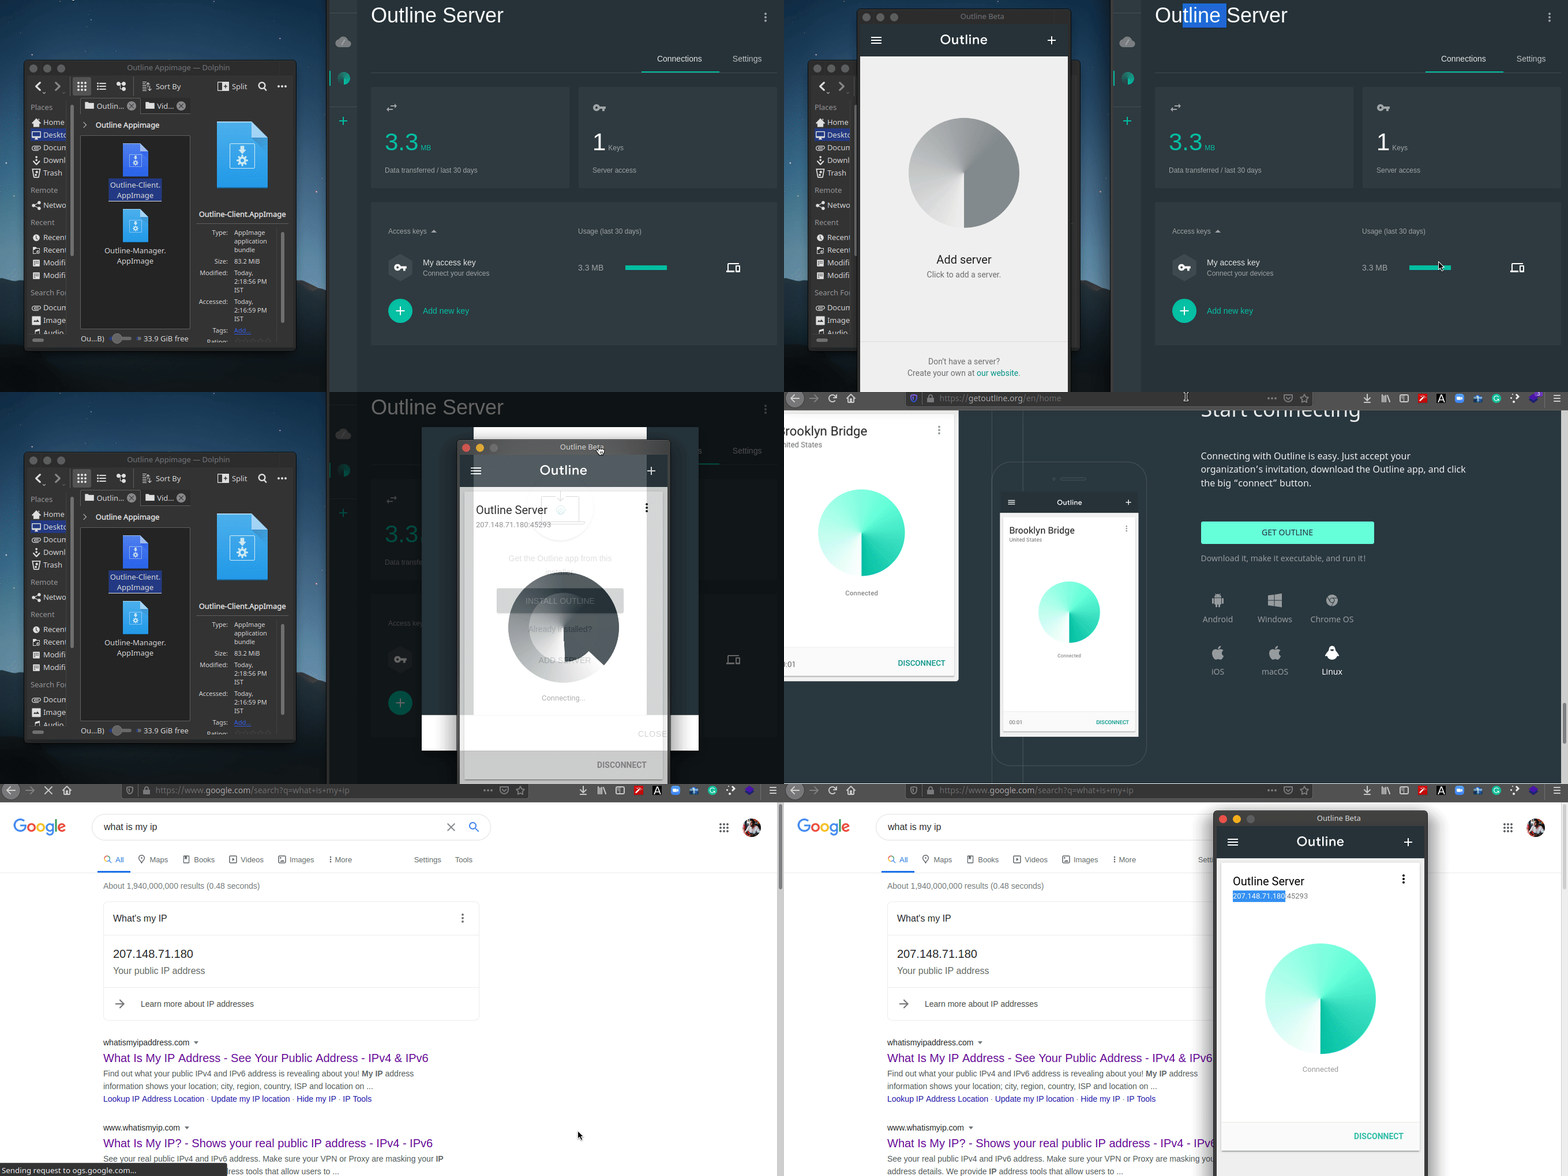
then open outline client, go to outline manager copy key, and add server to the client.

Now your VPN Client is ready. as you can see about my public ip is also changed to the vps serve we are using.


Enjoy.


If you want a details video please watch my youtube channel. also i have put the youtube video below

Pin It on Pinterest