by Teffin Varghese | Oct 31, 2021 | Hosting, Howtos, Linux, Networking, OS, Review, Security, Servers, Troubleshooting, Unix, VPN, VPS, Vulnerability, Workstation
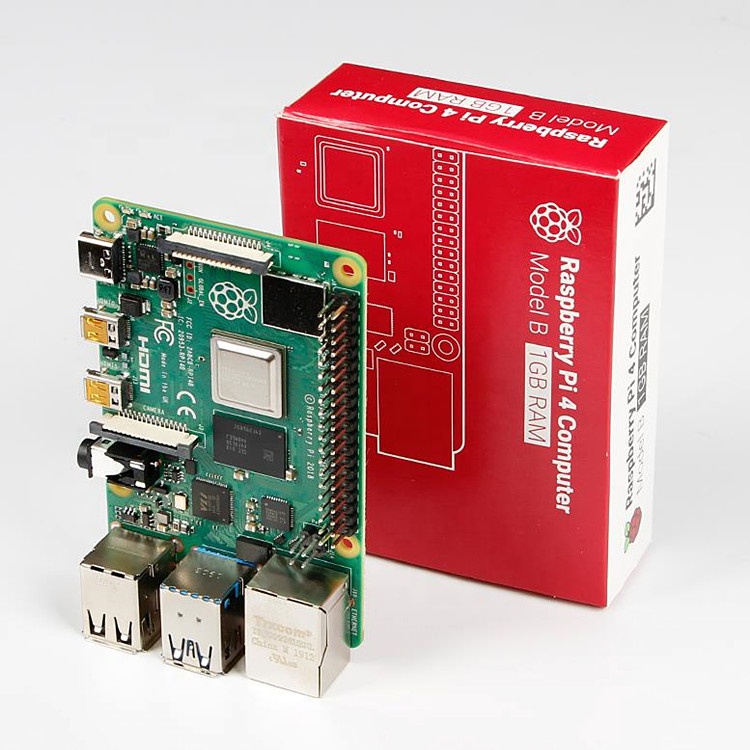
For the 64-Bit OS support we need to use Raspberry Pi 4
I’m using Raspberry Pi 4 Model-B With * Gigs of RAM, A 4GB RAM model would work just fine.
But First what is Raspberry Pi and what is it used for ?
he Raspberry Pi is a low cost, credit-card sized computer that plugs into a computer monitor or TV, and uses a standard keyboard and mouse.
It is a capable little device that enables people of all ages to explore computing, and to learn how to program in languages like Scratch and Python.
It’s capable of doing everything you’d expect a desktop computer to do, from browsing the internet and playing high-definition video, to making spreadsheets, word-processing, and playing games.
What’s more, the Raspberry Pi has the ability to interact with the outside world, and has been used in a wide array of digital maker projects, from music machines and parent detectors to weather stations and tweeting birdhouses with infra-red cameras.
We want to see the Raspberry Pi being used by kids all over the world to learn to program and understand how computers work.
Assemble and enclose the Raspberry Pi, We recommend a case with passive cooling or with a small fan and heat-sinks.
Yes of course you can the Pi without any case or cooling setup, But we recommend to use a cooling case for protection and better performance.
Download Kali-Linux Image from the official website.
You can get the download link from the below URL.
You need to select ARM image category, then choose the Raspberry Pi 64-bit Image.
Now you need to write this image to a Micro SD card, Which you are going to use it on your Raspberry Pi.
You can use either Balena Etcher or the official Raspberry Pi imager for this task.
Here we are using the official Raspberry Pi imager. You can download the imager from the following URL.
https://www.raspberrypi.com/software/
Here is the download link for Windows machines
https://downloads.raspberrypi.org/imager/imager_1.6.2.exe
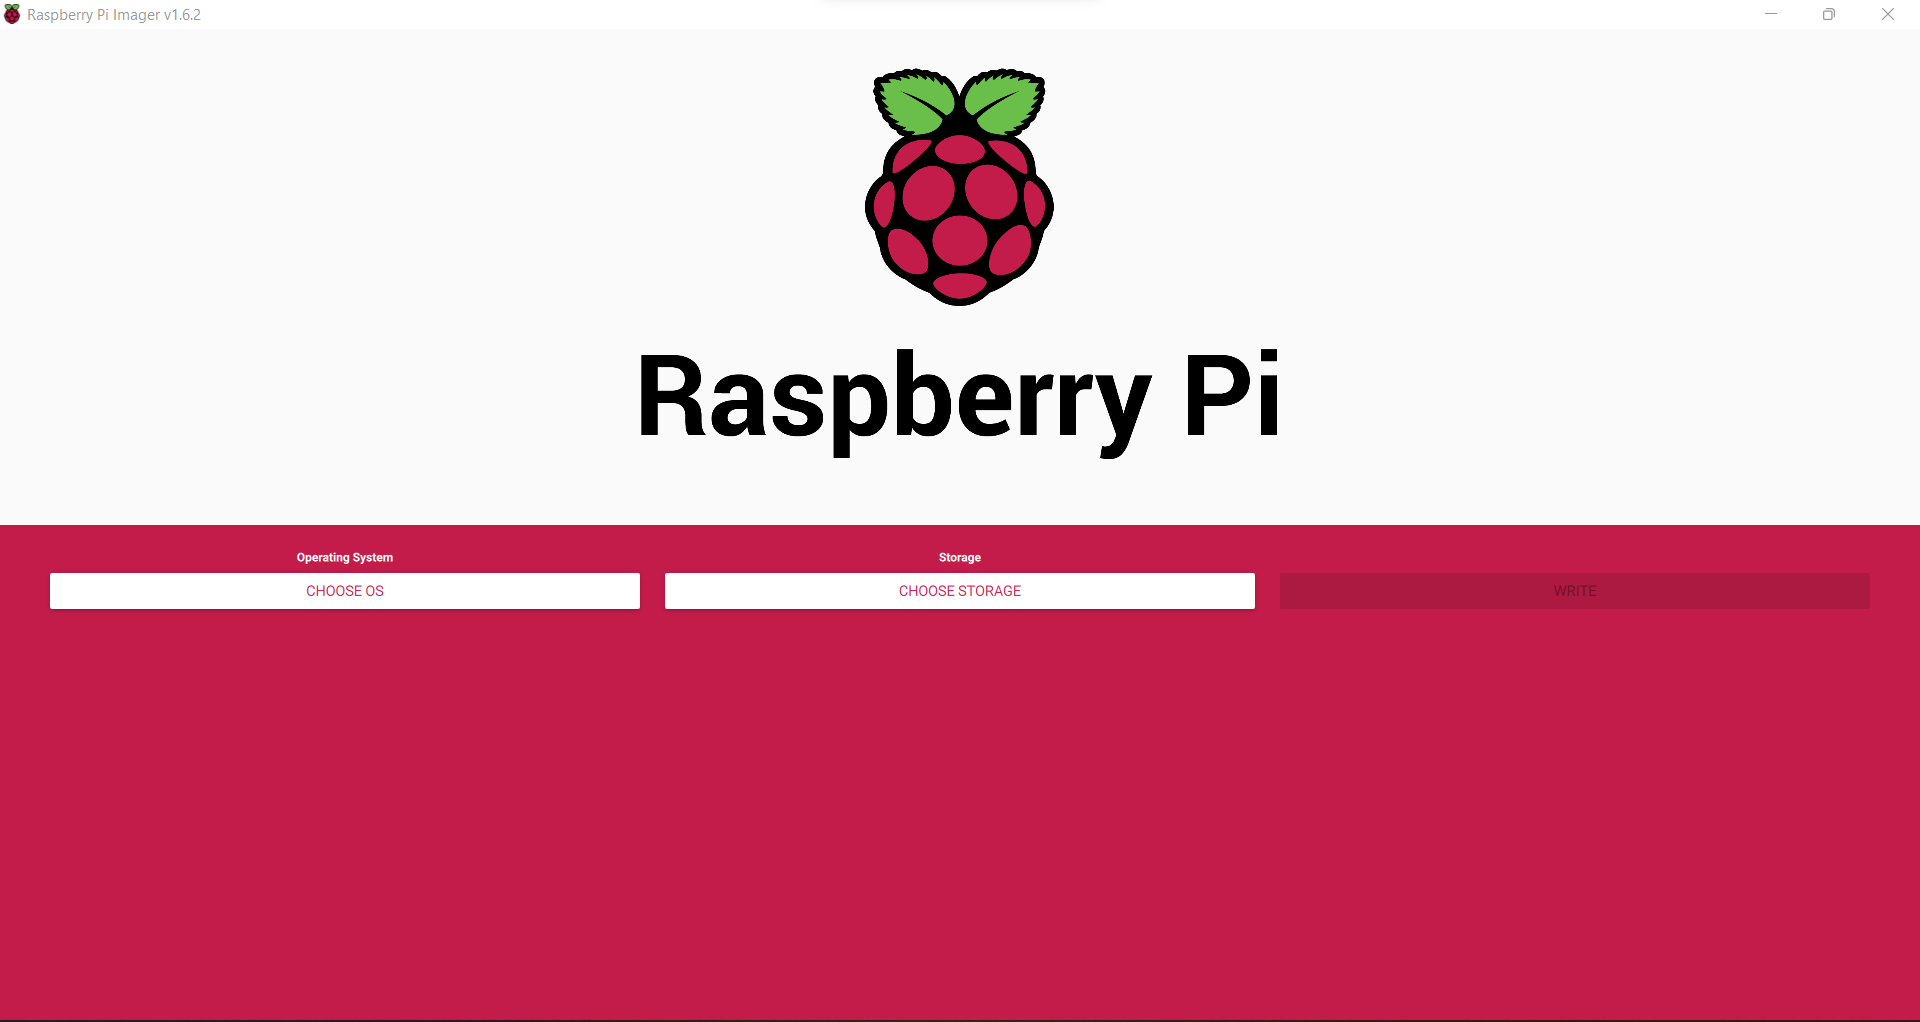
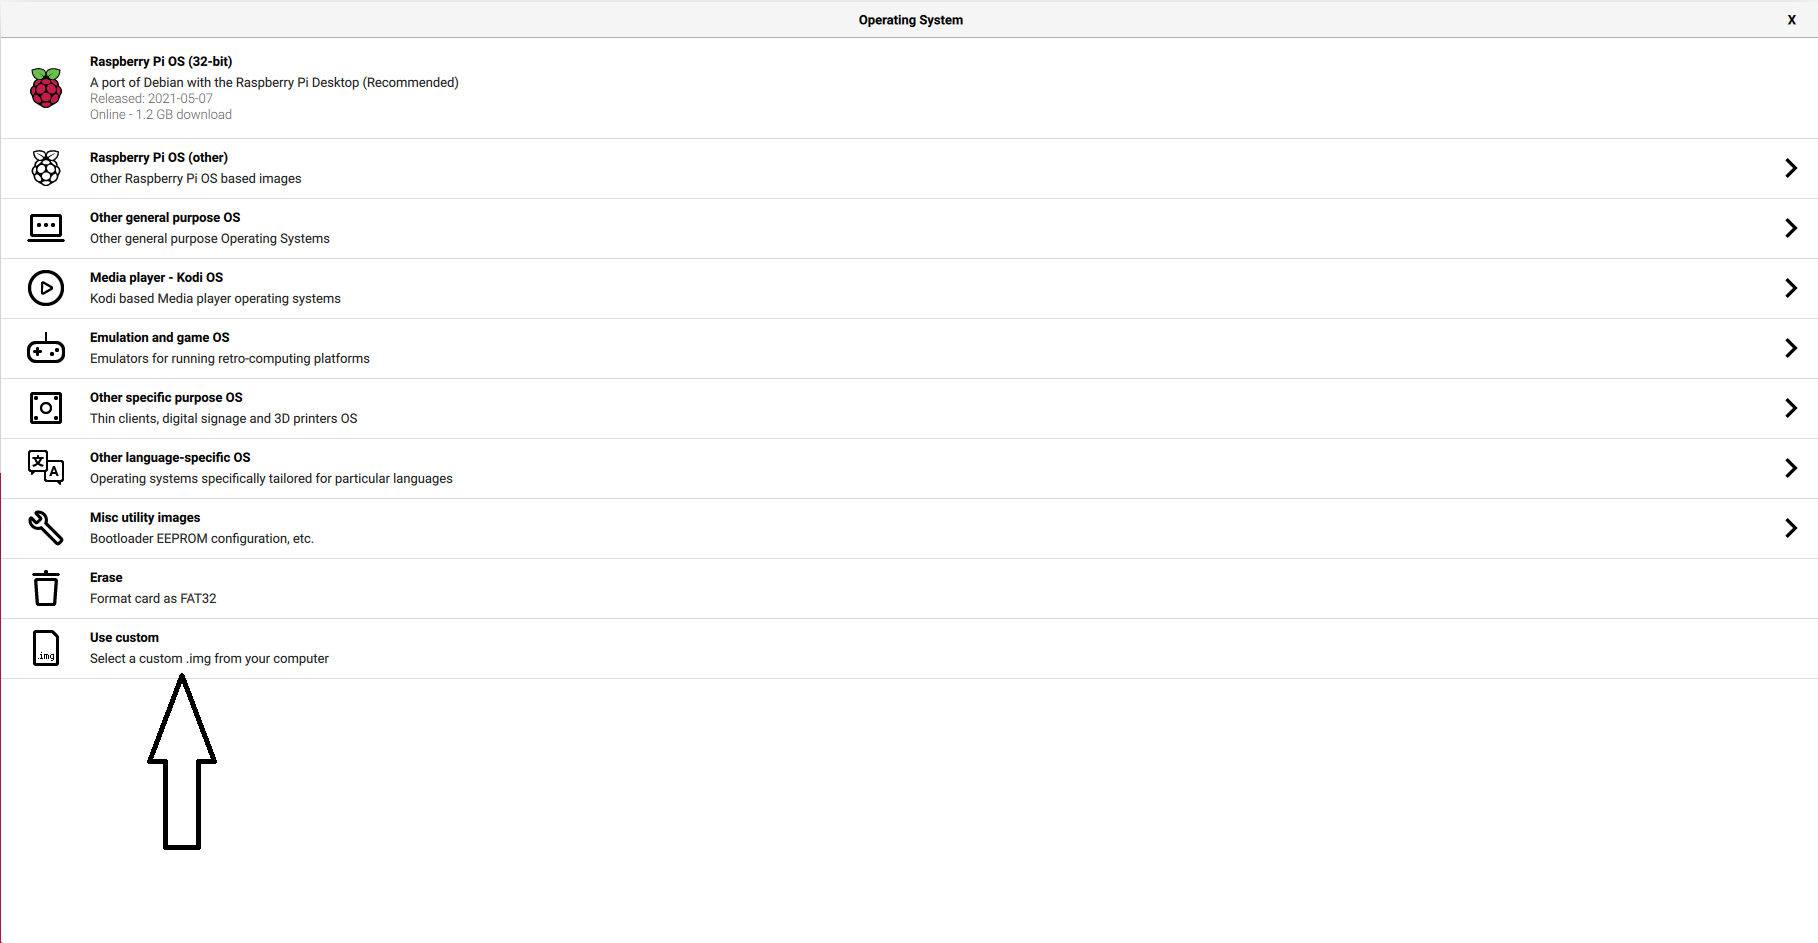
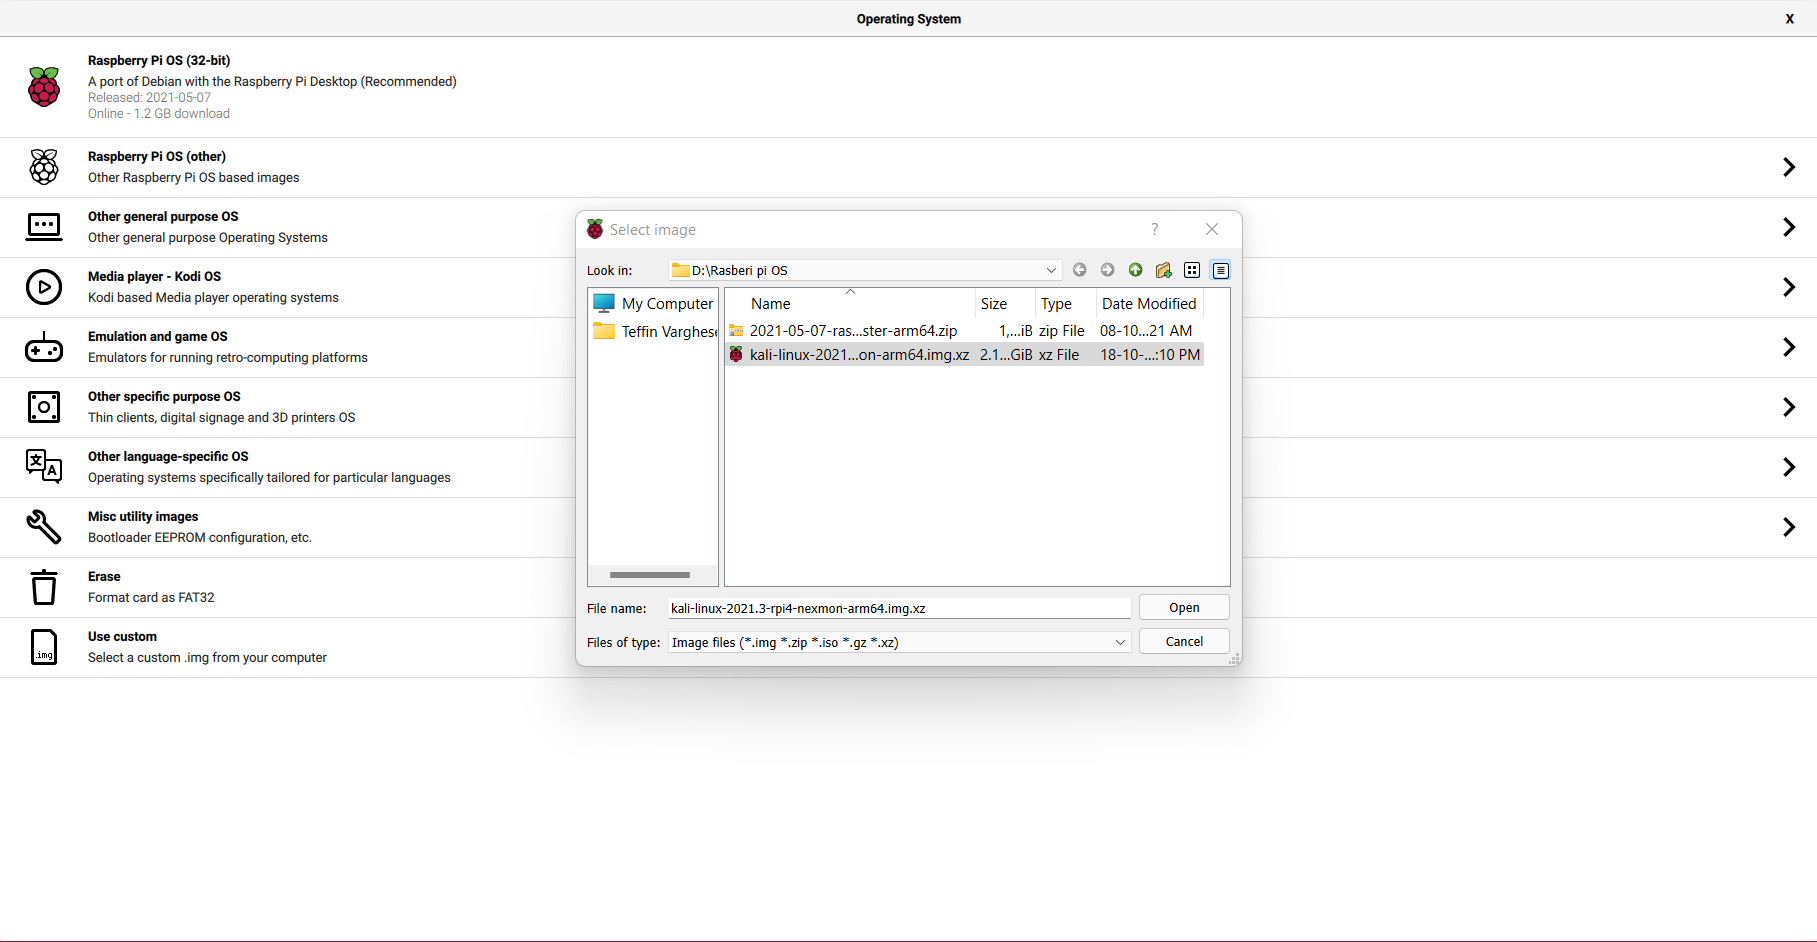
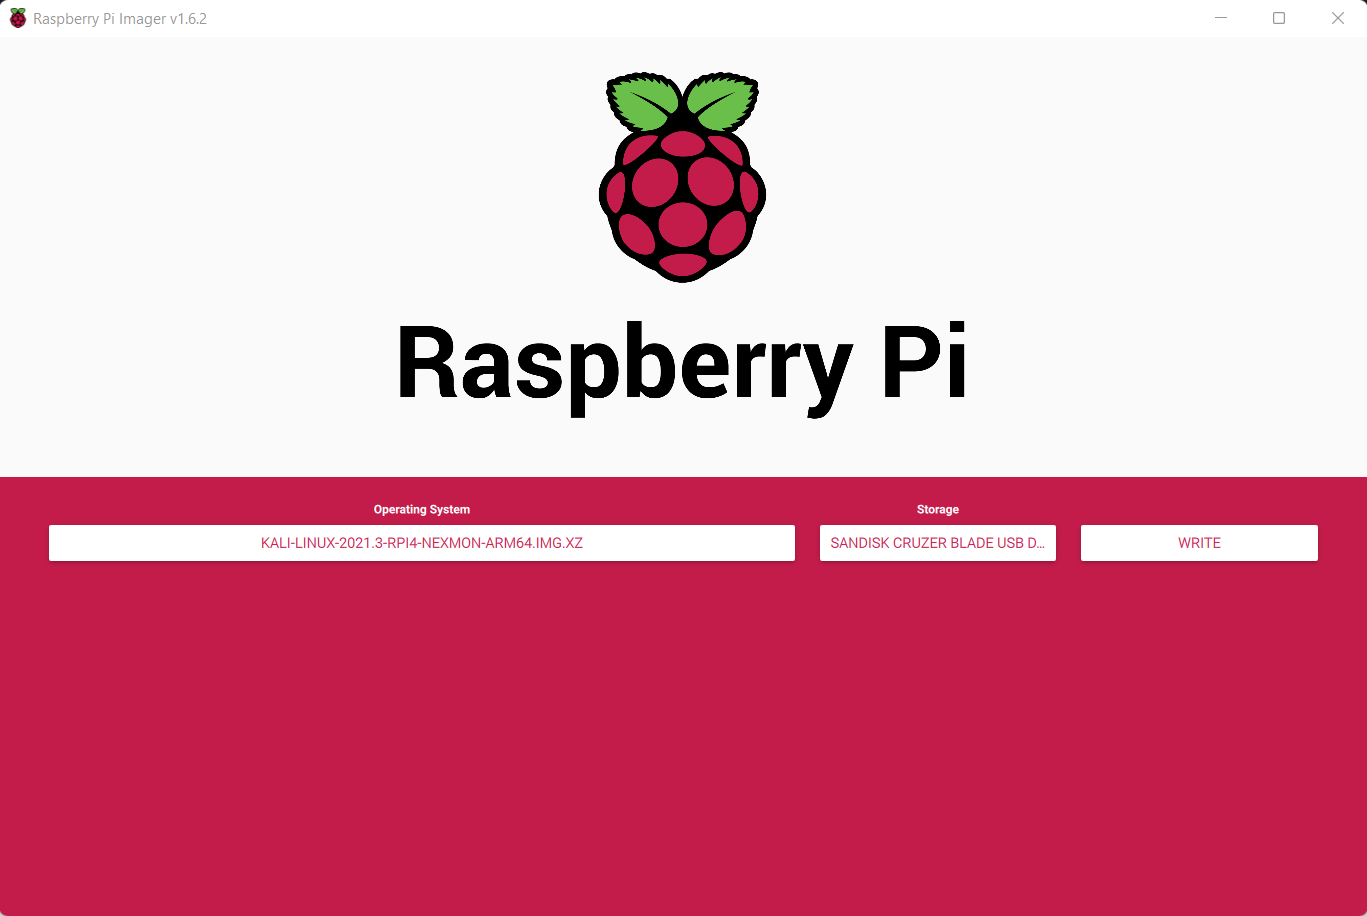
Write Kali-Linux image to the Micro SD-Card. Please follow the following images.
1, Launch the Pi Imager and select Choose OS.
2, Select the option “Use Custome” for our Kali-Linux Image
3, Browse and choose the Kali-Linux Image we have downloaded from our PC.
4, Now select storage and choose our micro SD-Card and click write to write the Image.
Note: Please make sure you have selected the correct storage, In our case the SD-Card. If you choose the wrong location the imager will wipe the selected storage location.
- step 5
Insert the Micro SD-card to your Raspberry Pi. Plug in your Raspberry Pi Power-Brick to the device and
connect your Pi to a monitor, also plugin your Mouse and Keyboard as well, Then power-on the power brick.
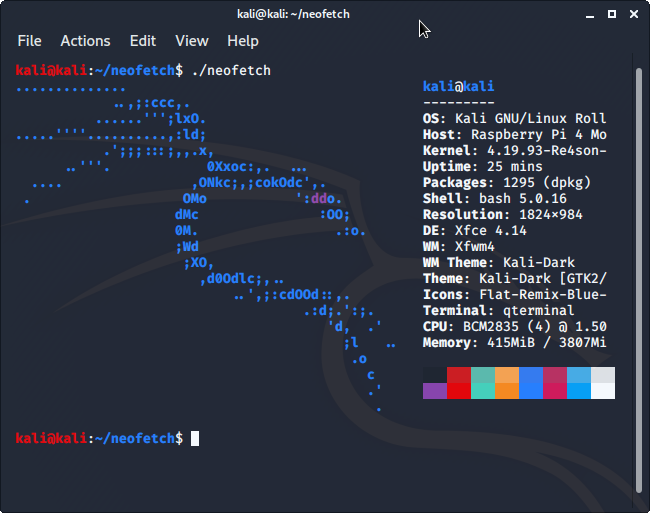
It will take some time for the initial bootup, Wait for it. If everything is perfect your Raspberry Pi will boot into Kali-Linux.
by Teffin Varghese | Jul 7, 2020 | Howtos, Linux, Networking, OS, Python, Security, Servers, Storages, Troubleshooting, Uncategorized, VMware Esxi, Workstation
How to upgrade 10G Intel NIC driver in Linux.
Step 1: Identify the NIC adapter on the server/machine.
For upgrading the NIC driver, First you need to identify the NIC model for that you can use “lspci” command.
Use the command “lspci | grep -i net” to list the PCIe devices. (Usually 10G NIC’s are plugged into the PCIe slots on the Motherboard)
Command: lspci | grep -i net
Sample Output:
04:00.0 Ethernet controller: Intel Corporation 82599ES 10-Gigabit SFI/SFP+ Network Connection (rev 01)
04:00.1 Ethernet controller: Intel Corporation 82599ES 10-Gigabit SFI/SFP+ Network Connection (rev 01)
06:00.0 Ethernet controller: Intel Corporation 82576 Gigabit Network Connection (rev 01)
06:00.1 Ethernet controller: Intel Corporation 82576 Gigabit Network Connection (rev 01)
Here our 10G adapter is Ethernet controller: Intel Corporation 82599ES 10-Gigabit SFI/SFP+ Network Connection (rev 01)
Step 2: Identify the active interface in the OS.
For identify the active interface just type “ip a” on the terminal, this will display the interfaces on the OS and from the list identify the active interface name.
Command: ip a
Sample Output:
1: lo: <LOOPBACK,UP,LOWER_UP> mtu 65536 qdisc noqueue state UNKNOWN
link/loopback 00:00:00:00:00:00 brd 00:00:00:00:00:00
inet 127.0.0.1/8 scope host lo
inet6 ::1/128 scope host
valid_lft forever preferred_lft forever
2: eth0: <BROADCAST,MULTICAST,UP,LOWER_UP> mtu 1500 qdisc pfifo_fast state UP qlen 1000
link/ether 32:36:65:64:66:34 brd ff:ff:ff:ff:ff:ff
inet x.x.x.x/x brd 50.7.126.127 scope global eth0
inet6 x:x:x::x/64 scope global
valid_lft forever preferred_lft forever
inet6 x::x:x:x:x/64 scope link
valid_lft forever preferred_lft forever
Step 3: Check the current driver version of the NIC.
For identifying the driver version use the command “ethtool -i <interface name>” Eg: ethool -i eth0
From the results you can view the current driver version. The output will be something like this.
Command: ethtool -i <interface name>
Sample Output:
driver: ixgbe
version: 4.2.1-k
firmware-version: 0x80000208
bus-info: 0000:04:00.0
supports-statistics: yes
supports-test: yes
supports-eeprom-access: yes
supports-register-dump: yes
supports-priv-flags: no
Here the “version: 4.2.1-k” indicates the current driver version of the NIC.
Step 4: Download the latest available driver from Intel.
Go to https://downloadcenter.intel.com/product/32609/Intel-82599-10-Gigabit-Ethernet-Controller
to download the required driver.
https://downloadcenter.intel.com/product/32609/Intel-82599-10-Gigabit-Ethernet-Controller
For Linux: https://downloadcenter.intel.com/download/14687/Ethernet-Intel-Network-Adapter-Driver-for-PCIe-Intel-10-Gigabit-Ethernet-Network-Connections-Under-Linux-?product=32609
https://downloadcenter.intel.com/download/14687/Ethernet-Intel-Network-Adapter-Driver-for-PCIe-Intel-10-Gigabit-Ethernet-Network-Connections-Under-Linux-?product=32609
Download the latest available driver from the above link.
Step 5: Install/upgrade the Driver.
To manually build the driver
—————————-
1. Move the base driver tar file to the directory of your choice.
For example, use ‘/home/username/ixgbe’ or ‘/usr/local/src/ixgbe’.
2. Untar/unzip the archive, where <x.x.x> is the version number for the
driver tar file:
# tar zxf ixgbe-<x.x.x>.tar.gz
3. Change to the driver src directory, where <x.x.x> is the version number
for the driver tar:
# cd ixgbe-<x.x.x>/src/
4. Compile the driver module:
# make install
The binary will be installed as:
/lib/modules/<KERNEL VER>/updates/drivers/net/ethernet/intel/ixgbe/ixgbe.ko
The install location listed above is the default location. This may differ
for various Linux distributions.
5. Load the module using the modprobe command.
To check the version of the driver and then load it:
# modinfo ixgbe
# modprobe ixgbe [parameter=port1_value,port2_value]
Alternately, make sure that any older ixgbe drivers are removed from the
kernel before loading the new module:
# rmmod ixgbe; modprobe ixgbe
Note: For certain distributions like (but not limited to) Red Hat Enterprise
Linux 7 and Ubuntu, once the driver is installed, you may need to update the
initrd/initramfs file to prevent the OS loading old versions of the ixgbe
driver.
Use the dracut utility on Red Hat distributions:
# dracut –force
For Ubuntu:
# update-initramfs -u
Step 6: Check and verify the new driver version.
Use the same command we used before “ethtool -i <interface name>” to view the driver version
Command: ethtool -i <interface name>
Sample Output:
driver: ixgbe
version: 5.7.1-k
firmware-version: 0x80000208
bus-info: 0000:04:00.0
supports-statistics: yes
supports-test: yes
supports-eeprom-access: yes
supports-register-dump: yes
supports-priv-flags: no
Note: Please read the read me file available from Intel before proceeding.
That’s all for now. CHEERS!!!
by Teffin Varghese | Aug 14, 2017 | Howtos, Linux, Networking, OS, Servers, Troubleshooting, VMware Esxi, Workstation
IPv6 [Internet Protocol version 6]

Introduction.
Internet Protocol Version 6 (IPv6) is a network layer protocol that enables data communications over a packet switched network.
Packet switching involves the sending and receiving of data in packets between two nodes in a network. The working standard for the IPv6 protocol was published by the Internet Engineering Task Force (IETF) in 1998.
The IETF specification for IPv6 is RFC 2460. IPv6 was intended to replace the widely used Internet Protocol Version 4 (IPv4) that is considered the backbone of the modern Internet.
IPv4 currently supports a maximum of approximately 4.3 billion unique IP addresses. IPv6 supports a theoretical maximum of 2128 addresses (340,282,366,920,938,463,463,374,607,431,768,211,456 to be exact!).
IPv6 and IPv4 share a similar architecture. The majority of transport layer protocols that function with IPv4 will also function with the IPv6 protocol. Most application layer protocols are expected to be interoperable with IPv6 as well, with the notable exception of File Transfer Protocol (FTP)
An IPv6 address consists of eight groups of four hexadecimal digits. If a group consists of four zeros, the notation can be shortened using a colon to replace the zeros.
A main advantage of IPv6 is increased address space. The 128-bit length of IPv6 addresses is a significant gain over the 32-bit length of IPv4 addresses, allowing for an almost limitless number of unique IP addresses.

IPv6 features
—————-
* Supports source and destination addresses that are 128 bits (16 bytes) long.
* Requires IPSec support.
* Uses Flow Label field to identify packet flow for QoS handling by router.
* Allows the host to send fragments packets but not routers.
* Doesn’t include a checksum in the header.
* Uses a link-local scope all-nodes multicast address.
* Does not require manual configuration or DHCP.
* Uses host address (AAAA) resource records in DNS to map host names to IPv6 addresses.
* Uses pointer (PTR) resource records in the IP6.ARPA DNS domain to map IPv6 addresses to host names.
* Supports a 1280-byte packet size (without fragmentation).
* Moves optional data to IPv6 extension headers.
* Uses Multicast Neighbor Solicitation messages to resolve IP addresses to link-layer addresses.
* Uses Multicast Listener Discovery (MLD) messages to manage membership in local subnet groups.
* Uses ICMPv6 Router Solicitation and Router Advertisement messages to determine the IP address of the best default gateway.
Adding a Temporary IPv6 Address on Linux.
=================================
Using “IP”
———-
/sbin/ip -6 addr add <ipv6address>/<prefixlength> dev <interface>
eg: /sbin/ip -6 addr add 2001:49f0:2920::a2/64 dev eth0
Using “ifconfig”
——————
/sbin/ifconfig <interface> inet6 add <ipv6address>/<prefixlength>
eg: /sbin/ifconfig eth0 inet6 add 2001:49f0:2920::a2/64
Add an IPv6 route through a gateway
============================
Using “ip”
———–
/sbin/ip -6 route add <ipv6network>/<prefixlength> via <ipv6address>
¬ [dev <device>]
eg: /sbin/ip -6 route add default via 2001:49f0:2920::1
Using “route”
—————
/sbin/route -A inet6 add <ipv6network>/<prefixlength> gw
¬ <ipv6address> [dev <device>]
eg: /sbin/route -A inet6 add default gw 2001:49f0:2920::1
Removing an IPv6 address
====================
Using “ip”
————
/sbin/ip -6 addr del <ipv6address>/<prefixlength> dev <interface>
eg: /sbin/ip -6 addr del 2001:49f0:2920::a2/64 dev eth0
Using “ifconfig”
——————
/sbin/ifconfig <interface> inet6 del <ipv6address>/<prefixlength>
eg: /sbin/ifconfig eth0 inet6 del 2001:49f0:2920::a2/64
by George Sruthin | Jul 20, 2017 | Howtos, Linux, OS, Workstation
Go to nvidia website and download driver, for this tutorial i am using .run file copy the file to your desktop , after that simply right click and select properties > select permissions > tick Execute : allow executing file as program ,
click this link to learn how to make file executable using terminal
after that you need to black list nouveau for that type following command in the terminal
sudo nano /etc/modprobe.d/blacklist-nouveau.conf
then copy following text in the nano editor in terminal then save it
blacklist nouveau
blacklist lbm-nouveau
options nouveau modeset=0
alias nouveau off
alias lbm-nouveau off
then type following command in the terminal
reboot your system after this procedure , now you can find your system resolution is changed from recommended to minimal,once login screen appear press Ctrl + Alt +F1 this will switch your interface from GUI to CLI then login by typing your username and password after that you should stop your Desktop Manager, by default ubuntu using lightdm you type following command in the terminal to stop lightdm
sudo service lightdm stop
this will stop gui service running in background then you should navigate to your nvidia driver location by typing cd /Destkop
if you type ls you can find driver which you have copied earlier
after that you need to execute driver installation file for that type following command in the terminal
sudo ./NVIDIA-Linux-x86_64-375.66.run
Please note the driver version which you are using may vary
then follow the instructions !
after installation reboot your system
in my system i have two cards one is Nvidia quadro K2200 & Tesla k40c
so i am going to install cuda to install cuda type follwing command line in the terminal , offline installation is also available i will include that tutorial in the future blog post if you want to download offline cuda package you can download it from https://developer.nvidia.com/cuda-downloads
sudo apt-get install nvidia-cuda-toolkit
this package is around 750 mb , installation speed is depend on your internet connecton, after installation reboot your system, to confirm whether both graphics card is detected in your system you can use inxi utility for that install inxi package in your system by typing
sudo apt-get install inxi
after the installation , open terminal and type
congratulations you have successfully install both nvidia driver and cuda