
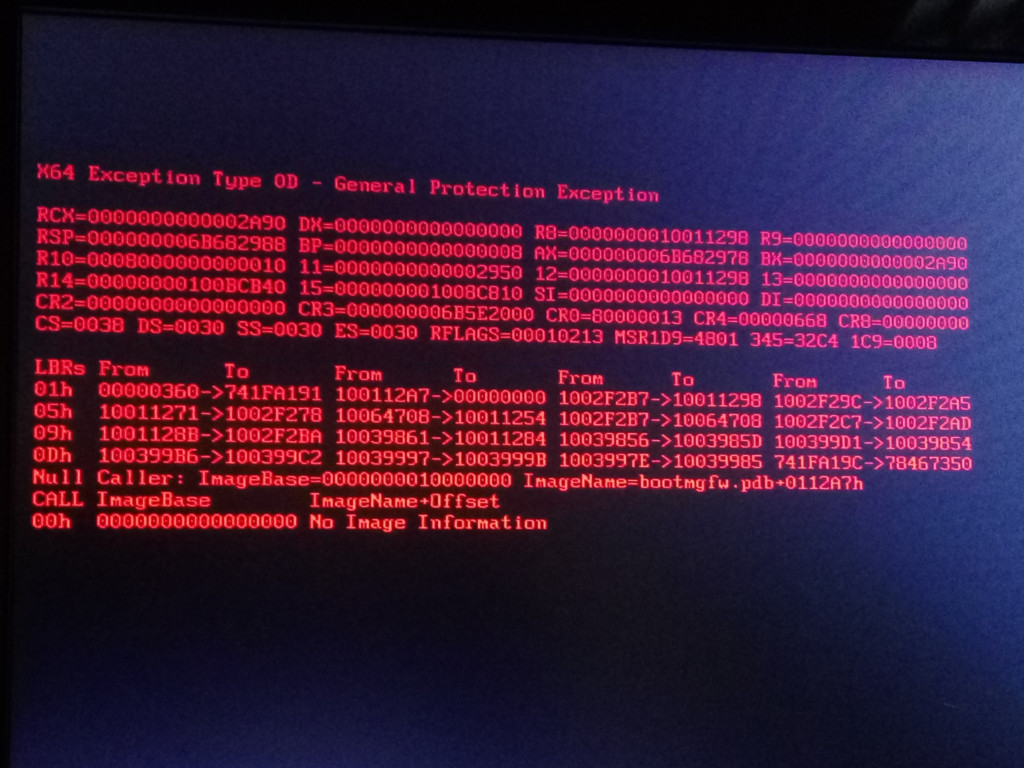
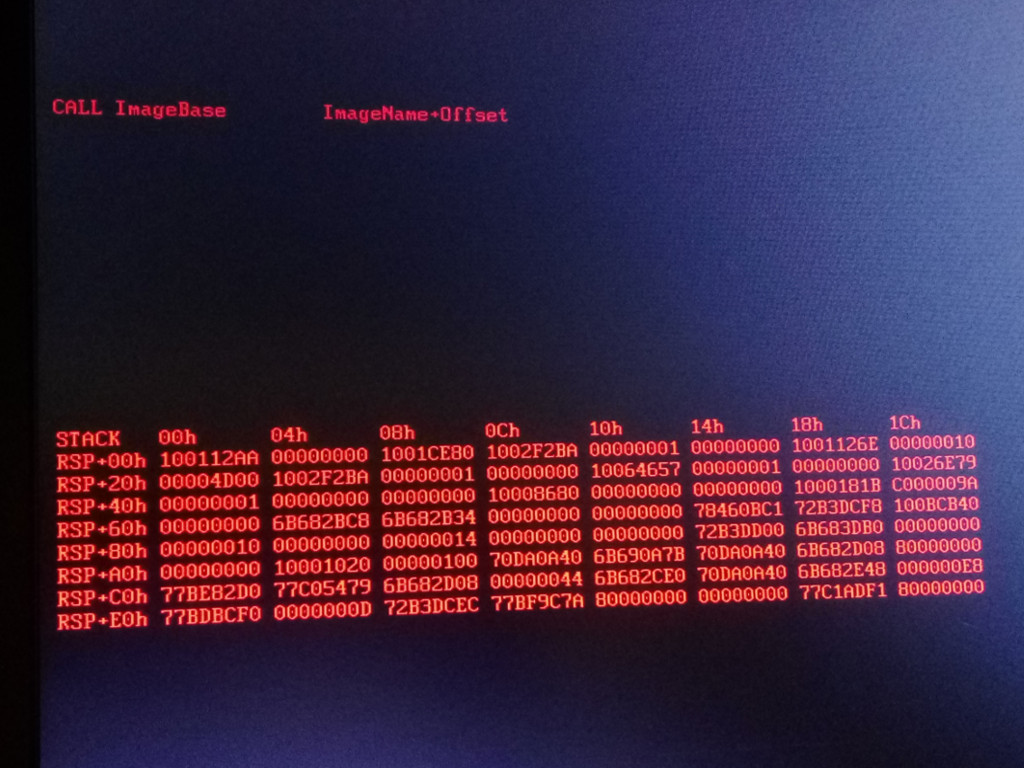
I faced this error after changing the motherboard
so i googled as per the HPE advisory says its the issue is with the HBA card firmware so you need to use SPP to upgrade firmware, BTW the server is equiped with HBA240 please check the below given url for more reference to fix this issue you can use SPP as per HPE
but above step didnt fix my issue
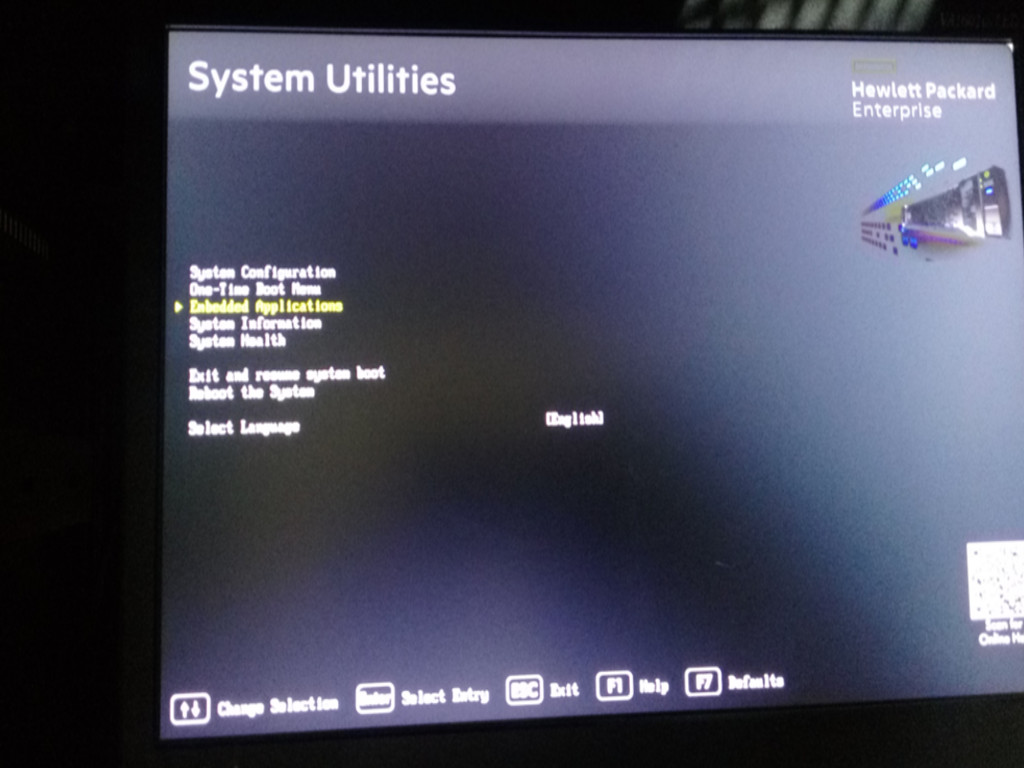
So as suggested by HPE Tech team i have perform the steps given below
BIOS backup and Restore on replaced system board and check the status. Please find the process
1: Format a USB with FAT 32. and add a folder with a specific name so that you can confirm you have mounted to correct directory
2: Connect it directly with the Gen9 server.
3: Reboot the server.
4: While Posting Tap F9 while it prompts to enter into the UEFI BIOS.
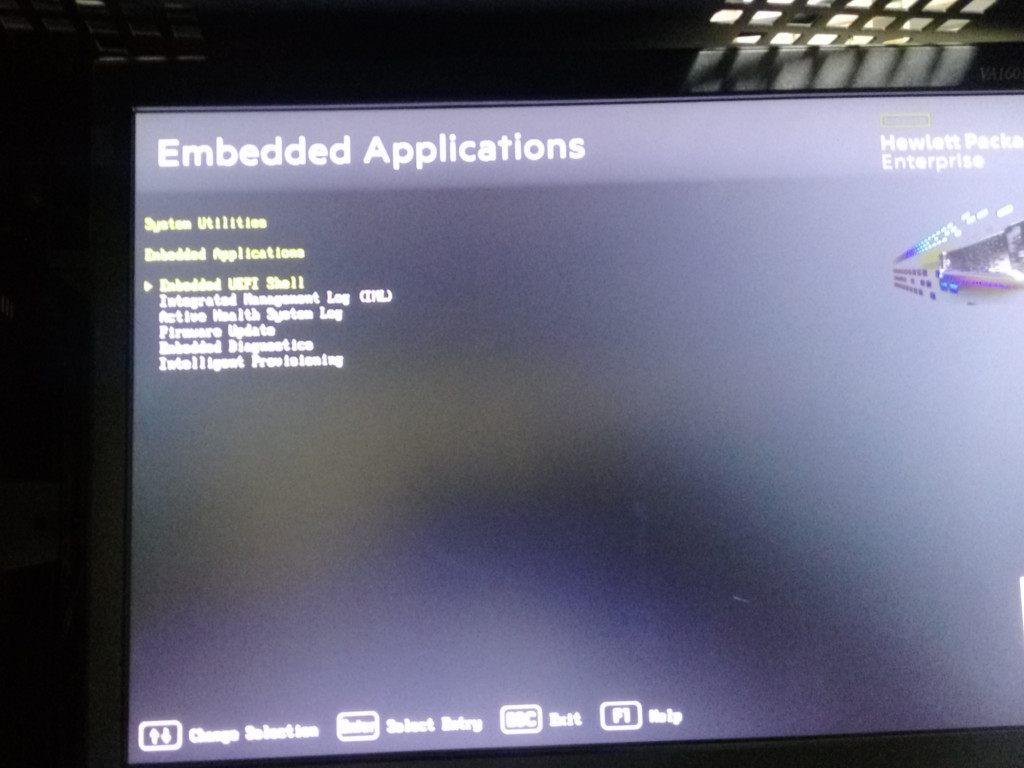
5: Once in UEFI BIOS select ” Embedded Application “.
6: Further Select ” Embedded UEFI Shell “.
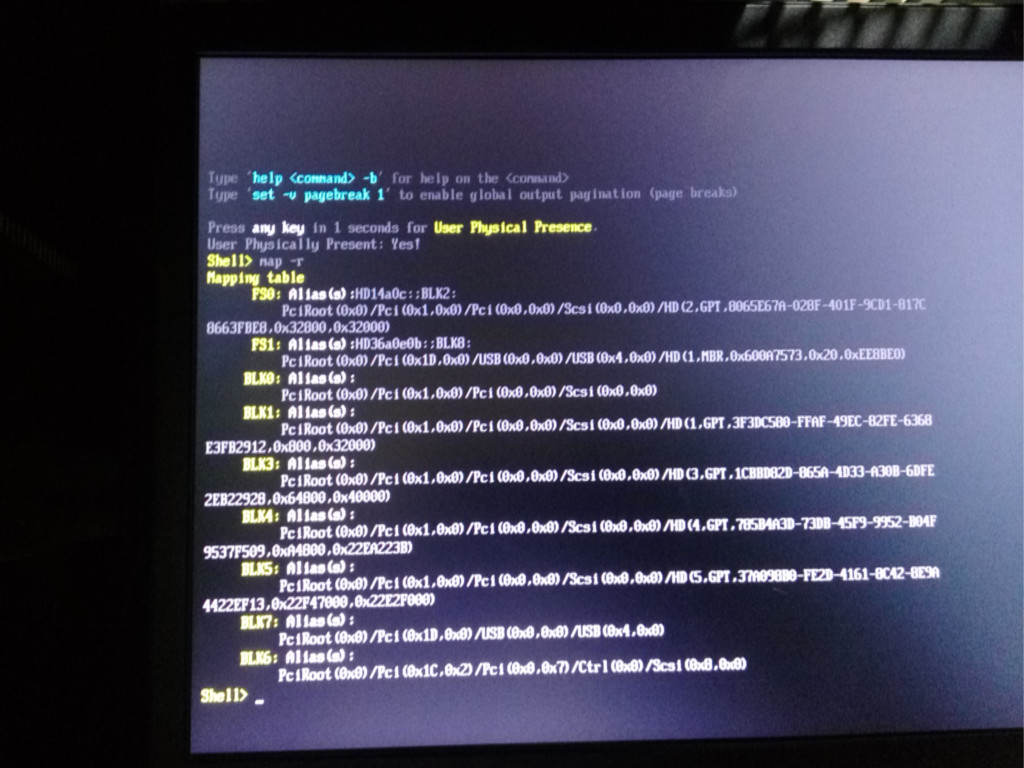
7: Once you are in ” Shell > ” prompt.
8: Type : map -r
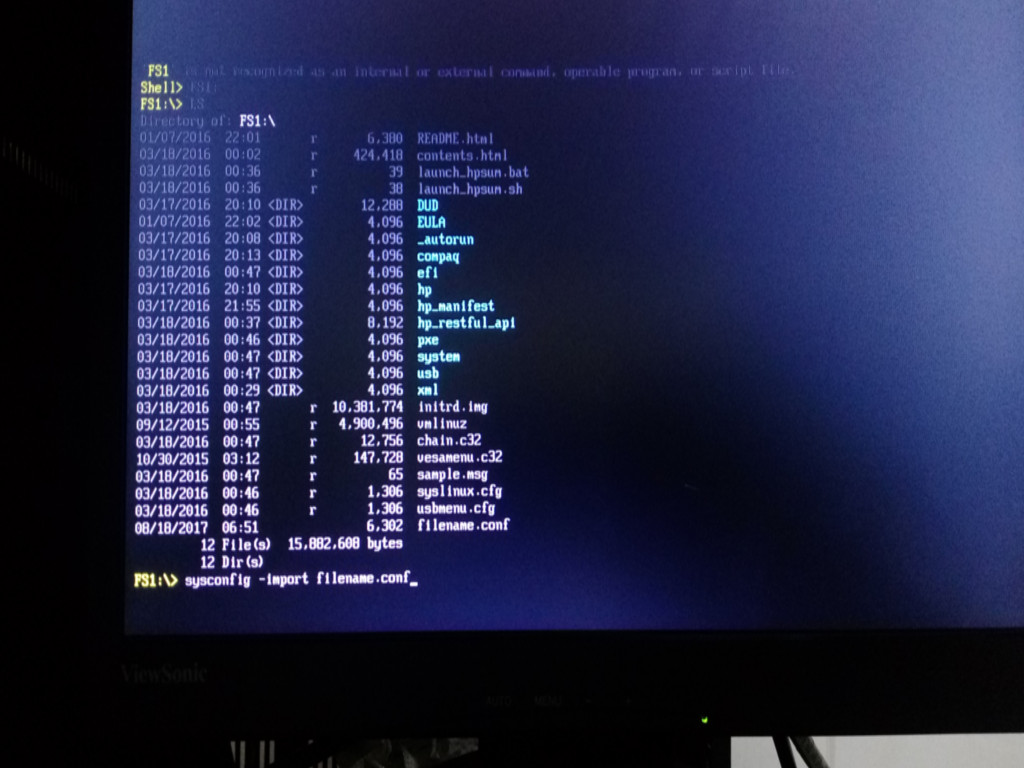
9: It will list the connected USB as FS0: . this may vary. in my case i have seen BOTH “FS0: & FS1:” so you shoud check its your usb or other devices as i said earlier you should mount the device and check for the folder which we have created. type cd ” FS0: ” or ” FS1 ” OR ” FSnth ” number of devices and check .type ” ls ” this will show created folder, if your folder is missing change ID from FS0: TO FSnth: if folder is present we can continue to next step
n th = number of FS devices
10: Then type *FS0: ( Tap Enter )
11: It will change the directory into FS0 (ie: USB connected externally)
12: Then type ” sysconfig -export filename.conf ” from the FS0:\> prompt (This will export the BIOS configuration into a file named (filename .conf)
13: To edit the BIOS configuration file :
14: Type edit filename.conf from FS0:\> prompt
15: Once editing is done then tap Ctrl + Q at the same time to exit from the editing screen. If you want to save the changes then Tap ” y ” else ” n “.
16: To import the changed file from the USB into the server type : sysconfig -import filename.conf from FS0:\> prompt
17: It will import the file and change the configuration in the server BIOS automatically.
18: To verify the changes reboot the server and check.

Good Luck !


0 Comments