by Teffin Varghese | Jul 16, 2020 | Howtos, Networking, News, OS, Security, Servers, Storages, Troubleshooting

Step 1: Identify the Adapter model
===========================
You can use the lspci command to view the details of the Adapter.
[root@localhost ~]# lspci | grep Mellanox
a1:00.0 Infiniband controller: Mellanox Technologies MT28908 Family [ConnectX-6]
Here our Adapter is Mellanox Technologies MT28908 Family [ConnectX-6]
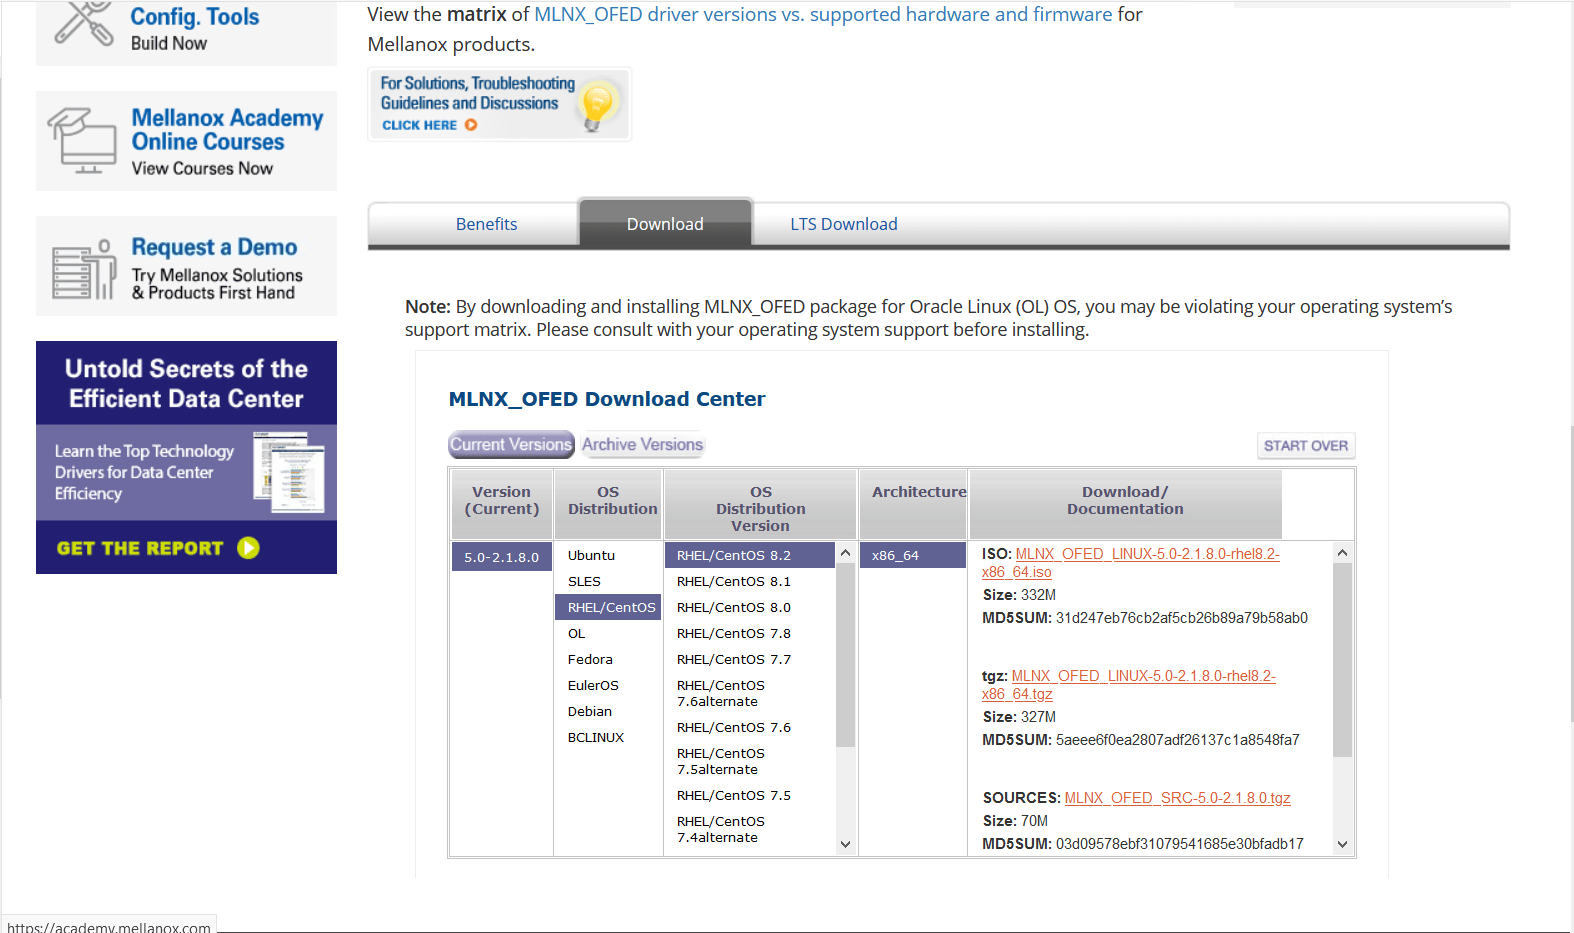
Step 2: Download the OFED driver for the Adapter.
===================================================================================
You can download the OFED driver from the below link and choose the OS and select the tar file for download.
https://www.mellanox.com/products/infiniband-drivers/linux/mlnx_ofed
https://www.mellanox.com/products/infiniband-drivers/linux/mlnx_ofed
You can use wget command to download the driver.
Example: wget http://content.mellanox.com/ofed/MLNX_OFED-5.0-2.1.8.0/MLNX_OFED_LINUX-5.0-2.1.8.0-rhel8.2-x86_64.tgz
http://content.mellanox.com/ofed/MLNX_OFED-5.0-2.1.8.0/MLNX_OFED_LINUX-5.0-2.1.8.0-rhel8.2-x86_64.tgz
Step 3: Extract the zip file.
============================================
Untar the zip file you have just downloaded
Example: tar -xvf MLNX_OFED_LINUX-5.0-2.1.8.0-rhel8.2-x86_64.tgz
Step 4: Navigate to the extracted directory.
======================================================================
Once you have extracted the tar file you can view a directory with the same name, navigate to the directory
by cd command
Example: cd MLNX_OFED_LINUX-5.0-2.1.8.0-rhel8.2-x86_64
Once you are in the directory please list the contents on the directory using a ls command.
and from the output you can view a script file name “mlnxofedinstall”
Step 5: Run the script file.
==========================================
You can run the script file using “./mlnxofedinstall”
Once you run the script the driver will be installed and once it is completed reload the driver or reboot the machine.
Note: The server must have Perl, python and GCC compilers for completing the driver installation.
If the installation run failed due to any unmet dependencies, please install the packages and libraries mentioned on the failed message.
Firmware upgrade.
————————–
Once the OFED driver is successfully installed then you can go with the firmware upgrade.
We are using the tool MSTFLINT for performing the firmware upgrade.
Step 1: First we need to identify the PCI bus ID of the adapter.
===========================================================================
Run “lspci | grep Mellanox” to determine the PCI bus ID
Example: [root@localhost ~]# lspci | grep Mellanox
a1:00.0 Infiniband controller: Mellanox Technologies MT28908 Family [ConnectX-6]
Here “a1:00.0” is our PCI bus ID.
Step 2: Download and unzip the Firmware Zip file.
=============================================================
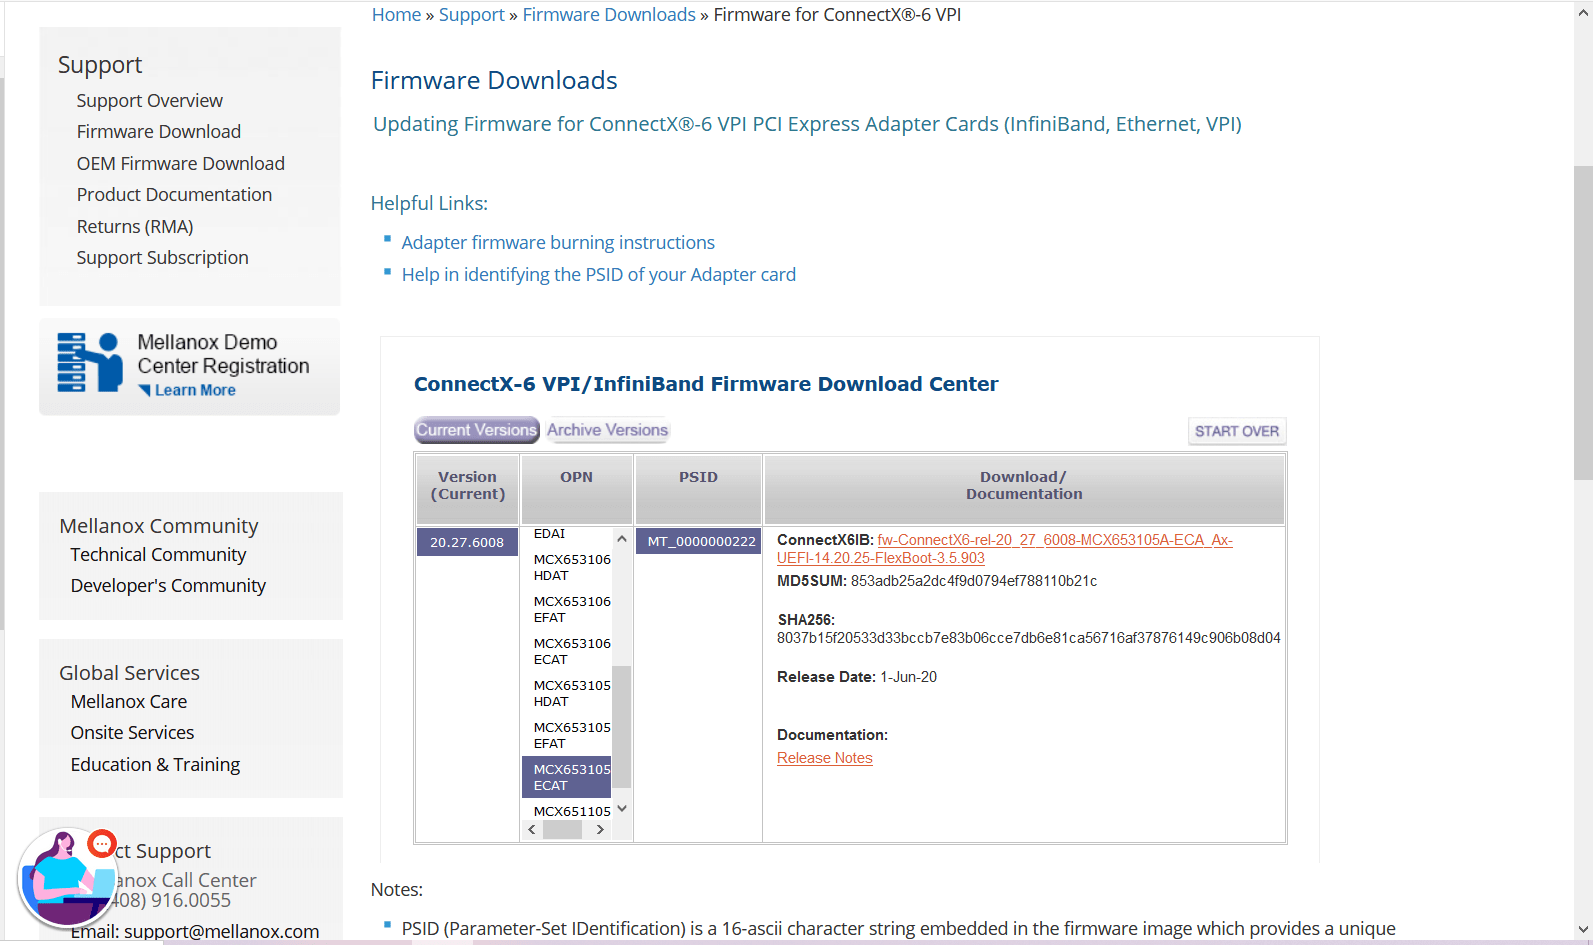
You can download the firmware from the official Mellanox website.
Link: https://www.mellanox.com/support/firmware/connectx6ib
https://www.mellanox.com/support/firmware/connectx6ib
Please download the firmware using “wget”
Example: wget http://www.mellanox.com/downloads/firmware/fw-ConnectX6-rel-20_27_6008-MCX653105A-ECA_Ax-UEFI-14.20.25-FlexBoot-3.5.903.bin.zip
http://www.mellanox.com/downloads/firmware/fw-ConnectX6-rel-20_27_6008-MCX653105A-ECA_Ax-UEFI-14.20.25-FlexBoot-3.5.903.bin.zip
Once it is downloaded unzip it by using the command “unzip”
Example: unzip fw-ConnectX6-rel-20_27_6008-MCX653105A-ECA_Ax-UEFI-14.20.25-FlexBoot-3.5.903.bin.zip
Once you unzip the file you can view a .bin file which is our firmware.
Example: fw-ConnectX6-rel-20_27_6008-MCX653105A-ECA_Ax-UEFI-14.20.25-FlexBoot-3.5.903.bin
Step3: Burn the firmware to the NIC.
============================================
You need the mstflint utility to update the firmware. You can download mstflint from the OpenFabrics site at mstflint_SW for Linux.
NOTE: If OFED is installed on your machine, then mstflint is already installed.
For burning the new firmware run
the command in the same directory as the firmware file, run “mstflint –d <PCI bus ID, i.e. 05:00.0> -i <.bin file> b”
Example: mstflint -d a1:00.0 -i fw-ConnectX6-rel-20_27_6008-MCX653105A-ECA_Ax-UEFI-14.20.25-FlexBoot-3.5.903.bin b
To load new FW run mstfwreset or reboot machine and check.
Example: [root@localhost ~]# ethtool -i ib0
driver: mlx5_core[ib_ipoib]
version: 5.0-2.1.8
firmware-version: 20.27.6008 (MT_0000000222)
expansion-rom-version:
bus-info: 0000:a1:00.0
supports-statistics: yes
supports-test: yes
supports-eeprom-access: no
supports-register-dump: no
supports-priv-flags: yes
Here “ib0” is our interface name, yours maybe different.
Please refer Mellanox documentation if you need any further details.
https://www.mellanox.com/products/adapter-software/firmware-tools https://www.mellanox.com/support/firmware/update-instructions

by Teffin Varghese | Jul 7, 2020 | Howtos, Linux, Networking, OS, Python, Security, Servers, Storages, Troubleshooting, Uncategorized, VMware Esxi, Workstation
How to upgrade 10G Intel NIC driver in Linux.
Step 1: Identify the NIC adapter on the server/machine.
For upgrading the NIC driver, First you need to identify the NIC model for that you can use “lspci” command.
Use the command “lspci | grep -i net” to list the PCIe devices. (Usually 10G NIC’s are plugged into the PCIe slots on the Motherboard)
Command: lspci | grep -i net
Sample Output:
04:00.0 Ethernet controller: Intel Corporation 82599ES 10-Gigabit SFI/SFP+ Network Connection (rev 01)
04:00.1 Ethernet controller: Intel Corporation 82599ES 10-Gigabit SFI/SFP+ Network Connection (rev 01)
06:00.0 Ethernet controller: Intel Corporation 82576 Gigabit Network Connection (rev 01)
06:00.1 Ethernet controller: Intel Corporation 82576 Gigabit Network Connection (rev 01)
Here our 10G adapter is Ethernet controller: Intel Corporation 82599ES 10-Gigabit SFI/SFP+ Network Connection (rev 01)
Step 2: Identify the active interface in the OS.
For identify the active interface just type “ip a” on the terminal, this will display the interfaces on the OS and from the list identify the active interface name.
Command: ip a
Sample Output:
1: lo: <LOOPBACK,UP,LOWER_UP> mtu 65536 qdisc noqueue state UNKNOWN
link/loopback 00:00:00:00:00:00 brd 00:00:00:00:00:00
inet 127.0.0.1/8 scope host lo
inet6 ::1/128 scope host
valid_lft forever preferred_lft forever
2: eth0: <BROADCAST,MULTICAST,UP,LOWER_UP> mtu 1500 qdisc pfifo_fast state UP qlen 1000
link/ether 32:36:65:64:66:34 brd ff:ff:ff:ff:ff:ff
inet x.x.x.x/x brd 50.7.126.127 scope global eth0
inet6 x:x:x::x/64 scope global
valid_lft forever preferred_lft forever
inet6 x::x:x:x:x/64 scope link
valid_lft forever preferred_lft forever
Step 3: Check the current driver version of the NIC.
For identifying the driver version use the command “ethtool -i <interface name>” Eg: ethool -i eth0
From the results you can view the current driver version. The output will be something like this.
Command: ethtool -i <interface name>
Sample Output:
driver: ixgbe
version: 4.2.1-k
firmware-version: 0x80000208
bus-info: 0000:04:00.0
supports-statistics: yes
supports-test: yes
supports-eeprom-access: yes
supports-register-dump: yes
supports-priv-flags: no
Here the “version: 4.2.1-k” indicates the current driver version of the NIC.
Step 4: Download the latest available driver from Intel.
Go to https://downloadcenter.intel.com/product/32609/Intel-82599-10-Gigabit-Ethernet-Controller
to download the required driver.
https://downloadcenter.intel.com/product/32609/Intel-82599-10-Gigabit-Ethernet-Controller
For Linux: https://downloadcenter.intel.com/download/14687/Ethernet-Intel-Network-Adapter-Driver-for-PCIe-Intel-10-Gigabit-Ethernet-Network-Connections-Under-Linux-?product=32609
https://downloadcenter.intel.com/download/14687/Ethernet-Intel-Network-Adapter-Driver-for-PCIe-Intel-10-Gigabit-Ethernet-Network-Connections-Under-Linux-?product=32609
Download the latest available driver from the above link.
Step 5: Install/upgrade the Driver.
To manually build the driver
—————————-
1. Move the base driver tar file to the directory of your choice.
For example, use ‘/home/username/ixgbe’ or ‘/usr/local/src/ixgbe’.
2. Untar/unzip the archive, where <x.x.x> is the version number for the
driver tar file:
# tar zxf ixgbe-<x.x.x>.tar.gz
3. Change to the driver src directory, where <x.x.x> is the version number
for the driver tar:
# cd ixgbe-<x.x.x>/src/
4. Compile the driver module:
# make install
The binary will be installed as:
/lib/modules/<KERNEL VER>/updates/drivers/net/ethernet/intel/ixgbe/ixgbe.ko
The install location listed above is the default location. This may differ
for various Linux distributions.
5. Load the module using the modprobe command.
To check the version of the driver and then load it:
# modinfo ixgbe
# modprobe ixgbe [parameter=port1_value,port2_value]
Alternately, make sure that any older ixgbe drivers are removed from the
kernel before loading the new module:
# rmmod ixgbe; modprobe ixgbe
Note: For certain distributions like (but not limited to) Red Hat Enterprise
Linux 7 and Ubuntu, once the driver is installed, you may need to update the
initrd/initramfs file to prevent the OS loading old versions of the ixgbe
driver.
Use the dracut utility on Red Hat distributions:
# dracut –force
For Ubuntu:
# update-initramfs -u
Step 6: Check and verify the new driver version.
Use the same command we used before “ethtool -i <interface name>” to view the driver version
Command: ethtool -i <interface name>
Sample Output:
driver: ixgbe
version: 5.7.1-k
firmware-version: 0x80000208
bus-info: 0000:04:00.0
supports-statistics: yes
supports-test: yes
supports-eeprom-access: yes
supports-register-dump: yes
supports-priv-flags: no
Note: Please read the read me file available from Intel before proceeding.
That’s all for now. CHEERS!!!
