by George Sruthin | Oct 28, 2014 | Howtos, Mac, OS
How to Enable and toggle Darkmode in Mac OS X 10.10 Yosemite using keyboard shortcut
This can be done by editing .GlobalPreferences.plist in /Library/Preferences/
.GlobalPreferences.plist will be hidden , if you want to access file use apps like InVisibles.app
original site is here
Open up Terminal then paste the following command line and hit Enter “Return Key”
it will ask for your admin password , enter your password and hit Return key
done
sudo defaults write /Library/Preferences/.GlobalPreferences.plist _HIEnableThemeSwitchHotKey -bool true
you can confirm it by opening .GlobalPreferences.plist from /Library/Preferences/
now logout your Mac(Hackint0sh) and re login
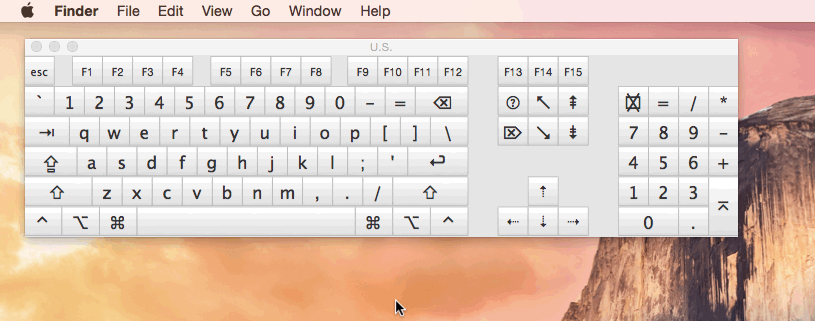
then press these keys
CTRL + OPT + CMD + T
Congrats you have successfully added shortcut for Darkmode in your Mac (Hackint0sh)
Video tutorial from youtube can be found here
by George Sruthin | Oct 15, 2014 | News
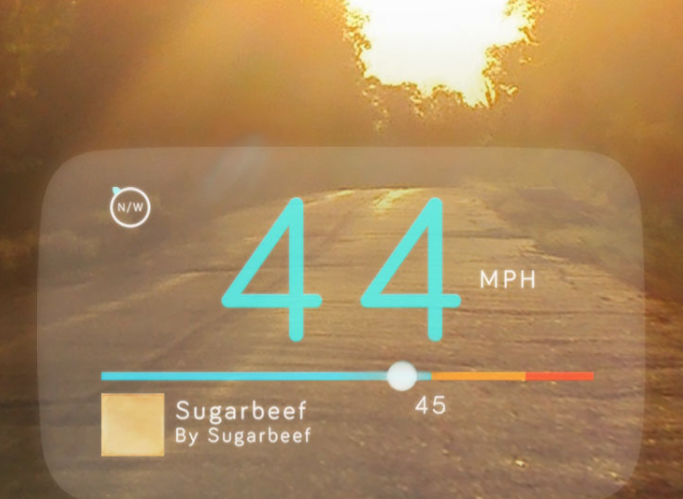
Navdy is designed to give you relevant information at a glance and the power to respond to that information with voice and touch-less gesture controls. Its core features include:
- Showing turn-by-turn navigation instructions in real time.
- Displaying information about your car such as your current speed, RPM or fuel economy.
- Safer display of text messages and other notifications from your phone.
- Accepting and initiating calls without looking at your phone.
- Playing, pausing, and skipping music streaming from your phone.
Navdy has no buttons, other than the power button. While you’re driving you’ll be able to control Navdy entirely with voice and touch-less gesture controls. Configuration (such as adjusting preferences or installing new apps) is done through your smartphone between trips. 
AND VOICE RECOGNITION
Ask Navdy to “compose new tweet”, “write new text” or “call mom” using the voice commands you’re already familiar with – Google Now or Siri.
TOUCHLESS GESTURES
Nothing could be more natural
Swipe left to answer a call, or right to dismiss an untimely notification. No more looking down to fumble with knobs, buttons or touch screens.
The notifications you want from the apps you love
Any notification on your phone (text, social, etc) can be displayed, read aloud or disabled entirely. Decide what you want to appear when.
WORKS WITH YOUR IPHONE OR ANDROID PHONE
Navdy extends the apps you already have on your phone. No service plans required.
There are even parental controls to keep teenagers safe.
VISIBLE DRIVING INTO THE SUN
Forty times brighter than an iPhone or Android phone
Navigation won’t disappear when a call
comes in
Works with any music app
Navdy connects to your car’s computer to let
you tap into its performance and
vitals. Whether it’s your fuel economy, tire
pressure, RPM, or any number of
diagnostics your car computer offers, navdy
has access and so do you.
With more navigation apps on the way
Specs
- 5.1″ wide transparent Head-Up Display (HUD)
- High quality projector
- IR camera for touchless gesture control
- Accelerometer, e-compass, ambient light sensor
- WiFi (802.11 b/g/n), Bluetooth 4.0/LE
-
Audio out via Bluetooth or 3.5mm minijack,
mini-USB port
-
Internal speaker and microphone with
noise canceling DSP
- Dual core processor running Android 4.4
-
OBD-II power and data connection to car
computer, with optional 12 volt power adapter
-
Portable, bendable, non-marking, powered friction
mount, with magnetic connection to the device
-
Dimensions (excluding mount): width: 130mm,
depth: 140mm, height: 95mm (including display)
Ships early 2015
$299 retail $499
by George Sruthin | Oct 14, 2014 | Howtos, Mac, OS
How to install wget in Mac OSX using Homebrew
install Homebrew first
Then type following command line in the terminal
$ brew install wget
installation will end fine
by George Sruthin | Oct 14, 2014 | Howtos, Mac
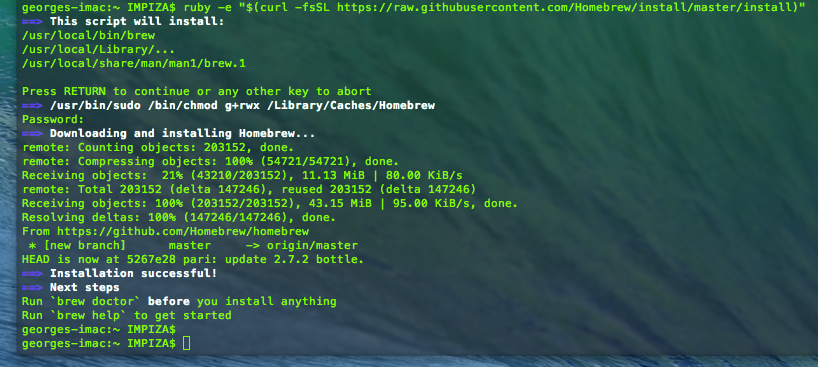
How to install Homebrew in Mac OSX
ruby -e "$(curl -fsSL https://raw.githubusercontent.com/Homebrew/install/master/install)"
Type above given command in the terminal
hit return key
type your password
this will take some time
and you will get this as result
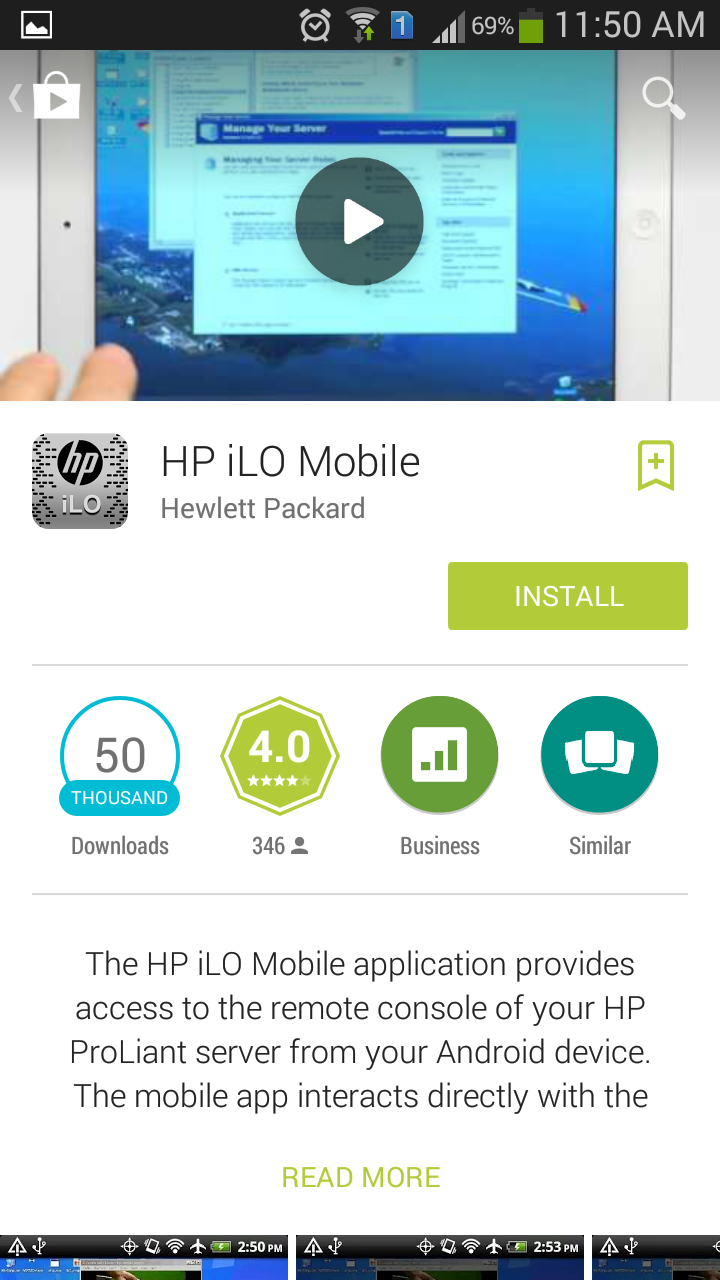
by George Sruthin | Oct 6, 2014 | Android, Howtos, OS, Servers
go to Google play and search HP iLO or here is the link to
Google Play
Supported servers
- HP ProLiant Gen8 Servers
- HP ProLiant G7 Servers
Supported mobile operating systems
- Android 2.2 or greater
- iOS 4.3 or greater
Manage
- Operate the server power switch
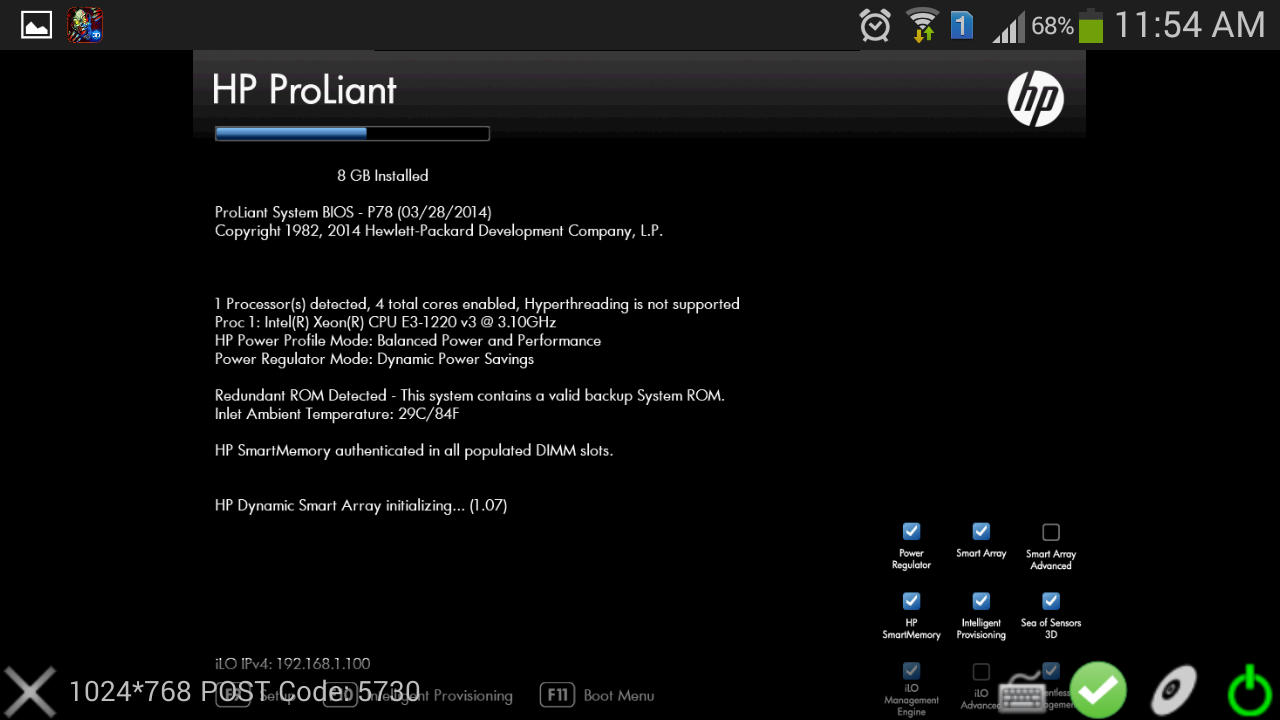
- Use the Remote Console to interact with the operating system, including BIOS and ROM configuration changes
- Mount an ISO CD/DVD image. The disk image is available on the server as a USB CD/DVD drive. You can boot from the disk image and deploy an operating system
- Launch HP iLO scripts and monitor their progress
- Access the iLO web interface
- Store the list of servers you want to manage
install it and launch it
after launching the application click
configure iLO option
add assigned ip for iLO
Login name and password
click done after adding the details
click the iLO ip
you will get 3 options
- Remote Console
- Lauch Script
- iLO Web Interface
click Remote Console
Quick tips
- Show/Hide menu bar – Tap once with two fingers to show or hide the menu bar in the Remote Console
- Show/Hide iLO web interface – Tap the server health icon in the Remote Console to show or hide the iLO web interface
- Ctrl/Alt/Del Command – Tap Ctrl+Alt+backspace to enter the Ctrl+Alt+Del command