Select Page

Is Norton 360 the key to Allowing Everyday Users to mine Crypto ?

By 2030, studies show that blockchain technology is expected to lift the global GDP up by two trillion US dollars. As more countries are setting trends in cryptocurrency implementation and development, Norton 360 recently released a feature for mining the cryptocurrency Ethereum with its cybersecurity package, check Norton Early Access Program Community forum.

Most antivirus providers would rather have consumers staying away from products or services that are too complex, untraceable, and decentralized — like cryptocurrencies. When users download cryptocurrency mining programs, antivirus software mistakenly detects these unvetted lines of code as cyber attacks. This usually prompts users to disable security in order to allow the mining programs to run, which opens up the computer to more cybersecurity risks

Instead of constantly fighting off cryptocurrency programs a user may download, Norton has developed their own mining application, making it easier and safer for more people. Norton Crypto will let users mine Ethereum, the world’s second most valuable cryptocurrency, on ordinary laptops and computers.

The problem with crytocurrency

In order to mine cryptocurrency, you need highly specialized computers to do the job. Cryptocurrency mining works by using a computer’s hardware to perform complex calculations in exchange for a reward. You need to build a ‘mining rig’ that will compute and verify crypto transactions for a higher chance of profit. However, this process uses a lot of energy because the computers are constantly working to solve the computational problems.


This is why a state-of-the-art, customized PC is necessary to perform computationally intensive mining tasks. It would have common elements like the CPU, RAM, and storage, but also graphics cards (GPUs). These GPUs are doing the hard work of mining, rather than a CPU. Crypto miners would need to connect hundreds of powerful GPUs to a single system in order to increase the odds of getting an Ethereum coin.


The GPUs also need a motherboard that can handle them; the motherboard should be customized to meet those functions as well, because not every circuit board follows the same rules to utilize their full potential. For example, some boards may need bigger holes to fit certain components, while others require set distances between pins to support specific features. If you’re mining Ethereum, which requires 62.56 kWh per transaction, you may also need energy-optimizing features like overvoltage protection to support the GPUs running 24/7.

The solution: pooling

To solve this problem, Norton 360 will utilize a pooling system to improve the odds of receiving a coin. Rather than a solo miner relying on high-end computing hardware and luck to get rewards, Norton envisions a pool of miners coming together to contribute whatever computing power they can offer. Afterwards, they can share rewards based on individual contributions.


Once the cryptocurrency has been earned, users can then pull all the accumulated coins into a cloud-based wallet called Norton Crypto Wallet until they can make the transfer. This allows miners to keep their earnings secure. Currently, Norton Crypto will only be available to a small group of customers as it gradually expands its rollout in the coming months. Norton is also considering adding other cryptocurrencies into the mix later on.


It’s still unclear how the business model for Norton Crypto will work, as the focus remains on offering coin miners cyber safety. However, Norton's offering is good news for people who want to earn digital currency without a lot of hardware resources. For more about cryptocurrency, do explore the cryptocurrency archives on our blog.

How to Reset forgotten the Root Password in ubuntu server

Introduction

If you forget your root password of your ubuntu server you can use this method.

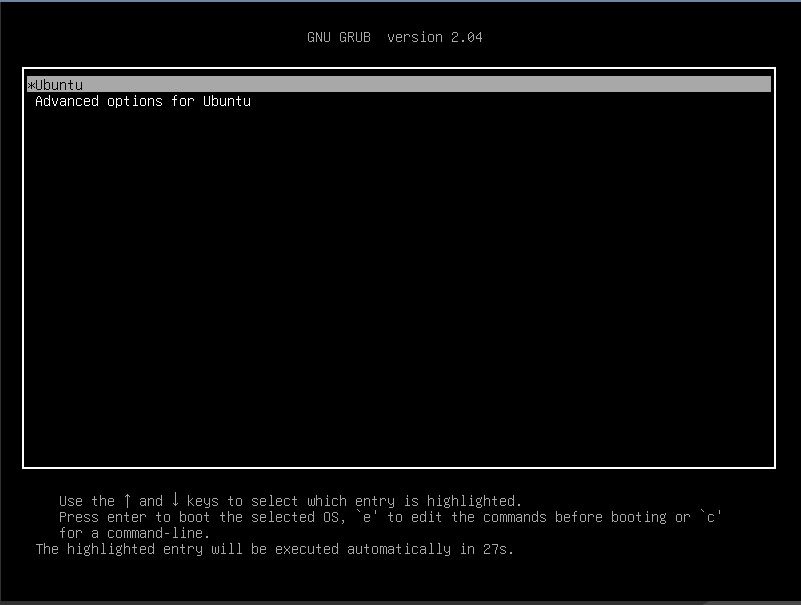
If you are using a bare metal server or a vps all you have to do is restart your server and press escape "ESC" key.

this will prevent Server OS to boot and bring up the GRUB boot promt. if you skip this step and boot in to OS then you need to restart your server again.

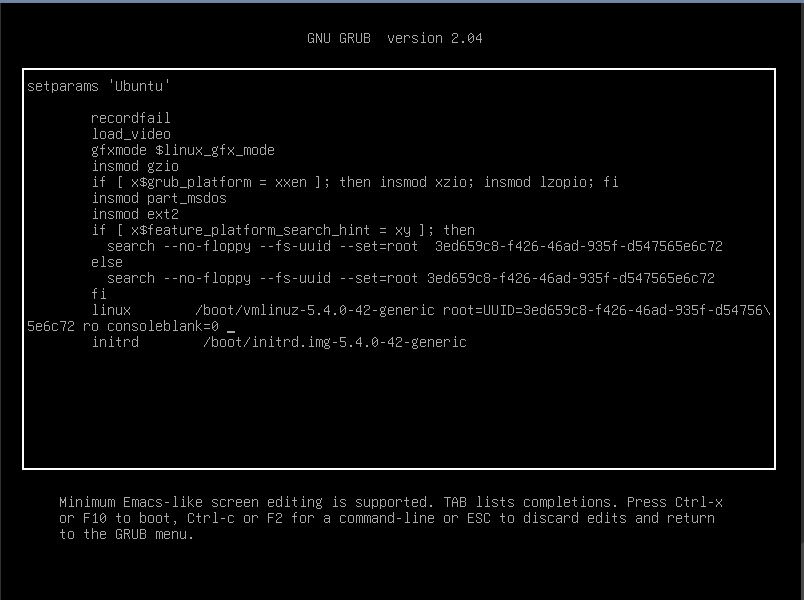
At the GRUB boot promt, press " E " to edit the first boot option which will be " Ubuntu "

Find kernal line starting with

 linux /boot/

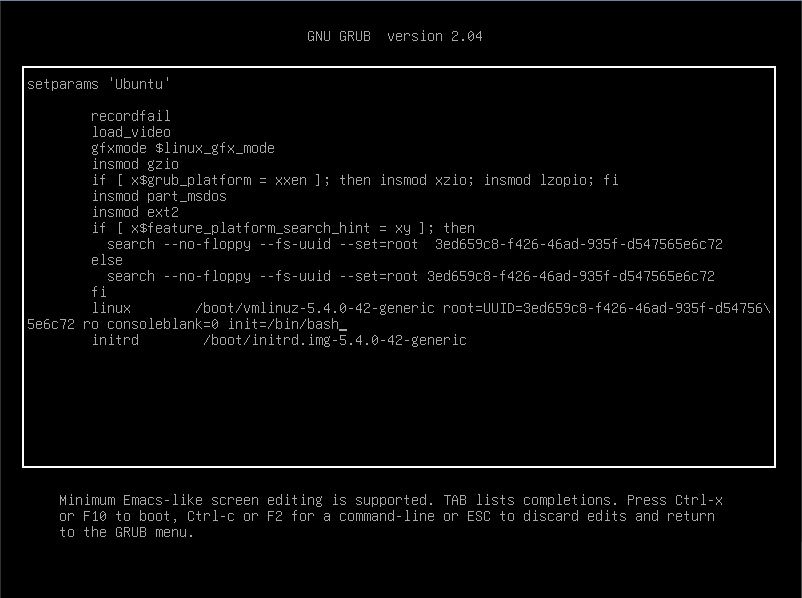
add space in the end of that line and add this command

init=/bin/bash

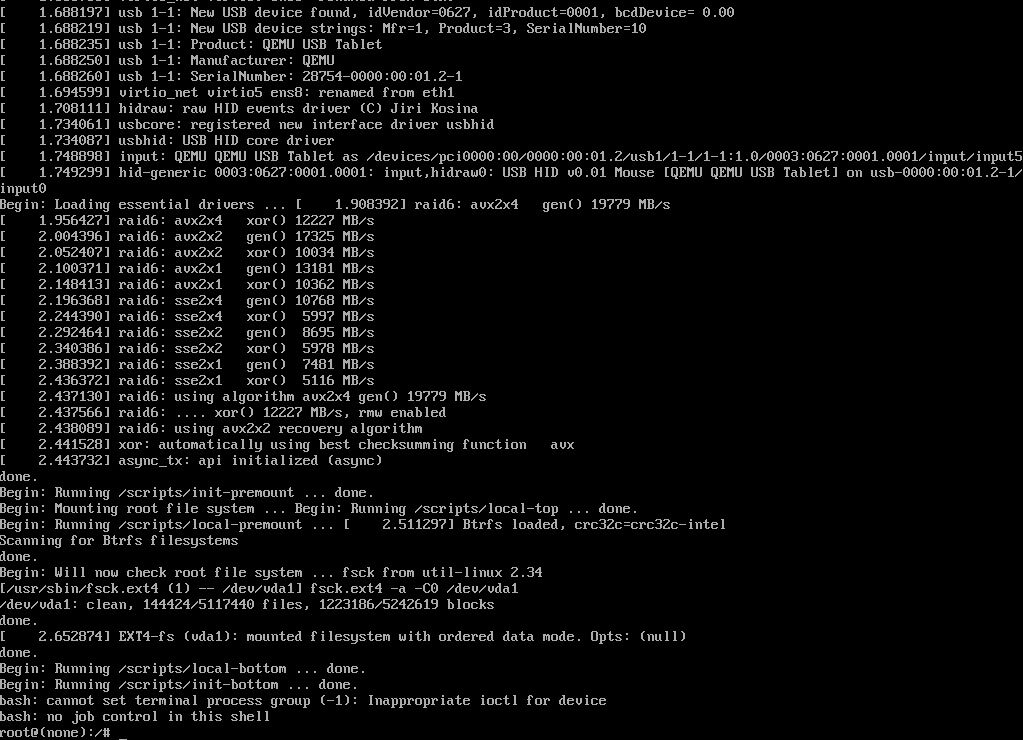
Press CTRL + X or F10  to boot into single-user mode.

the system will boot and you will see the root prompt.

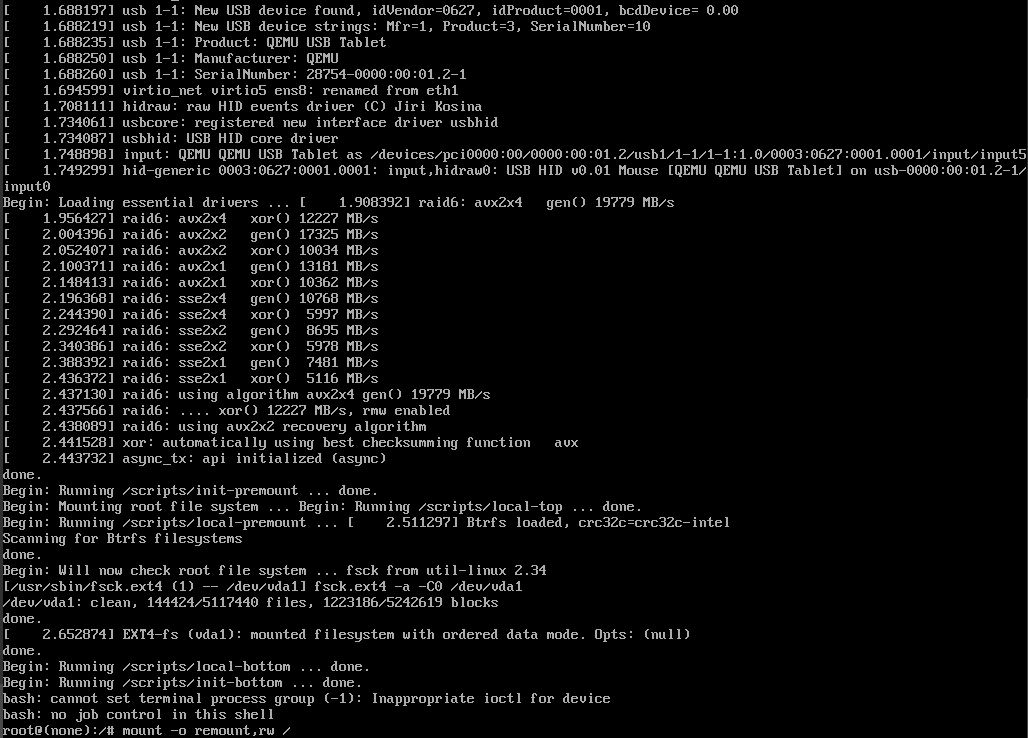
 mount -o remount,rw /

type above command to mount the system volume, for me it gives me an error but works.

now type command to reset your password.

passwd

This will ask you to type your password twice to confirm then reboot the server.


Hope this will help you, if you have any question please let me know.

Best application to find where space is being taken up on your Windows PC or Server.

When ever you got alert on your PC that Hard drive didn't have much space left, first thing we all do is clearing temp, uninstalling unwanted application or Using third party application like CCleaner or even running disk clean up from windows, but in most cases you are not fully aware where the space has been consumed.

TreeSize Free is a utility that scans your hard drive and shows where your disk space has gone, there are 3 versions available Free, Personal and Professional. for a home user free version is sufficient,

for TreeSize edition comparison use this link

Visual Tour

Efficient Disk Space Reporting

Scan your volumes in seconds and see the size of all folders including all subfolders and break it down to file level.

Quickly Clean Up Your Disks

With the integrated Windows Explorer context menu and the usual keyboard shortcuts you can quickly get rid of unwanted stuff.

Stunning visualization

See the distribution of the used disk space at a glance with our customizable treemap chart.

What is Your Solution?

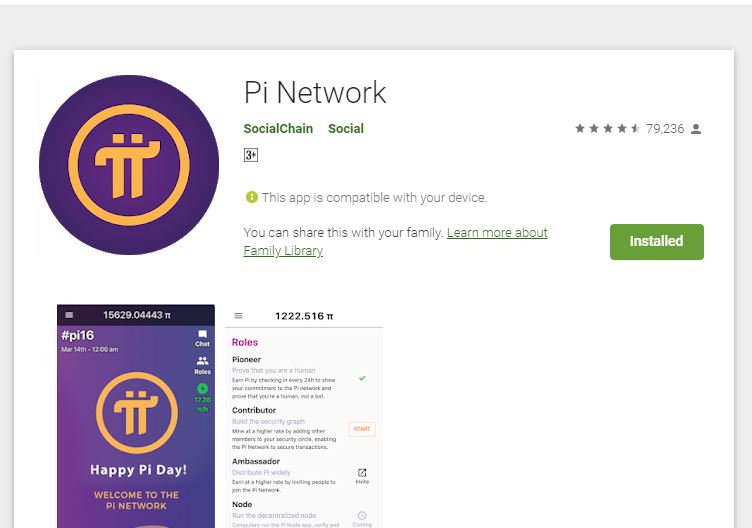
Pi Network First Crypto Miner for Mobile.

Pi Network introduce First crypto currency mining app to mobile platform, to join and download miner app please click below button and use invitation code " impiza ".

What makes Pi different ?

  • Mining crypto is hard.
  • Investing in crypto is risky.
  • Too many of us are left out of the cryptocurrency revolution.
  • Pi makes crypto mining easy
  • Breakthrough tech allows you to mine on your phone without draining your battery.
Decentralized

Secure, Immutable, non-counterfeitable and interoperable digital money.

Mobile First

Works on your mobile phone and does not drain your battery.

User & Planet-Friendly

Easy to use security at scale, without the massive electrical waste.

use above link, it will guide you to Pi network official website.

Currently Pi not yet listed on exchanges and you can't buy it with any currency, the only way to install pi app and start working using invitation code.


Do not download any apps outside Pi network

by clicking download button, it will redirect you to official android play store, install the app. 

Open your application, now type "Your desired username", remember if you invite your friends in the future you have to use this as your invitation code,

 there are 2 types of verification available

  1. Facebook
  2. Phone Number

you have to choose one of those, this will help you to retrieve your pi miner if you phone is lost.

Remember "Yon only use one device at a time"


Finally use invitation code " impiza ", now you can start mining, you need to open miner at least once every day.  by doing so you can also verify your team members are mining or not, if they are not mining you can ping them and notify.


Introduction: Why cryptocurrencies matter

Currently, our everyday financial transactions rely upon a trusted third party to maintain a record of transactions. For example, when you do a bank transaction, the banking system keeps a record & guarantees that the transaction is safe & reliable. Likewise, when Cindy transfers $5 to Steve using PayPal, PayPal maintains a central record of $5 dollars debited from Cindy’s account and $5 credited to Steve’s. Intermediaries like banks, PayPal, and other members of the current economic system play an important role in regulating the world’s financial transactions.


However, the role of these trusted intermediaries also has limitations:


  1. Unfair value capture. These intermediaries amass billions of dollars in wealth creation (PayPal market cap is ~$130B), but pass virtually nothing onto their customers - the everyday people on the ground, whose money drives a meaningful proportion of the global economy. More and more people are falling behind.
  2. Fees. Banks and companies charge large fees for facilitating transactions. These fees often disproportionately impact lower-income populations who have the fewest alternatives.
  3. Censorship. If a particular trusted intermediary decides that you should not be able to move your money, it can place restrictions on the movement of your money.
  4. Permissioned. The trusted intermediary serves as a gatekeeper who can arbitrarily prevent anybody from being part of the network.
  5. Pseudonymous. At a time when the issue of privacy is gaining greater urgency, these powerful gatekeepers can accidentally disclose -- or force you to disclose -- more financial information about yourself than you may want.

Solution: Pi - Enabling mining on mobile phones

After identifying these key barriers to adoption, the Pi Core Team set out to find a way that would allow everyday people to mine (or earn cryptocurrency rewards for validating transactions on a distributed record of transactions). As a refresher, one of the major challenges that arises with maintaining a distributed record of transactions is ensuring that updates to this open record are not fraudulent. While Bitcoin’s process for updating its record is proven (burning energy / money to prove trustworthiness), it is not very user (or planet!) friendly. For Pi, we introduced the additional design requirement of employing a consensus algorithm that would also be extremely user friendly and ideally enable mining on personal computers and mobile phones.

Roadmap / Deployment plan

Phase 1 - Design, Distribution, Trust Graph Bootstrap.

The Pi server is operating as a faucet emulating the behavior of the decentralized system as it will function once its live. During this phase improvements in the user experience and behavior are possible and relatively easy to make compared to the stable phase of the main net. All minting of coins to users will be migrated to the live net once it launches. In other words, the livenet will pre-mint in its genesis block all account holder balances generated during Phase 1, and continue operating just like the current system but fully decentralized. Pi is not listed on exchanges during this phase and it is impossible to “buy” Pi with any other currency.

Phase 2 - Testnet

Before we launch the main net, the Node software will be deployed on a test net. The test net will use the same exact trust graph as the main net but on a testing Pi coin. Pi core team will host several nodes on the test net, but will encourage more Pioneers to start their own nodes on the testnet. In fact, in order for any node to join the main net, they are advised to begin on the testnet. The test net will be run in parallel to the Pi emulator in phase one, and periodically, e.g. daily, the results from both systems will be compared to catch the gaps and misses of the test net, which will allow Pi developers to propose and implement fixes. After a thorough concurrent run of both systems, testnet will reach a state where its results consistently match the emulator’s. At that time when the community feels its ready, Pi will migrate to the next phase.

Phase 3 - Mainnet

When the community feels the software is ready for production, and it has been thoroughly tested on the testnet, the official mainnet of the Pi network will be launched. An important detail is that, in the transition into the mainnet, only accounts validated to belong to distinct real individuals will be honored. After this point, the faucet and Pi network emulator of Phase 1 will be shut down and the system will continue on its own forever. Future updates to the protocol will be contributed by the Pi developer community and Pi’s core team, and will be proposed by the committee. Their implementation and deployment will depend on nodes updating the mining software just like any other blockchains. No central authority will be controlling the currency and it will be fully decentralized. Balances of fake users or duplicate users will be discarded. This is the phase when Pi can be connected to exchanges and be exchanged for other currencies.

Types of Pi Users

  • Pioneer. A user of the Pi mobile app who is simply confirming that they are not a “robot” on a daily basis. This user validates their presence every time they sign in to the app. They can also open the app to request transactions (e.g. make a payment in Pi to another Pioneer)
  • Contributor. A user of the Pi mobile app who is contributing by providing a list of pioneers he or she knows and trusts. In aggregate, Pi contributors will build a global trust graph.
  • Ambassador. A user of the Pi mobile app who is introducing other users into Pi network.
  • Node. A user who is a pioneer, a contributor using the Pi mobile app, and is also running the Pi node software on their desktop or laptop computer. The Pi node software is the software that runs the core SCP algorithm, taking into account the trust graph information provided by the Contributors.

I will include mining using node in the future blog.

Happy Mining

MySQL Bin Files Eating Lots of Disk Space (fix)

Some time you may find MySQL stopped working and failed to start, and if you check status of MySQL using "systemctl status mysql" or "journalctl -xe" you can find that your "filesystem is out of space"

Trouble Shooting

OK first of all, we have to determine which disk partition is full, MySQL can be configured to store data on different disk or partition. by default it will be stored in /var/lib/mysql , i am going to use df command and find out how much space it uses, btw my vps has 20Gb of file system.


root@testserver:~# du -sh /var/lib/mysql
13G    /var/lib/mysql
root@coversunkochi:~#
root@coversunkochi:~# lsblk
NAME    MAJ:MIN RM  SIZE RO TYPE MOUNTPOINT
sda       8:0    0 19.1G  0 disk
├─sda1    8:1    0   19G  0 part /
├─sda14   8:14   0    1M  0 part
└─sda15   8:15   0   61M  0 part /boot/efi
root@coversunkochi:~#
root@coversunkochi:~# df -h /
Filesystem      Size  Used Avail Use% Mounted on
/dev/sda1        19G  18.6G   403M  99% /

As you can see my vps has a root directory of 19 Gb and /var/lib/msql uses 13Gb. and total of 18.6 Gb is used by filesystem. 

To Fix this i have 3 Methods.

  1. Manually delete Log files.
  2. Using MySQL (Only works if mysql is starts)
  3. Set Persist binlog settings(this will automatically delete logs after number of days you set)

Ok Lets get started.

Method #1 Manually Delete Log files.

you need to change directory to /var/lib/mysql, if you type type "du-bsh *" you can find your logs some thing like this, for tutorial i have only listed binlog files you can see the file name binlog.000141 to binlog.000148 these are the files which consumes most of you filesystem.


root@coversunkochi:/var/lib/mysql# du -bsh *
48M     /var/lib/mysql/binlog.000141
102M    /var/lib/mysql/binlog.000142
67M     /var/lib/mysql/binlog.000143
104M    /var/lib/mysql/binlog.000144
102M    /var/lib/mysql/binlog.000145
101M    /var/lib/mysql/binlog.000146
103M    /var/lib/mysql/binlog.000147
44M     /var/lib/mysql/binlog.000148

you can also find bindlog.index file this contains log files name, you be careful to do some thing stupid, you need take a backup first, then edit this file and remove indexing "remove names of logs" then save this.
after that you can delete files which is not in the index
now you can restart msyql it will start.

Method #2 Using MySQL

If you MySQL is still working you need to access MySQL then type following command, login to MySQL.


mysql> SHOW BINARY LOGS;
+---------------+-----------+-----------+
| Log_name      | File_size | Encrypted |
+---------------+-----------+-----------+
| binlog.000141 |  50260145 | No        |
| binlog.000142 | 106706425 | No        |
| binlog.000143 |  69240464 | No        |
| binlog.000144 | 108516594 | No        |
| binlog.000145 | 106324989 | No        |
| binlog.000146 | 105725450 | No        |
| binlog.000147 | 107466759 | No        |
| binlog.000148 |  98082094 | No        |
+---------------+-----------+-----------+

this will list your binary logs index, to delete logs to a certain number, i am going to delete binlog.000141 so i need to type command like this, the number mentioned below is the number of log which should apper in index file after removing, so in our case 141 will be deteted or all logs from 1 to 141 and rest of the logs will remain.


mysql> PURGE BINARY LOGS TO 'binlog.000142';

I have put MySQL logs for comparison before and after doing the purge.


mysql> SHOW BINARY LOGS;
+---------------+-----------+-----------+
| Log_name      | File_size | Encrypted |
+---------------+-----------+-----------+
| binlog.000141 |  50260145 | No        |
| binlog.000142 | 106706425 | No        |
| binlog.000143 |  69240464 | No        |
| binlog.000144 | 108516594 | No        |
| binlog.000145 | 106324989 | No        |
| binlog.000146 | 105725450 | No        |
| binlog.000147 | 107466759 | No        |
| binlog.000148 |  98082094 | No        |
+---------------+-----------+-----------+
8 rows in set (0.01 sec)

mysql> PURGE BINARY LOGS TO 'binlog.000142';
Query OK, 0 rows affected (0.01 sec)

mysql> SHOW BINARY LOGS;
+---------------+-----------+-----------+
| Log_name      | File_size | Encrypted |
+---------------+-----------+-----------+
| binlog.000142 | 106706425 | No        |
| binlog.000143 |  69240464 | No        |
| binlog.000144 | 108516594 | No        |
| binlog.000145 | 106324989 | No        |
| binlog.000146 | 105725450 | No        |
| binlog.000147 | 107466759 | No        |
| binlog.000148 |  98195420 | No        |
+---------------+-----------+-----------+
7 rows in set (0.00 sec)

Method #3 Set Persist binlog settings.

Now we can set automatically delete old log files!

In MySQL 8.0, use binlog_expire_logs_seconds instead, where the default value is 2592000 seconds (30 days). In this example, we reduce it to only 3 days (60 seconds x 60 minutes x 24 hours x 3 days):


mysql> SET GLOBAL binlog_expire_logs_seconds = (60*60*24*3);
Query OK, 0 rows affected (0.00 sec)

mysql> SET PERSIST binlog_expire_logs_seconds = (60*60*24*3);
Query OK, 0 rows affected (0.01 sec)

Enjoy.

SET PERSIST will make sure the configuration is loaded in the next restart. Configuration set by this command is stored inside /var/lib/mysql/mysqld-auto.cnf.

Pin It on Pinterest